Introduction
BigQuery is a fully managed and serverless data warehouse solution available in the Google Cloud Storage (GCS) Platform. It allows users to perform complex analytics on terabytes of data in real time without managing any infrastructure.MoEngage × BigQuery
MoEngage and BigQuery integration uses GCS Data Imports and Exports on MoEngage to transfer data to Google BigQuery for advanced analytics.Use Cases
BigQuery integration with MoEngage helps you with the following use cases:- Sync real-time audiences from BigQuery
- Import users and events from BigQuery
- Export campaign interaction events to BigQuery (via GCS)
Advantages
The integration of BigQuery with MoEngage helps you with the following advantages:Reduce Integration Time
- No more searching for the right Extract, Transform, and Load (ETL) tool, as MoEngage directly integrates with BigQuery.
- Long and complicated ETL pipelines are now replaced with a one-time integration setup that gives MoEngage direct access to your data.
- This decreases the dependency on tech teams significantly.
Faster Data Processing
- BigQuery infrastructure enables MoEngage to store, process, and query massive amounts of data in near real-time.
- Any changes in the original schema are propagated immediately without having to change any configuration on MoEngage’s end, which is a significant advantage over traditional ETL pipelines.
- The cost of import is significantly lower than that of traditional data pipelines, so ETL tools and external cloud providers are not required.
Integration
PrerequisitesEnsure you have a BigQuery account with permission to create new users, schemas, or tables.
Step 1: Grant Permissions to MoEngage
- Audience Sync and Import
- Exports
To grant permission to MoEngage, you must grant read access to specific BigQuery tables and allow MoEngage to submit jobs and download query results via the BigQuery Jobs API. These instructions assume you have administrative privileges in the Google Cloud Platform project hosting your BigQuery dataset.Create a Service Account for MoEngageTo create a service account for MoEngage, perform the following steps:
- Open the Google Cloud Console.
- Navigate to the project that contains the BigQuery dataset.
- Navigate to the IAM & Admin section and select Service Accounts.
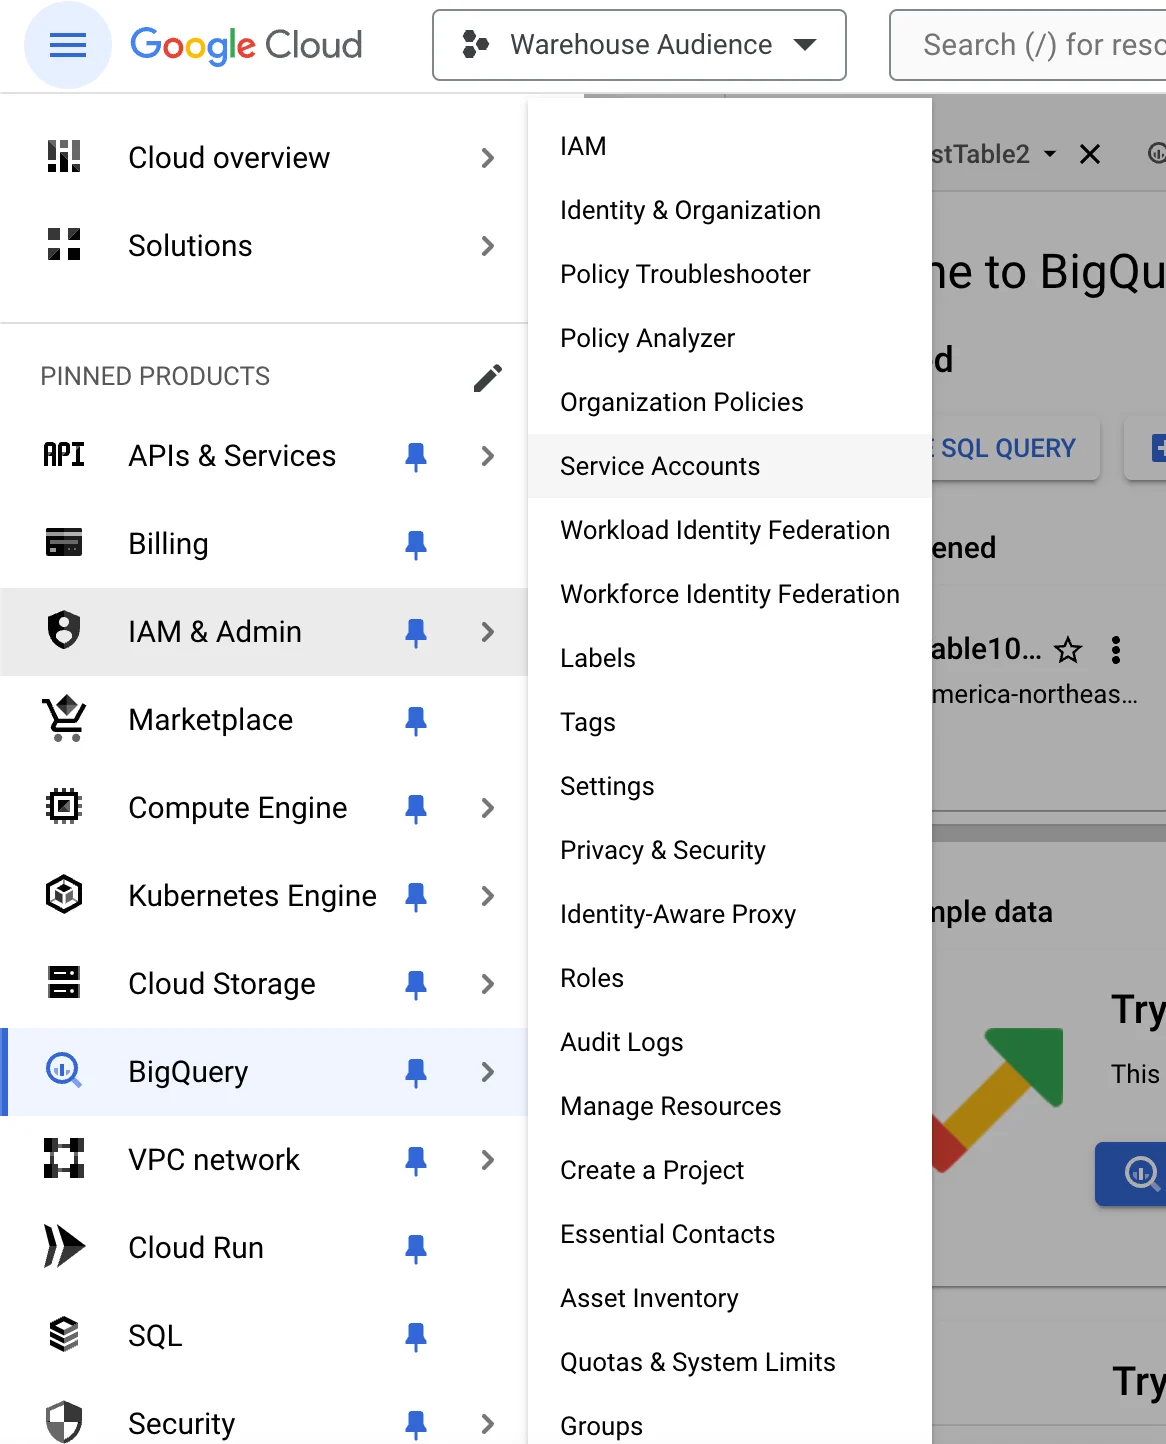
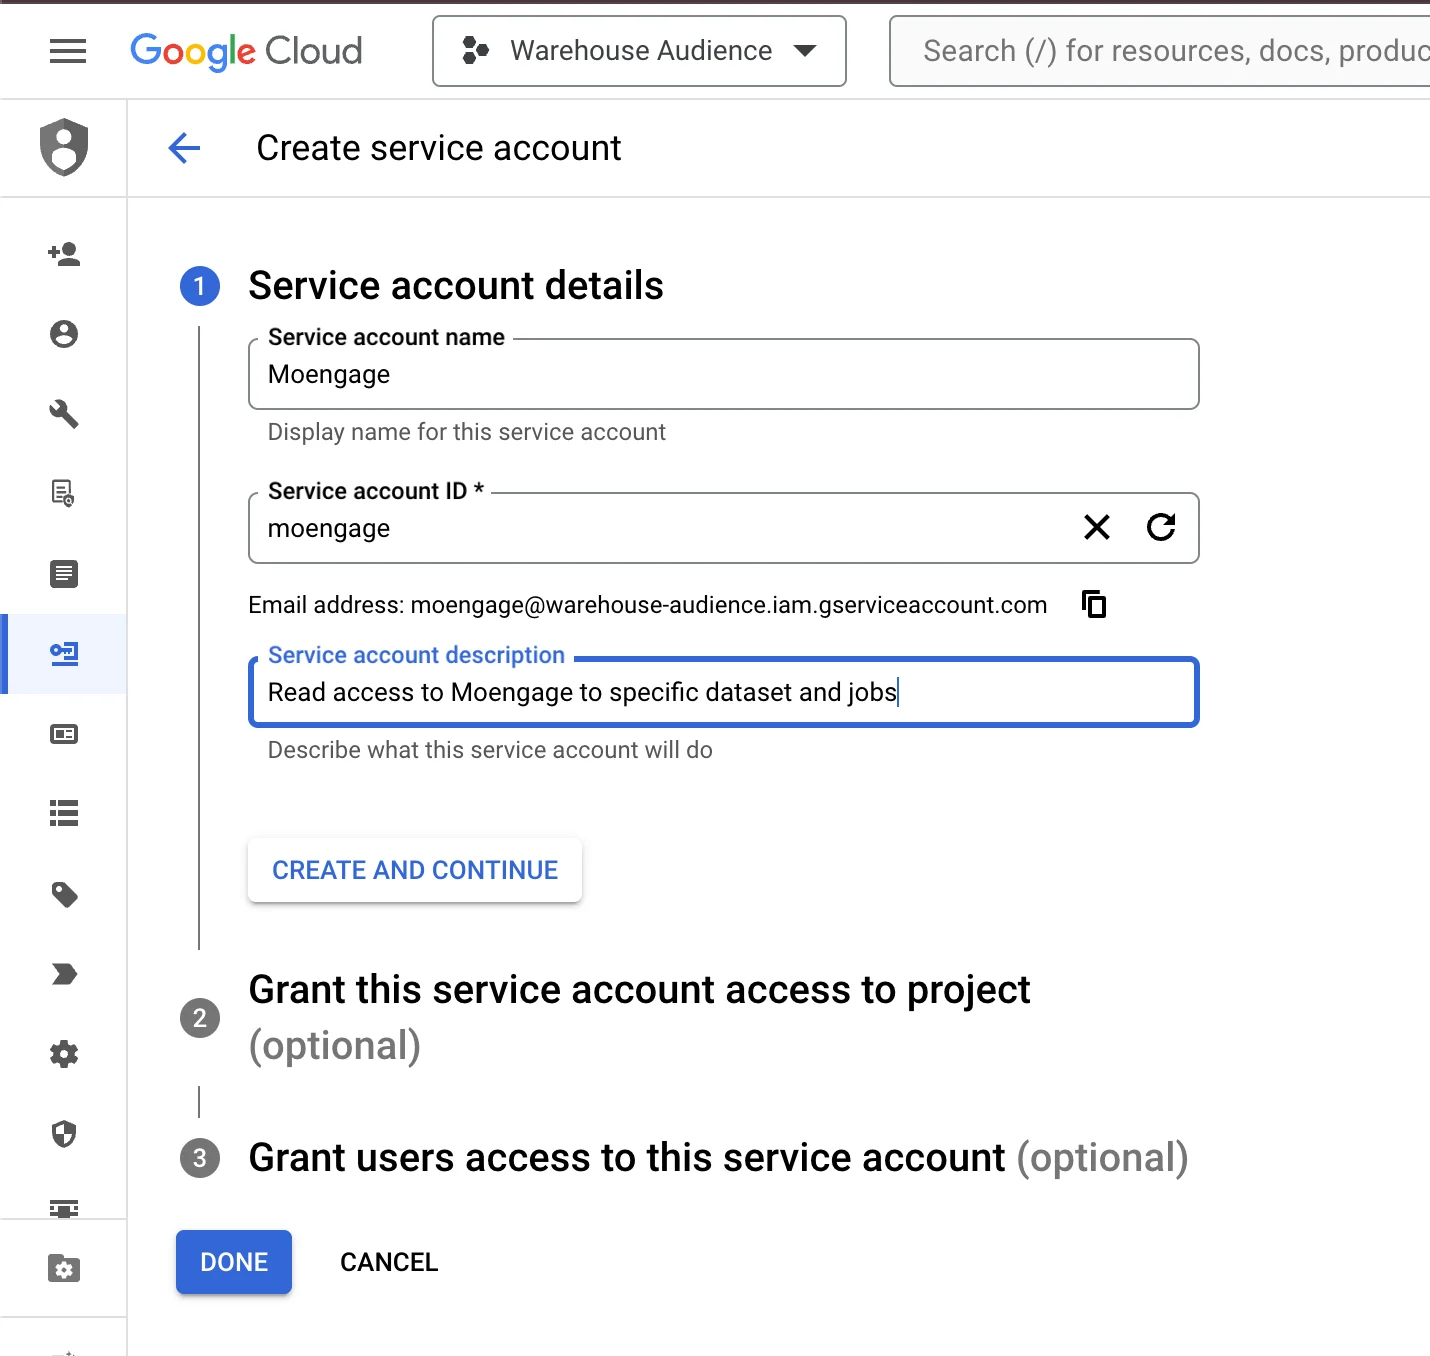
- Click Create Service Account.
- Enter a name and description (for example, moengage-access).
- Select the role for the service account as BigQuery Job User.
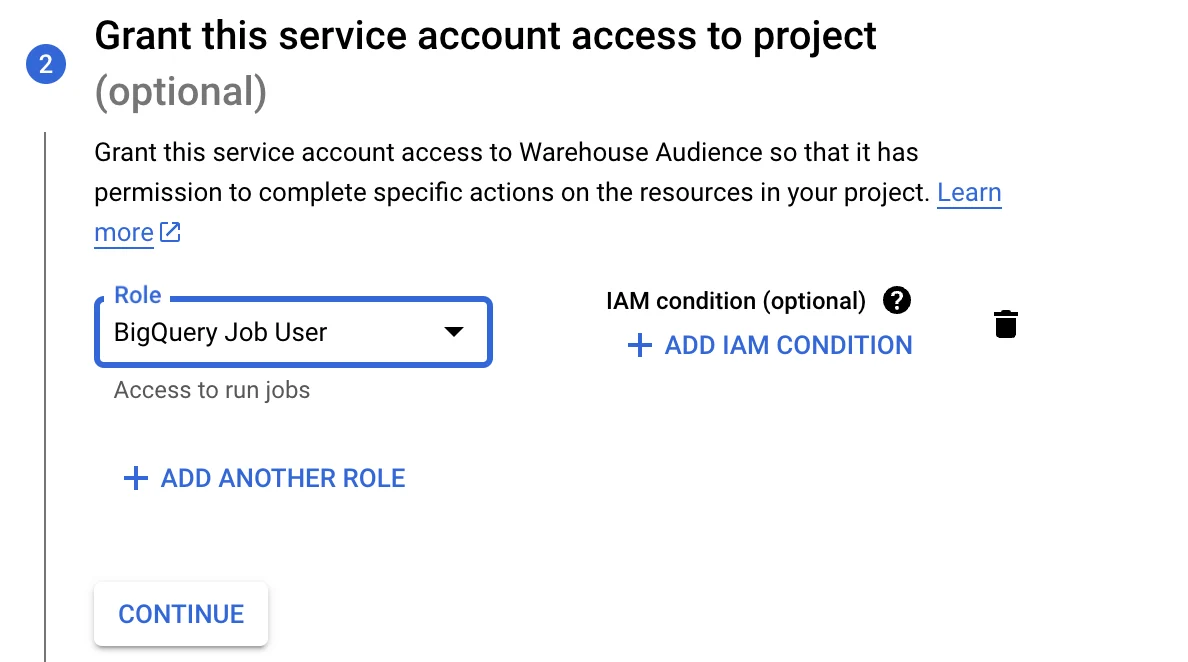
- Create the service account.
- Navigate to the service account and select the KEYS tab.
- Click the ADD KEY list and then select Create new key.
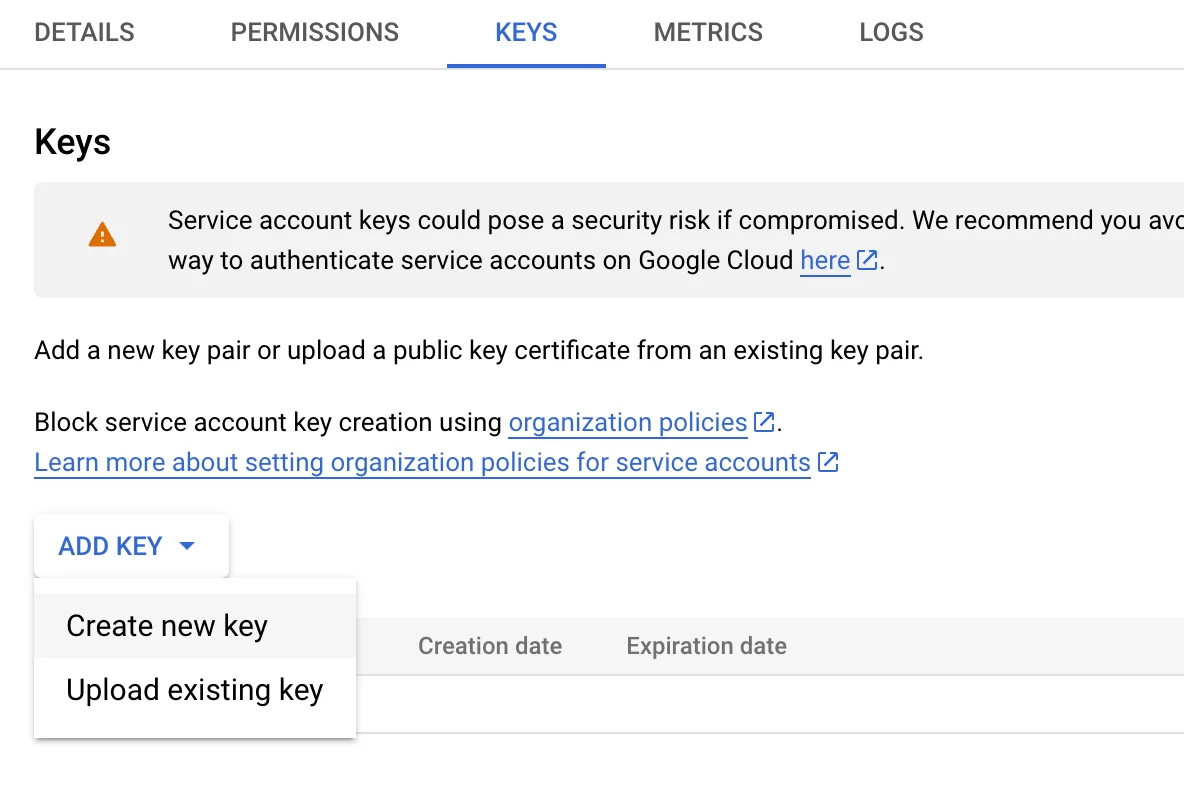
- Select JSON as the key type on the pop-up window.
- Click CREATE to generate and download the JSON key file.
- Keep the JSON key file secure.
- In the BigQuery console , navigate to the dataset containing the tables you want MoEngage to access.
- Click the Sharing drop-down list, and then select Permissions.
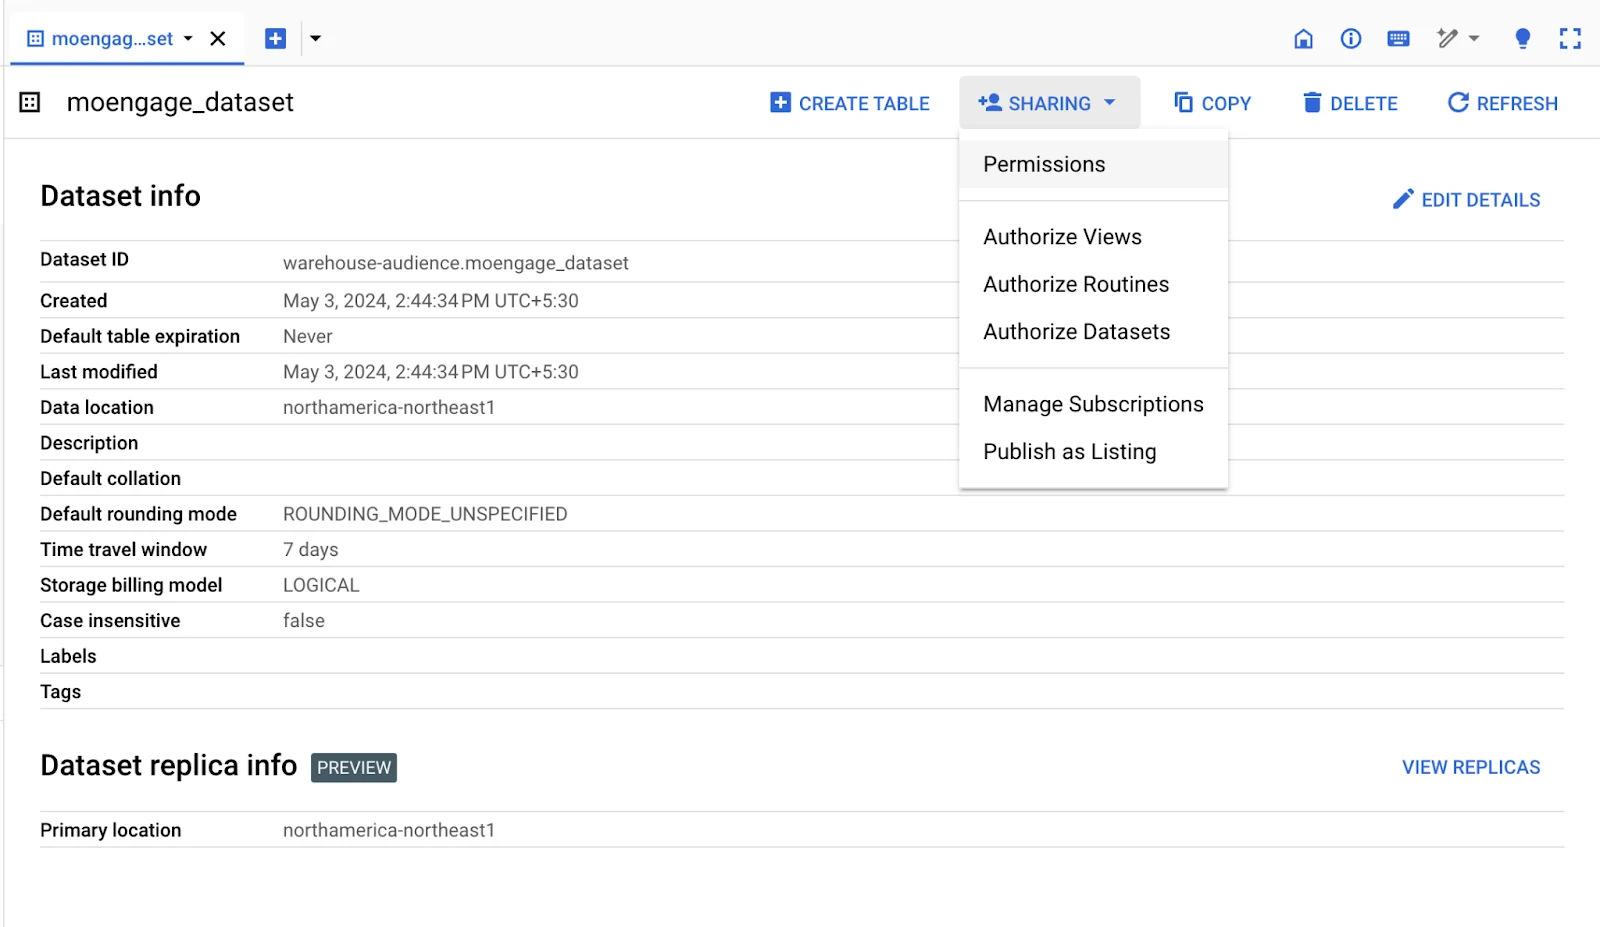
- Add the service account’s email address (found in the JSON key file) as a member with the “BigQuery Data Viewer ” role.
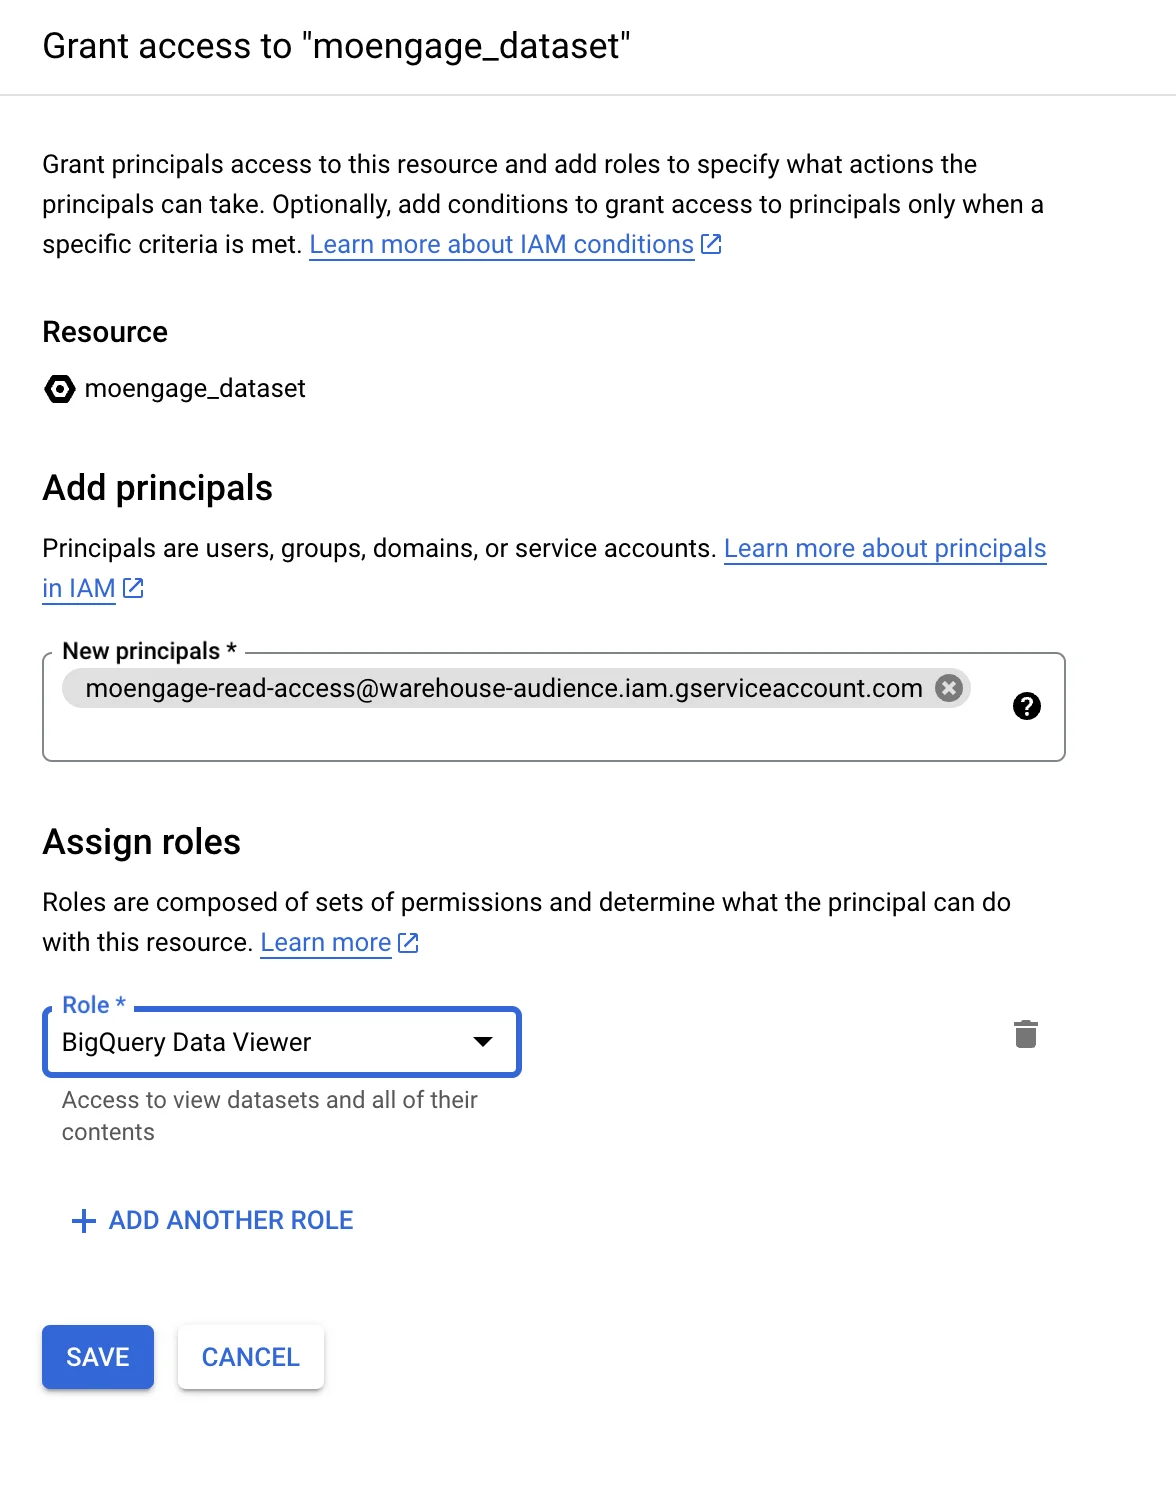
- Click Save to grant access to the dataset.
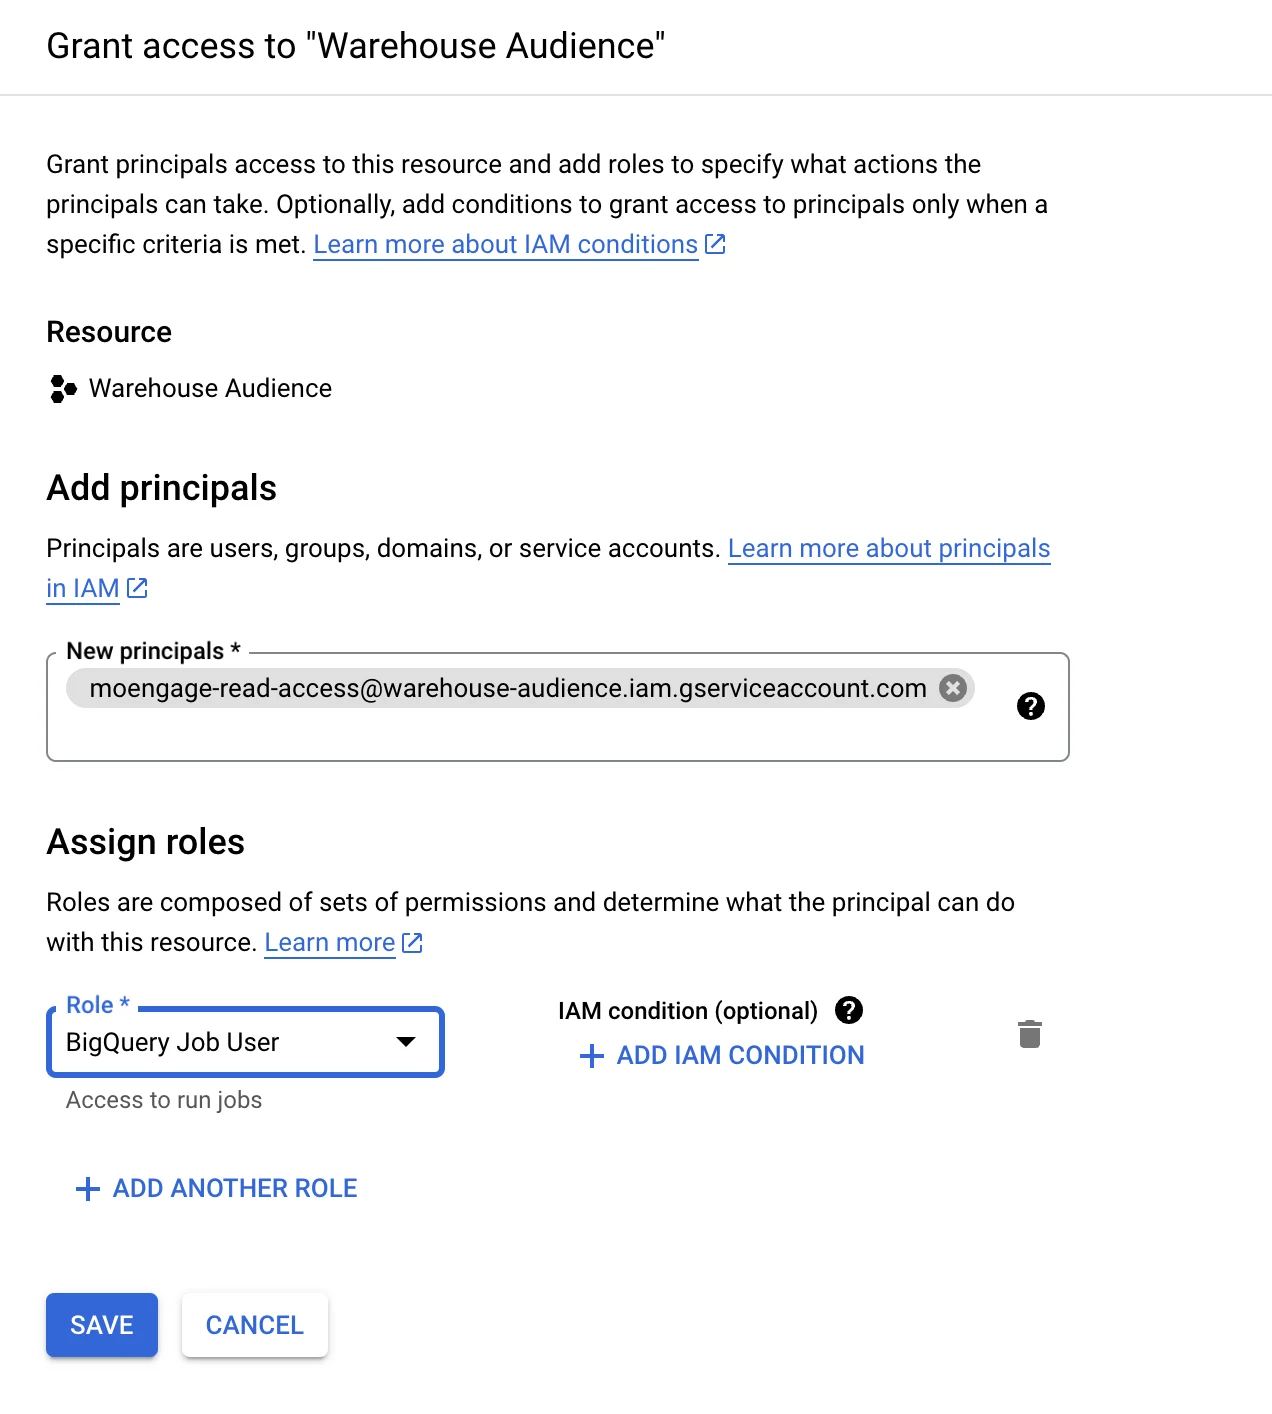
- In the Google Cloud Console , go to the IAM & Admin section, and then select IAM.
- Click Grant Access to add a new member.
- Enter the service account’s email address (from the JSON key file).
- Assign the role as BigQuery Job User to enable interaction with the BigQuery Jobs API.
- Click Save to grant access.
- In the BigQuery console , open the dataset with the desired tables.
- Select the table(s) you want to restrict access to and click Share Table from the context menu.
- Add the service account’s email address as a member and assign the BigQuery Data Viewer role only for these specific tables.
Step 2: Connect BigQuery on the App Marketplace
To connect BigQuery on the App marketplace, perform the following steps:- On the left navigation menu in the MoEngage dashboard, click App marketplace.
- On the App Marketplace page, search for BigQuery.
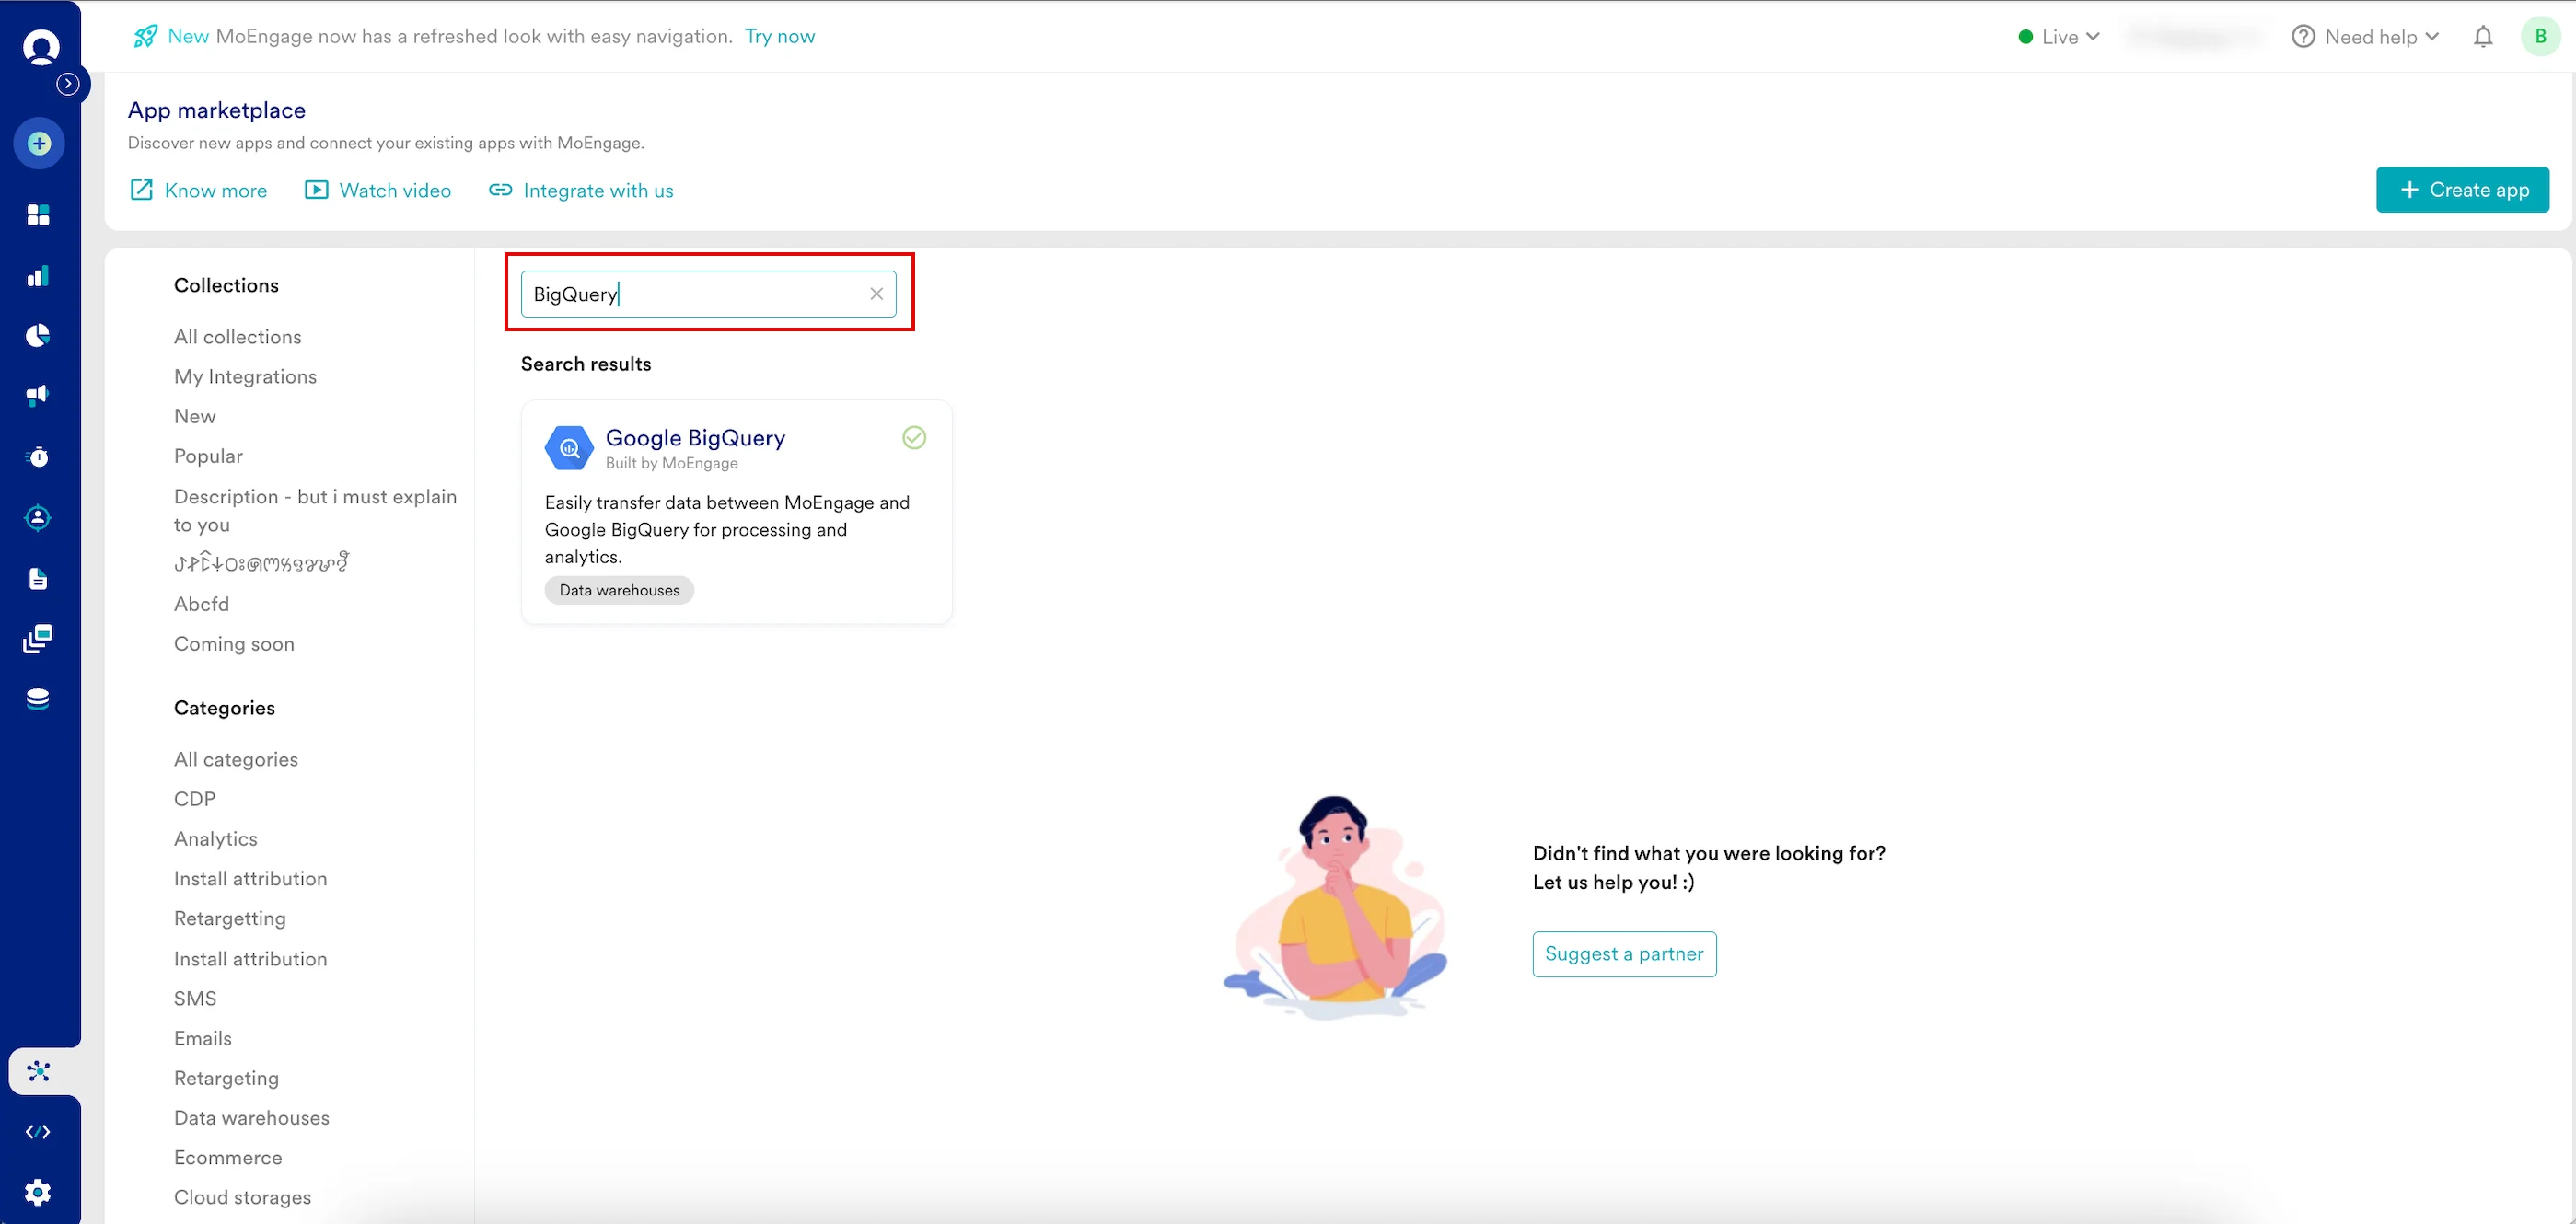
- Click the BigQuery tile.
- On the BigQuery page, go to theIntegrate tab and click +Add Connection.
- Enter the following details:
Field Required Description Connection name Yes Enter a name for the BigQuery connection. Project ID No This refers to the unique identifier assigned to your project within the Google Cloud Platform (GCP). MoEngage needs this ID to know exactly which Google Cloud project to connect to. You can find this ID on your Google Cloud Console dashboard. Service account credentials Yes This field requires you to upload a JSON key file that you generate from a Service Account in your Google Cloud project. The JSON file contains a private key that acts as a password, allowing MoEngage to securely and automatically access your BigQuery data without sharing your personal login details. Alternatively, you can follow the steps mentioned here (From 10 through 12). Enable GCS for faster segmentation and exports Optional Turn on the GCS staging toggle to improve the speed and efficiency of MoEngage reading and writing data to BigQuery. This feature allows MoEngage to use Google Cloud Storage (GCS) as a temporary staging area for your data. Note: You must contact the MoEngage Support team to enable this feature for Warehouse Audiences, and you do not require a support ticket for Exports. GCS Bucket name Optional Enter the name of the GCS bucket you have created in your GCP project. MoEngage will use this bucket to temporarily store the segment data exported from BigQuery before importing it. GCS Folder path Optional You must specify the folder name within your GCS bucket where MoEngage should store the temporary files. This helps in keeping your data organized (for example, moengage_imports/).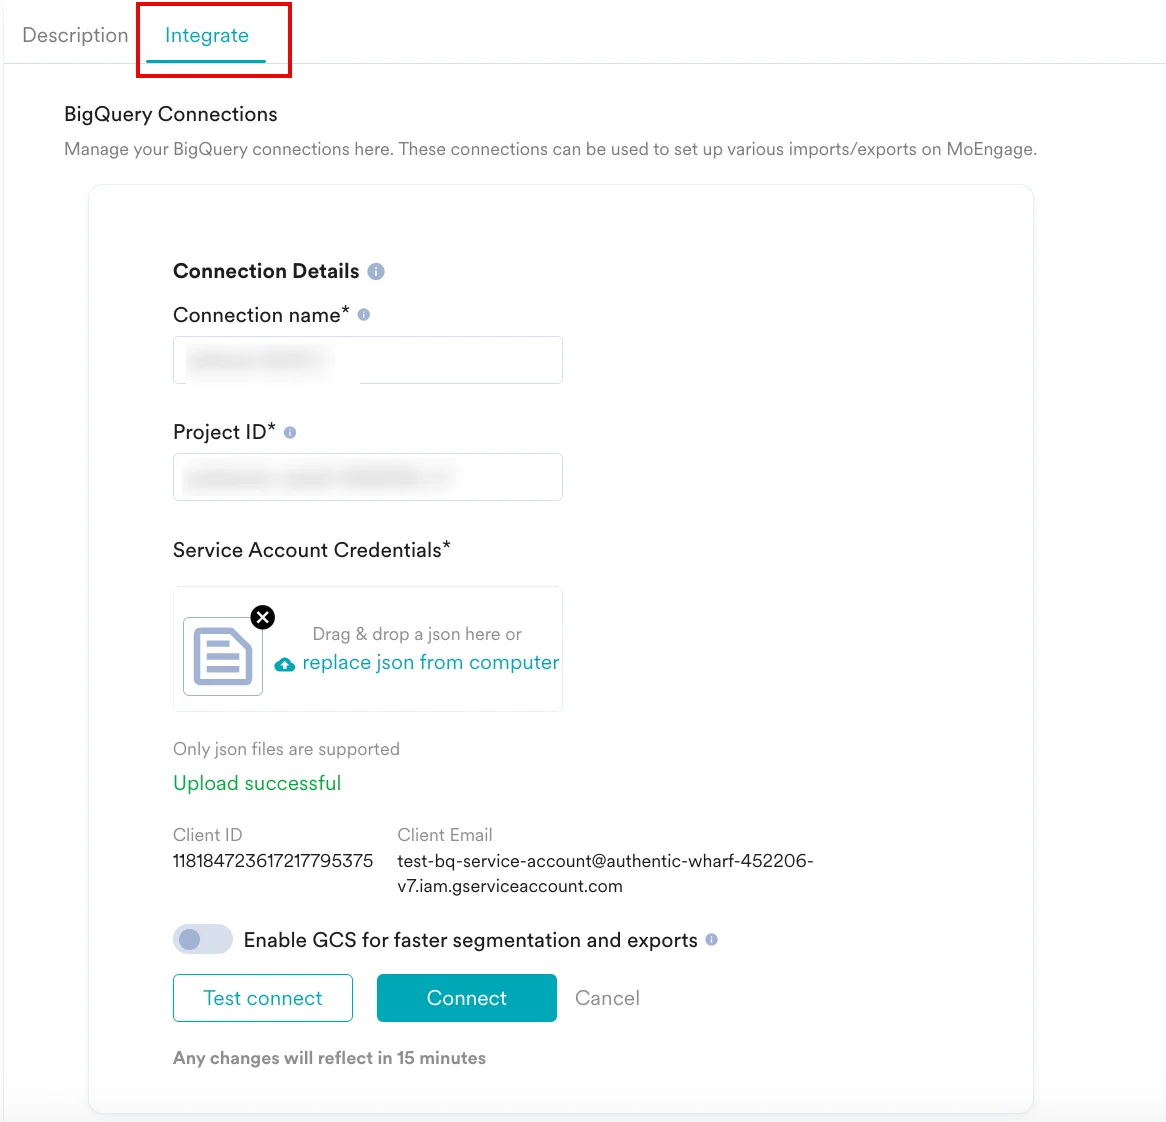
- Click Connect. Your BigQuery connection is now integrated.
Supported Datetime Formats
| Date and Time Format | Examples |
|---|---|
"datetime_format": "YYYY-MM-DD" |
|
"datetime_format": "YYYY/MM/DD" |
|
"datetime_format": "DD/MM/YYYY" |
|
"datetime_format": "DD-MM-YYYY" |
|
"datetime_format": "DD-MM-YYYY hh:mm:ss" |
|
"datetime_format": "DD/MM/YYYY hh:mm:ss" |
|
"datetime_format": "YYYY-MM-DD hh:mm:ss" |
|
"datetime_format": "YYYY/MM/DD hh:mm:ss" |
|
"datetime_format": "DD-MM-YYYYThh:mm:ss.s" |
|
"datetime_format": "DD/MM/YYYYThh:mm:ss.s" |
|
"datetime_format": "DD-MM-YYYYThh:mm:ssTZD" |
|
"datetime_format": "DD/MM/YYYYThh:mm:ssTZD" |
|
"datetime_format": "YYYY-MM-DD hh:mm:ss.s" |
|
"datetime_format": "YYYY/MM/DD hh:mm:ss.s" |
|
"datetime_format": "YYYY-MM-DDThh:mm:ssTZD" |
|
"datetime_format": "YYYY/MM/DDThh:mm:ssTZD" |
|
"datetime_format": "YYYY-MM-DDThh:mm:ss.sTZD" |
|
"datetime_format": "YYYY/MM/DDThh:mm:ss.sTZD" |
|