Introduction
The Meta Conversions integration establishes a secure, Server-to-Server (S2S) connection between MoEngage and Meta. By mitigating the impact of browser-side obstacles such as cookie restrictions and ad blockers, it ensures a more consistent and high-fidelity data stream for better attribution.
MoEngage supports the following distinct connectors for Meta:
- Meta Web Conversions: Streamline website events (for example, purchases, registrations, Add to Cart) captured by the MoEngage Web SDK directly to Meta’s server.
- Meta Offline Conversions: Sync high-value offline data (for example, In-store Transactions, CRM leads, or Phone Orders) directly into Meta to measure the full impact of your omnichannel marketing.
Use Cases
Integrating Meta Conversions with MoEngage allows you to sync event data to support the following use cases:
- Signal resilience: Recover “lost” conversions typically blocked by browser privacy settings or ad-blocking software.
- Offline to online attribution: Bridge the gap between physical storefront transactions and digital ad clicks to measure total ROI.
- Return on Ad Spend (ROAS) optimization: Provide high-quality, real-time data to Meta’s machine-learning algorithms to lower your Cost Per Acquisition (CPA) and improve ad delivery.
Prerequisites
PrerequisitesBefore setting up, ensure you have the access to the following below:
- Pixel ID : You must obtain a Pixel ID to use Conversions App. If you’ve already set up a Pixel for your website, we recommend that you use the same Pixel ID for your browser and server events.
- Business Manager : You also need a Business Manager. If you don’t have a Business Manager yet, see the Help Center article on how to Create a Business Manager.
Meta Conversions is part of the Connected Channels add-on. Contact your dedicated MoEngage CSM (customer success manager) to enable it for your account. Supported Event Types
- This integration supports only Web and Offline conversion events.
- Business Messaging events (ex: events sourced from Messenger, WhatsApp, or Instagram Direct) are not supported in this app.
Integration Setup
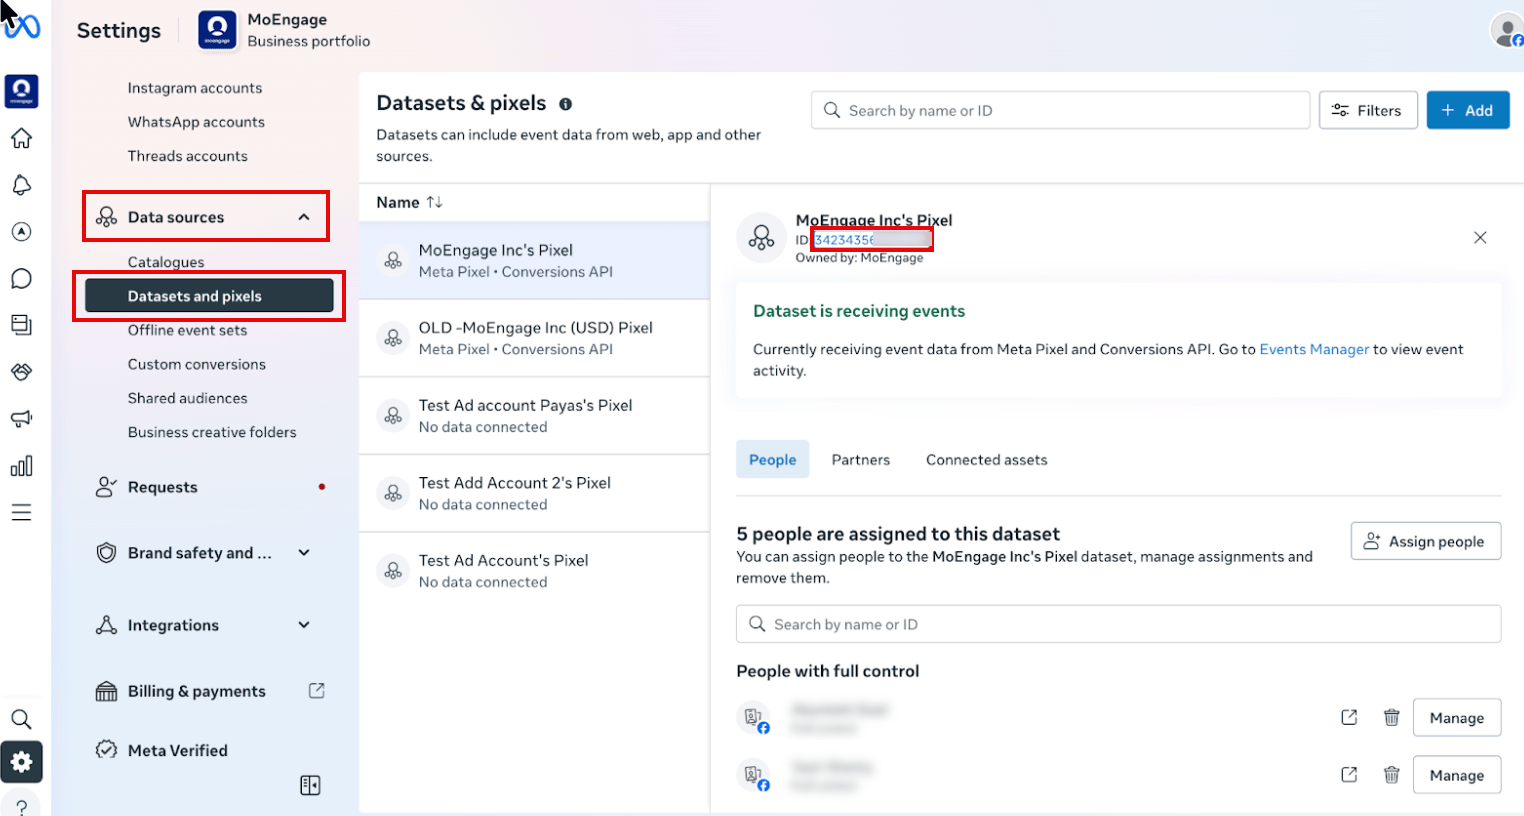
Before connecting, retrieve your Pixel (Dataset) ID from Meta Events Manager:
1.1. Choose the Pixel you want to implement
In Events Manager, go to Data Sources > Datasets and Pixels.
Select your dataset, and then copy the Pixel ID displayed.
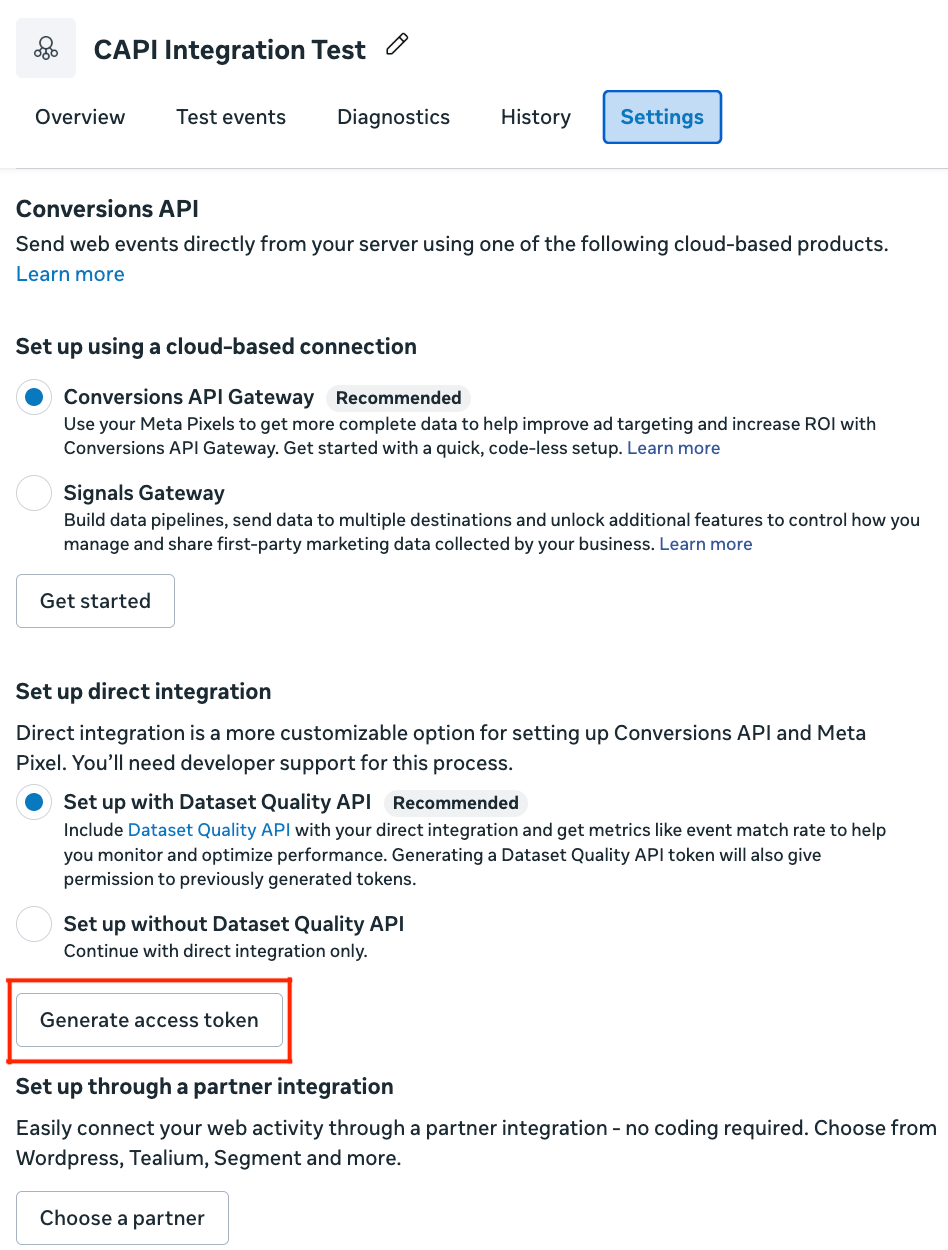
1.2. Select the Settings tab
Once your Pixel is selected, navigate to the Settings tab to access configuration options.
 Inside Events Manager, follow these steps:
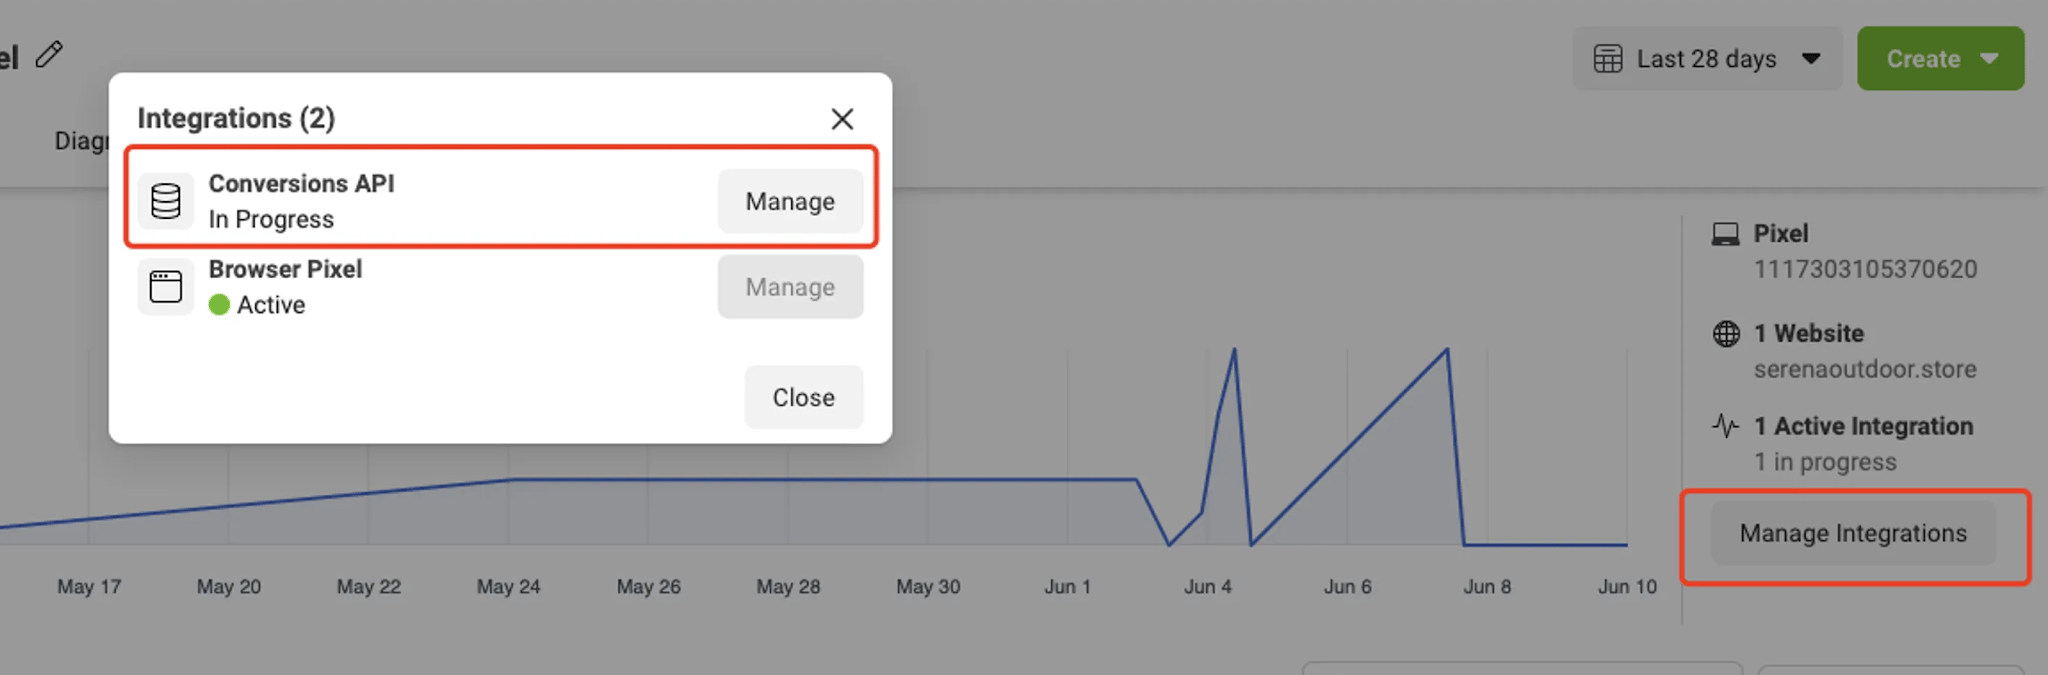
 Once you have your token, click on the Manage Integrations button in the Overview tab in Events Manager. In the pop-up screen, click the Manage button next to Conversions API. This will automatically create a Conversions API app and Conversions API system user for you. There is no need to go through App or share any permissions.
Note: The
Generate access token
link is only visible to users with developer privileges
for the business. The link is hidden from other users.Important: If you generate a new
access
token, make sure to update it in MoEngage
before using the connector.
Campaign Setup
Choose the integration type you want to set up. Both Web and Offline Conversions require the same authentication credentials but track different types of conversion events.
Web Conversions
Offline Conversions
To connect Meta Web Conversions in the App Marketplace, perform the following steps:
- On the left navigation menu in the MoEngage UI, click App Marketplace.
- On the App Marketplace page, search for Meta Conversions.
- Click the Meta Conversions tile.
- On the Meta Conversions page, click the Integrate tab.
- Click the (
 )down arrow key, and then click Track Web Conversions.
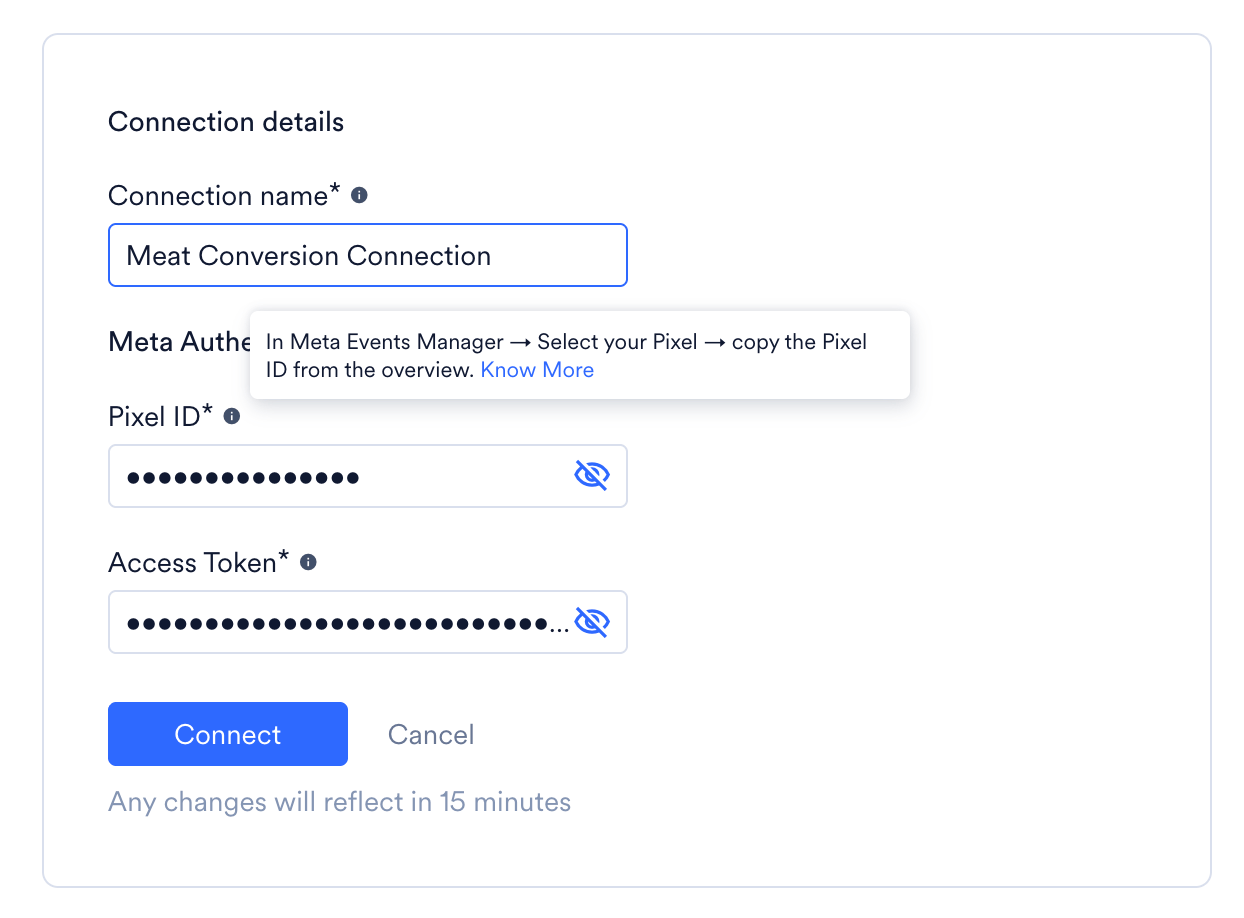
- Enter the following details:
| Field | Required | Description |
|---|
| Connection name | Yes | A unique internal name (for example, Meta Web Conversions). |
| Pixel ID | Yes | Your unique Meta Pixel ID. |
| Access Token | Yes | Paste the Access Token generated from Meta Events Manager. |
- Click Connect to save your connection.
To create a Meta Web Conversions campaign, perform the following steps:
- On the left navigation menu in the MoEngage UI, click Engage, and then click Campaigns.
- On the All campaigns page, click + Create campaign.
- In the Create campaign dialog box, under Connected Apps, click Meta Conversions and then click the most suitable delivery type.
- In Step 1 (Target Users), select your audience.
- In Step 2 (Content), select your Connector (Track Web Conversions) and your created connection.
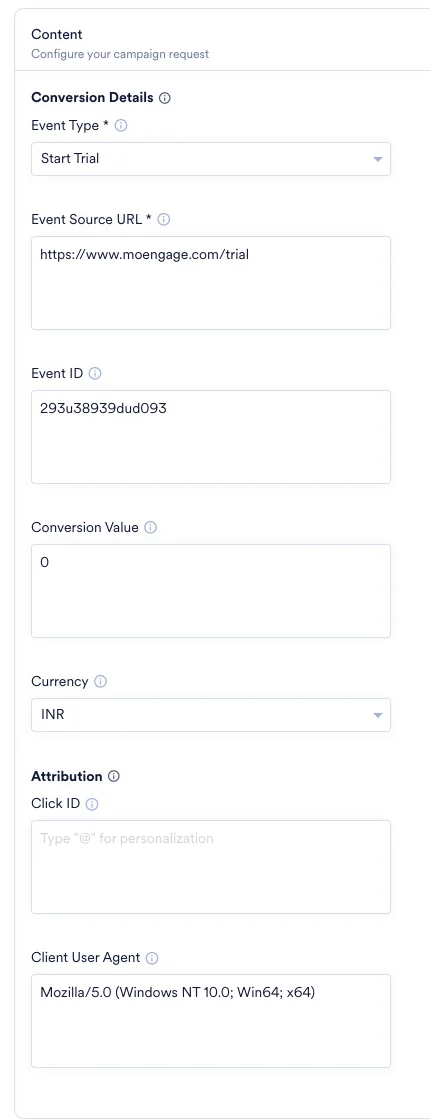
- Under Conversion Details, configure the following fields:
| Field | Required | Description |
|---|
| Event Type | Yes | Select a standard Meta conversion event from the dropdown. |
| Event Source URL | Yes | The browser URL where the event happened. Must match your verified domain. Ex: ‘https://example.com/checkout’. |
| Event ID | No | Unique ID such as Lead or Transaction ID to avoid duplicate events. |
| Conversion Value | No | Revenue generated from the conversion. |
| Currency | No | Select the currency code from the dropdown |
| Click ID | No | Meta Click ID stored in the _fbc browser cookie. Highly recommended for accurate attribution. The Meta Click ID (fbclid) captured in the user profile is used for matching events to ad clicks. |
| Client User Agent | No | The user agent for the browser corresponding to the event. Example: Mozilla/5.0 (Windows NT 10.0; Win64; x64) |
-
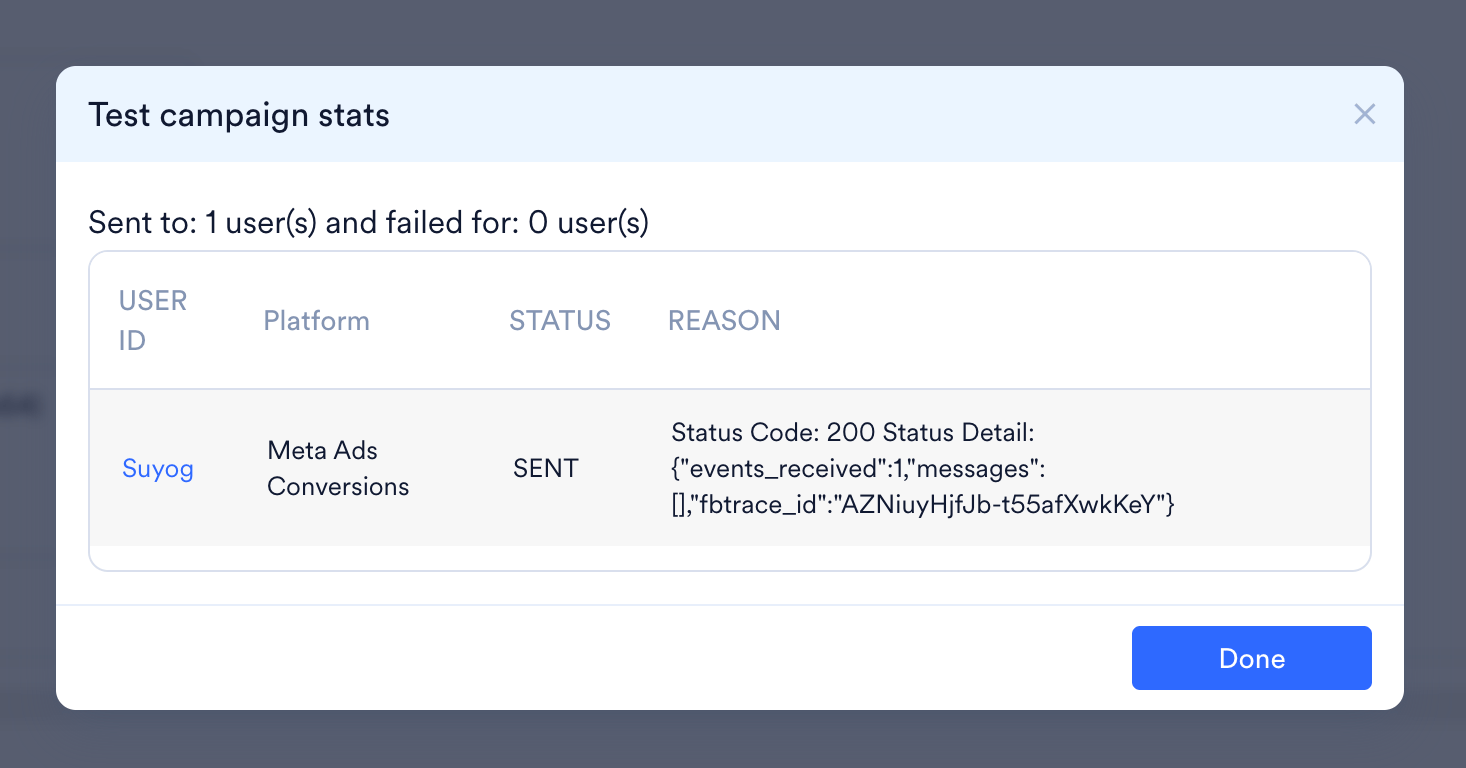
Your campaign is now ready to be tested and sent. Using the Test functionality, you can also test your connector configuration.

-
You would receive a message as shown below, this confirms your setup is complete.
-
Publish the campaign.
Event Time Limit for Web Events: The event time must not be more than 7 days in the past at the time of sending. If any event in the request has a time older than 7 days, Meta will reject the request and no events will be processed.
To connect Meta Offline Conversions in the App Marketplace, perform the following steps:
- On the left navigation menu in the MoEngage UI, click App Marketplace.
- On the App Marketplace page, search for Meta Conversions.
- Click the Meta Conversions tile.
- On the Meta Conversions page, click the Integrate tab.
- Click the () down arrow key and then click Track Offline Conversions.
- Enter the following details:
| Field | Required | Description |
|---|
| Connection name | Yes | A unique internal name (for example, Meta Offline Conversions). |
| Pixel ID | Yes | Your unique Meta Pixel (Dataset) ID. |
| Access Token | Yes | Paste the Access Token generated from Meta Events Manager. |
- Click Connect to save your connection.
To create a Meta Offline Conversions campaign, perform the following steps:
- On the left navigation menu in the MoEngage UI, click Engage, and then click Campaigns
- On the All campaigns page, click + Create campaign.
- In the Create campaign dialog box, under Connected Apps, click Meta Conversions and then click the most suitable delivery type.
- In Step 1 (Target Users), select your audience.
- In Step 2 (Content), select your Connector (Track Offline Conversions) and your created connection.
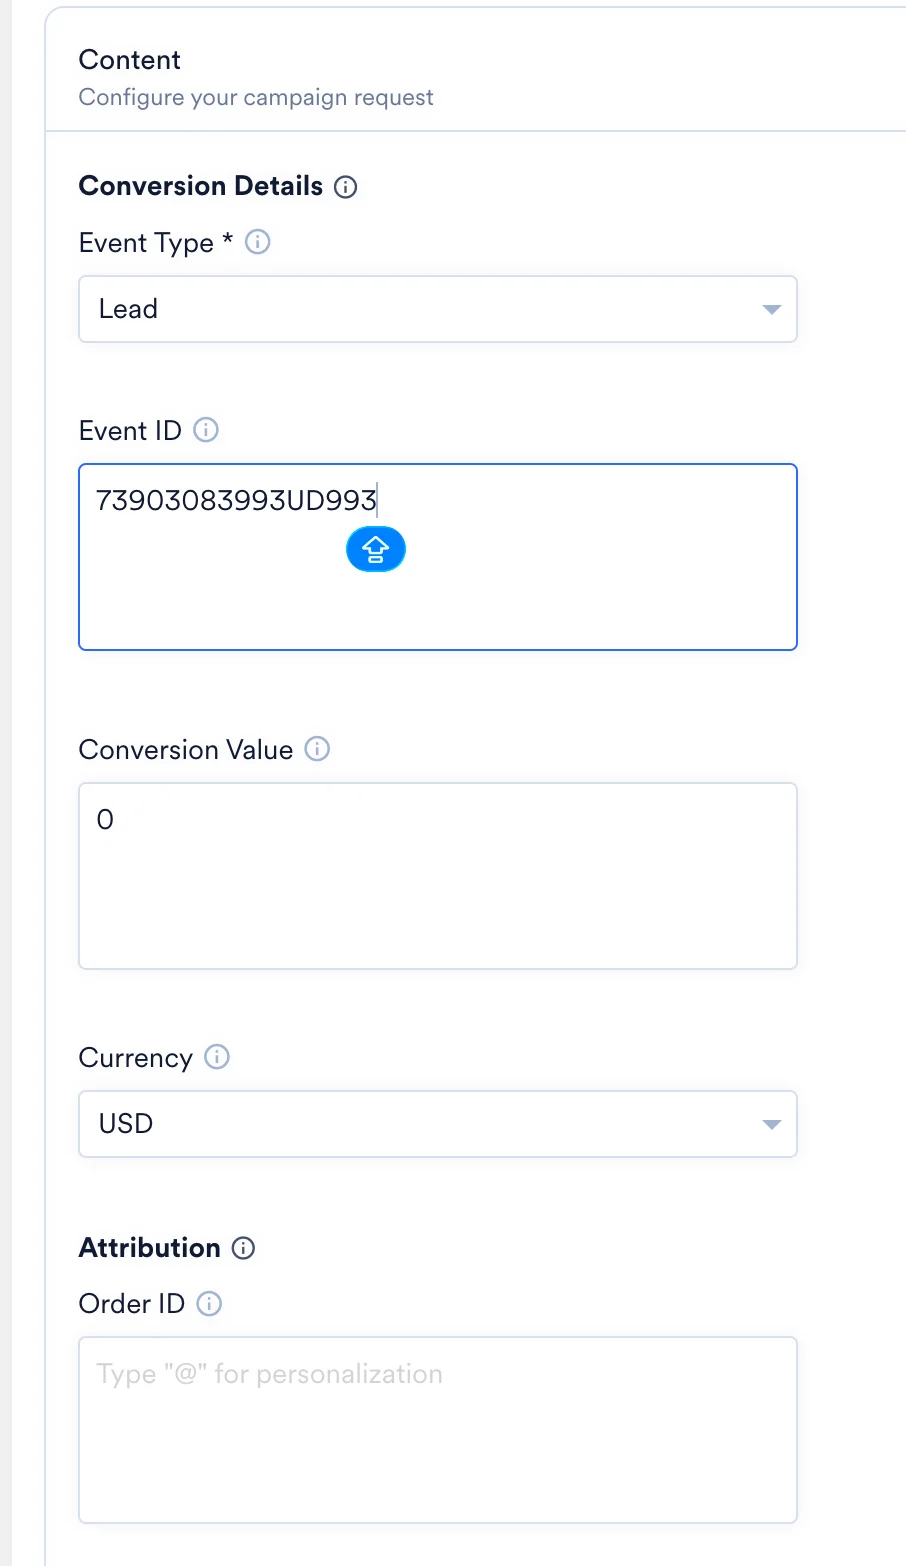
- Under Conversion Details, configure the following fields:
| Field | Required | Description |
|---|
| Event Type | Yes | Select a standard Meta conversion event from the dropdown. |
| Event ID | No | Unique ID such as a Transaction ID to avoid duplicate events. |
| Conversion Value | No | Revenue generated from the offline conversion. |
| Currency | No | Select the currency code from the dropdown |
| Order ID | No | The Order ID or Receipt Number for this transaction. |
-
Your campaign is now ready to be tested and sent. Using the Test functionality, you can also test your connector configuration.
-
You would receive a message as shown below, this confirms your setup is complete.
-
Publish the campaign.
Event Time Limit for Offline EventsException for physical store events: If Offline Conversion is used, you may send transactions up to 62 days after the conversion occurred.