

Configure Workspace Settings
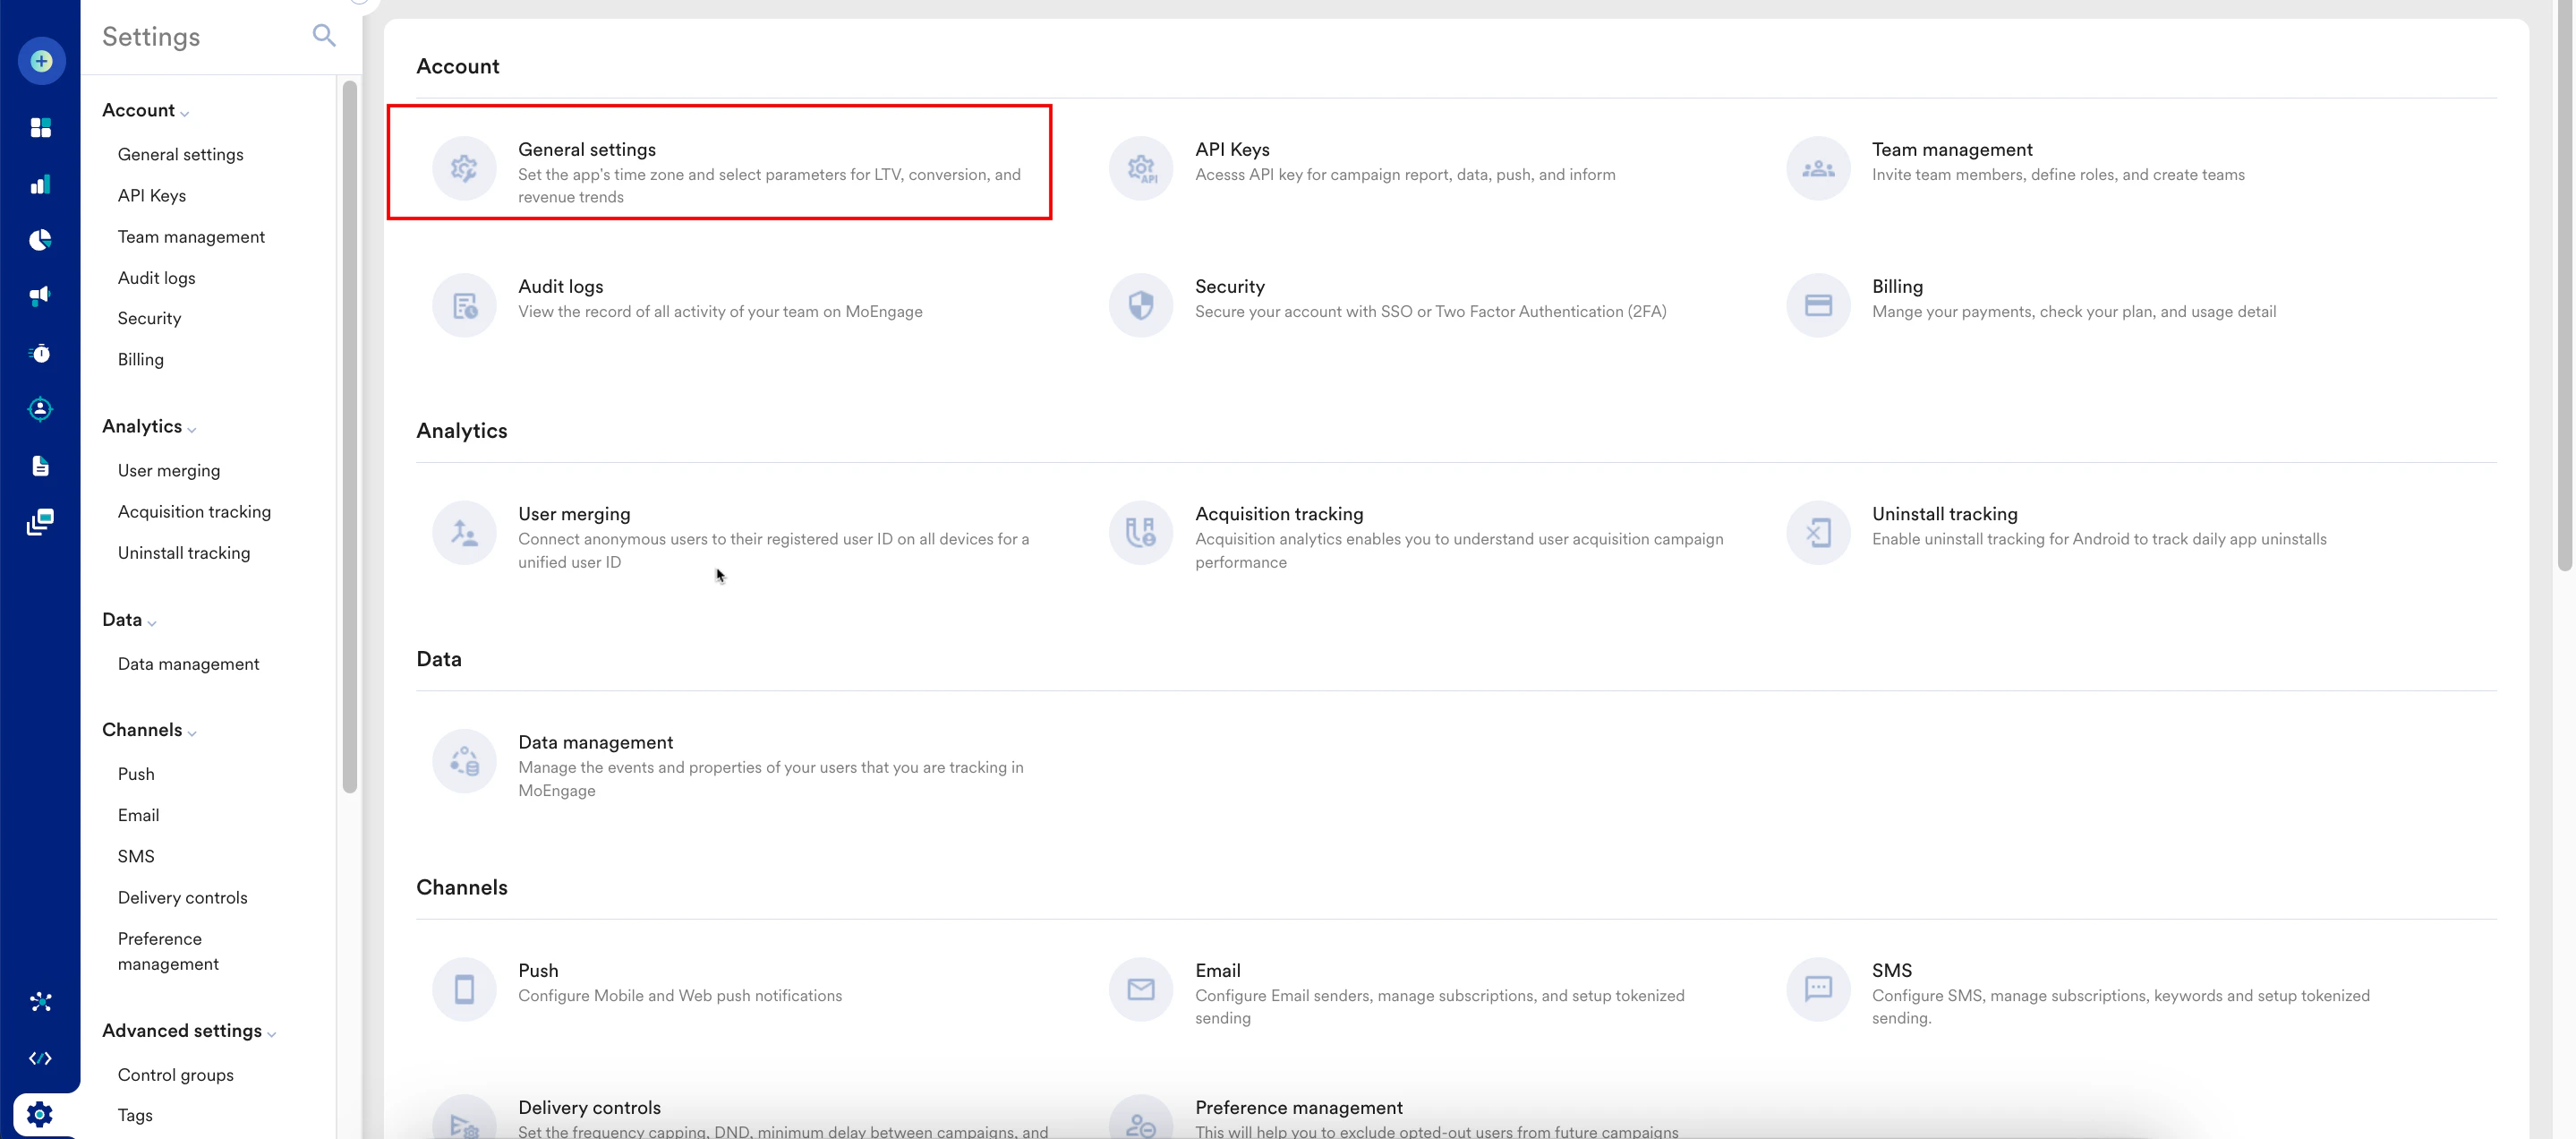
Perform the following steps to configure your workspace settings:- On the left navigation menu in the MoEngage dashboard, click Settings > Account > General settings.
- On the General settings page, enter the following details:
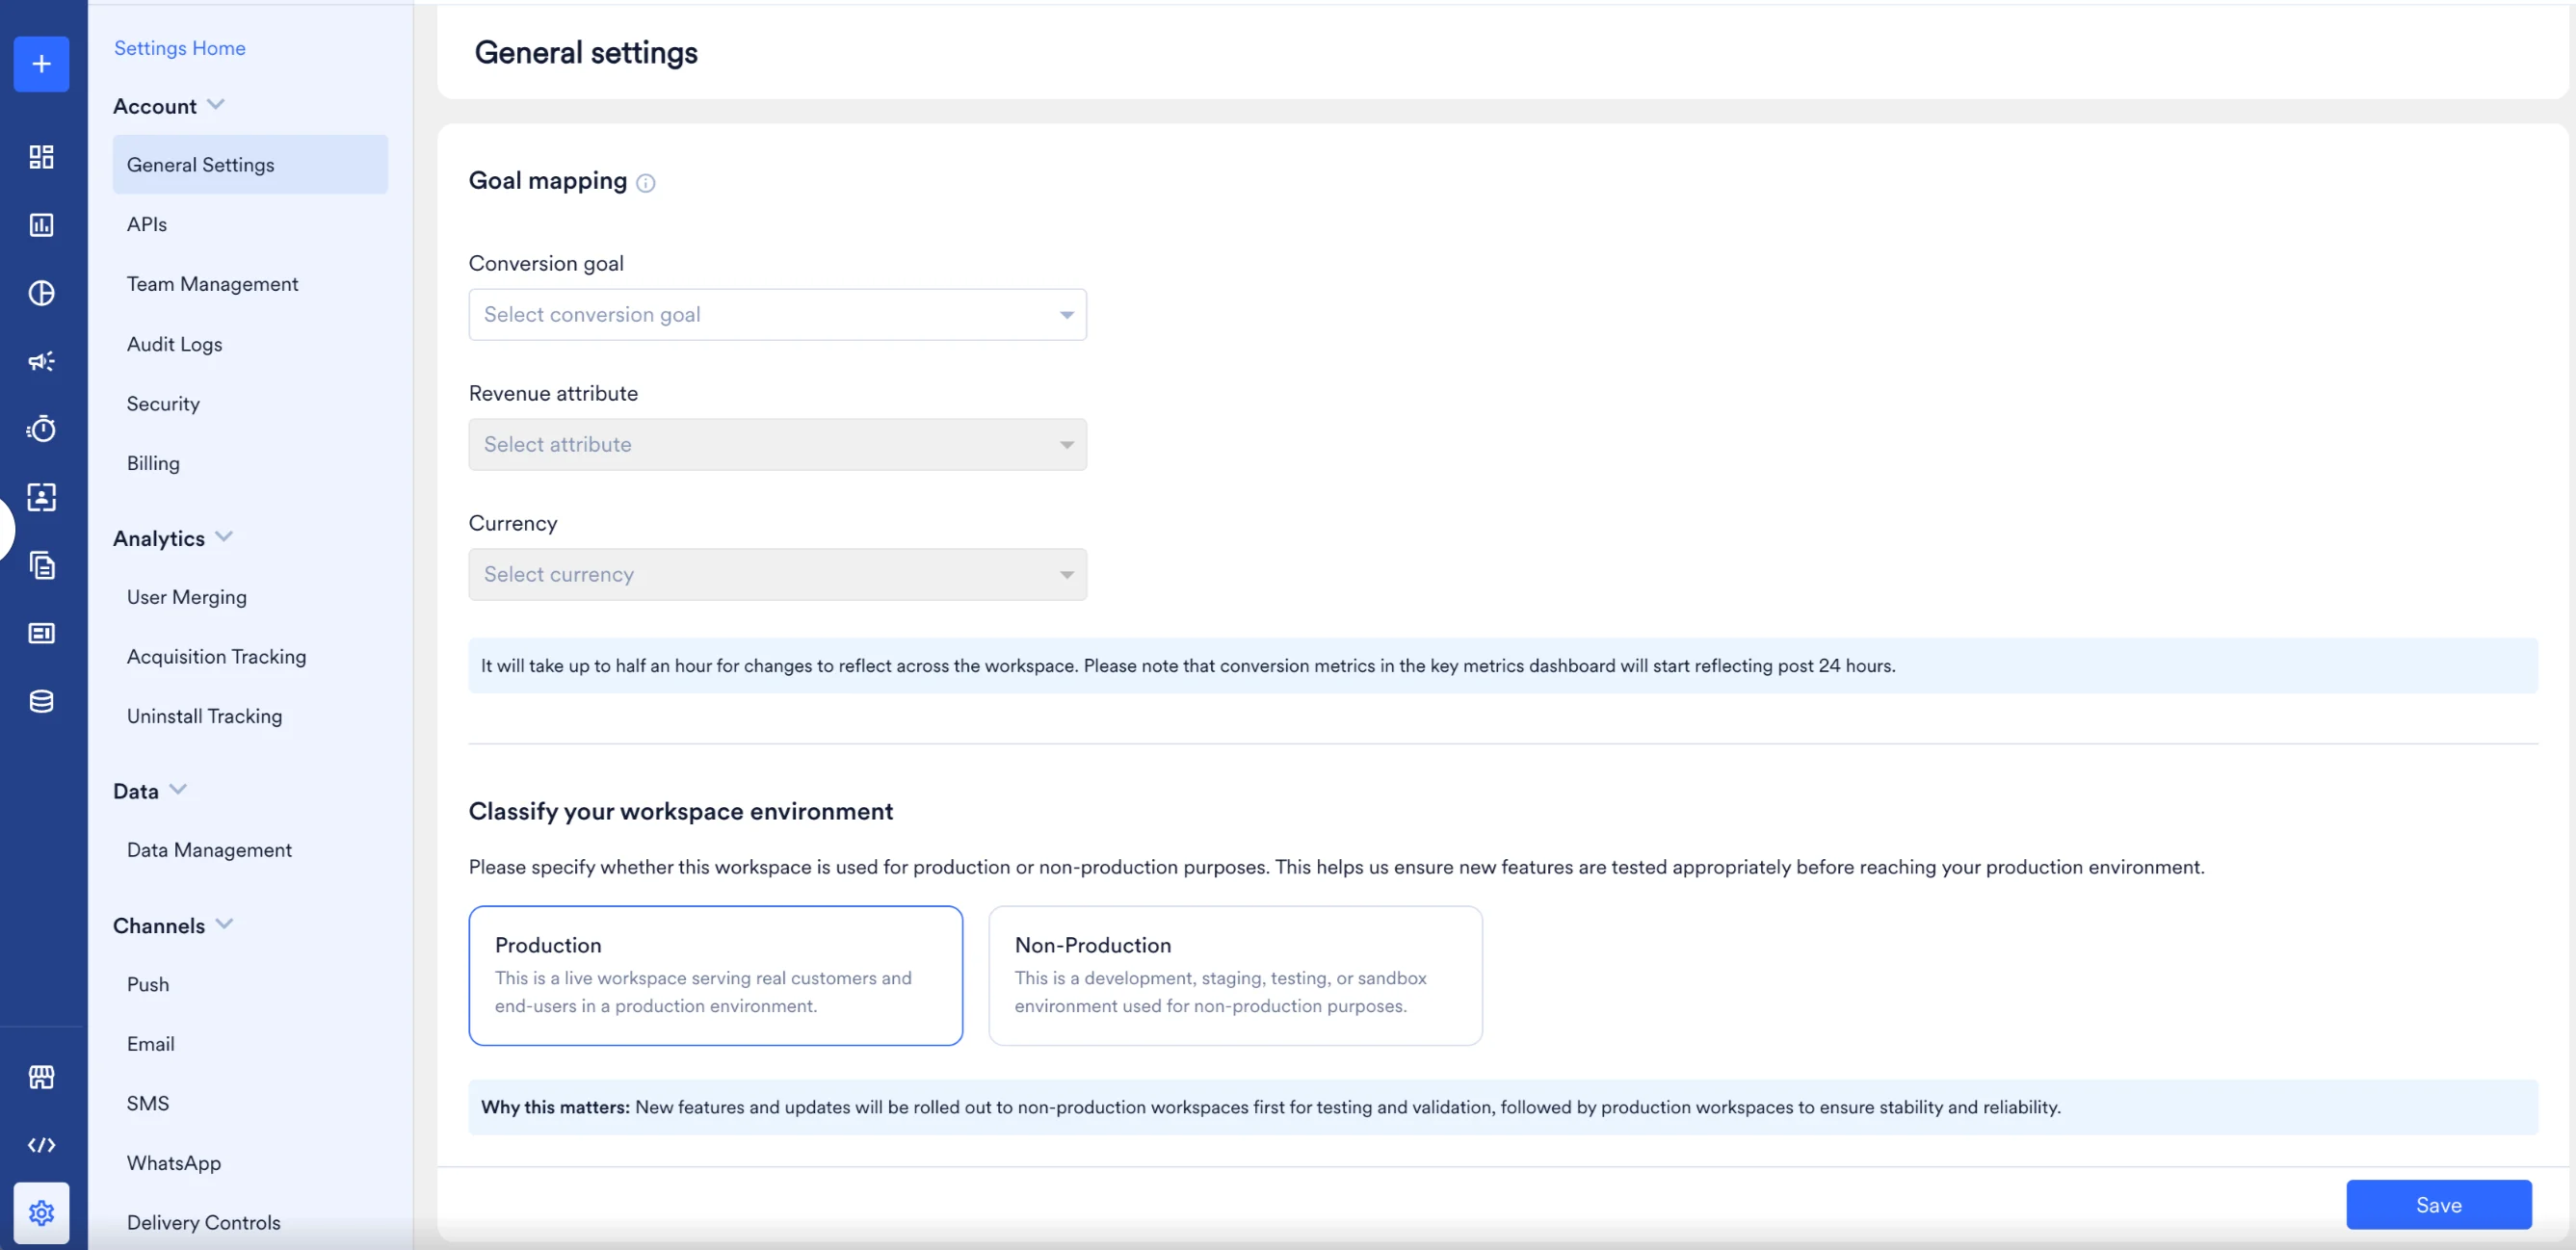
- Click Save.
Workspace Classification
- Workspace classification data will be used to provision an automated release cycle in future where you will be notified at every stage of the rollout.
- This feature is available only for customers on the Enterprise plan.
Set Workspace Classification for an Existing Workspace
- On the left navigation menu in the MoEngage dashboard, click Settings > Account > General settings.
- In the Classify your workspace environment field, select one of the following options:
- Production: Select this option if the workspace handles live end-user data and campaigns.
- Non-Production: Select this option if the workspace is used for UAT, staging, or testing purposes.
- Click Save.
Set Workspace Classification During Onboarding
When you create a new workspace, the onboarding flow includes a mandatory step to set the workspace classification. On the final step, you must select either Production or Non-Production before the workspace creation can be completed.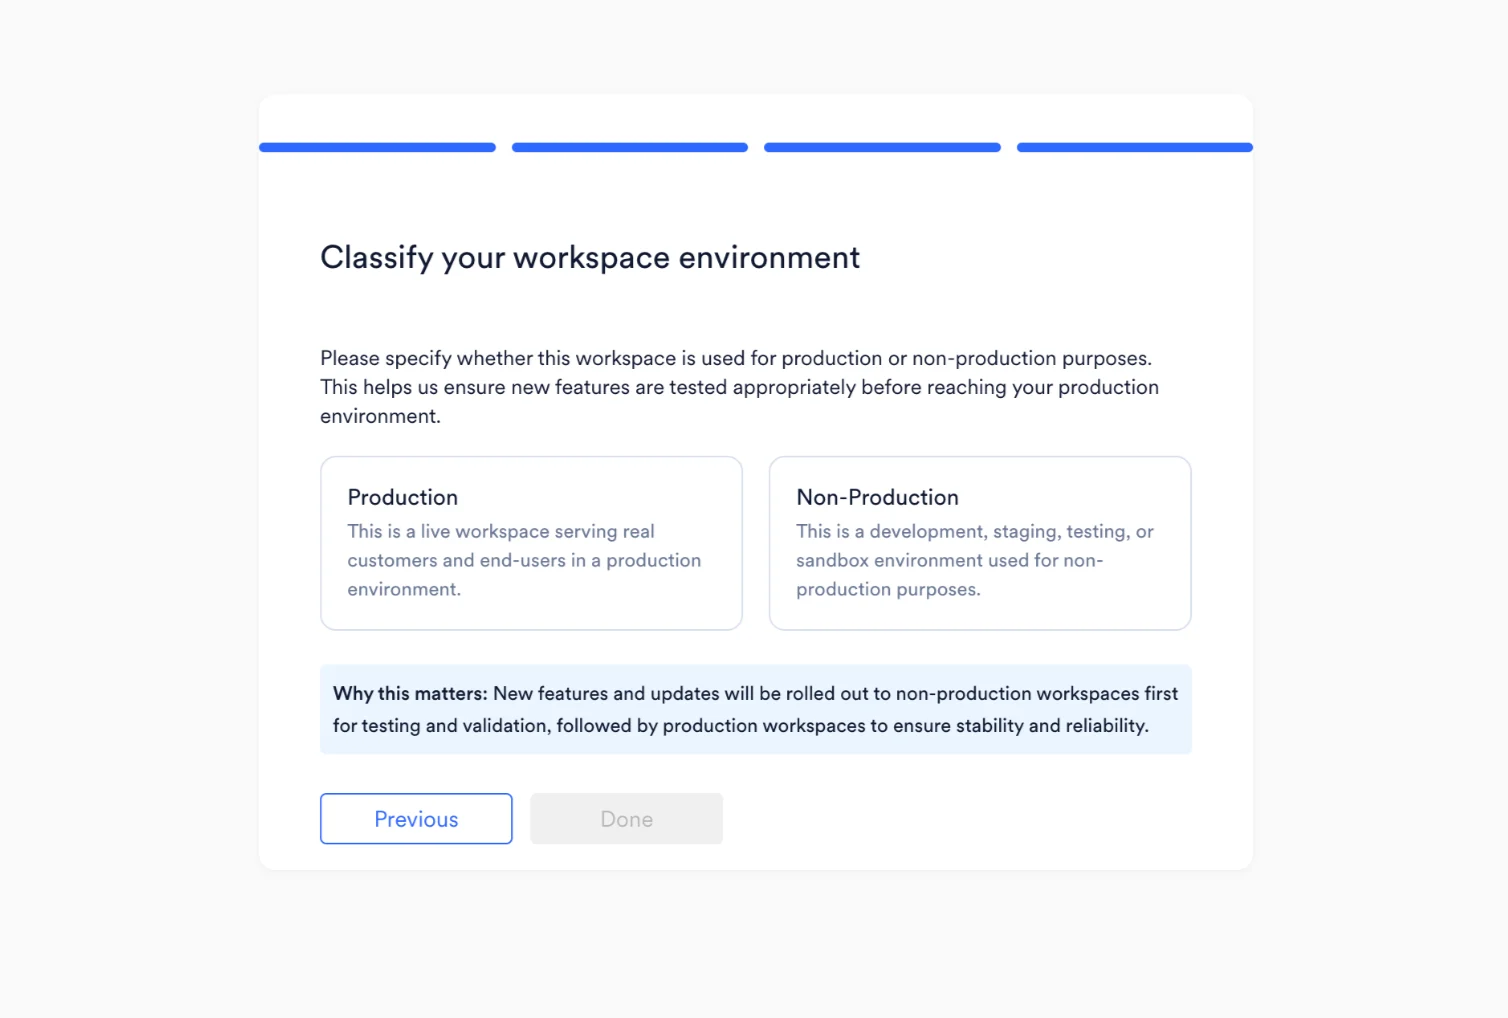
- Any existing workspace without a pre-selected classification is treated as Non-Production by default.
- The Test environment (from the Live/Test environment toggle) is always marked as Non-Production and cannot be changed.