Connected Apps is MoEngage’s low-code framework for integrating external platforms with our customer engagement ecosystem. This guide walks you through building a Connected Channel — an integration that sends data from MoEngage to your platform.
📌 Looking for a different path?If your use case is sending data into MoEngage (e.g., CRM syncs, event tracking, form submissions), you need Connected Sources instead. Reach out to us to get started.
Why Build on Connected Apps?
The MoEngage App Marketplace is a curated ecosystem of 250+ technology partners. Connected Apps gives you the fastest path to joining it.Increase Market Reach
Gain visibility among MoEngage’s large customer base by listing on the App Marketplace.
New Revenue Streams
Monetize through subscriptions, transactions, or connector fees.
Faster Go-to-Market
Streamlined integration process means you can bring solutions to market quicker.
Reduce Dev Costs
Low-code framework makes building and deploying integrations accessible to teams of any size.
Types of Connected Apps
Connected Apps has two integration types. This guide covers Connected Channels. If you need Connected Sources, please refer to the Connected Sources guide.↑
Connected Channels
THIS GUIDE
MoEngage sends data to your platform. Ideal for messaging, ads, support tools.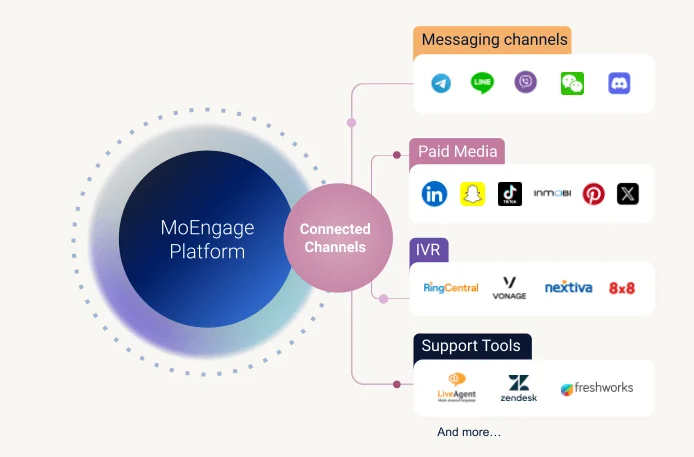
↓
Connected Sources
Your platform sends data into MoEngage. Ideal for CRMs, e-commerce, and form tools.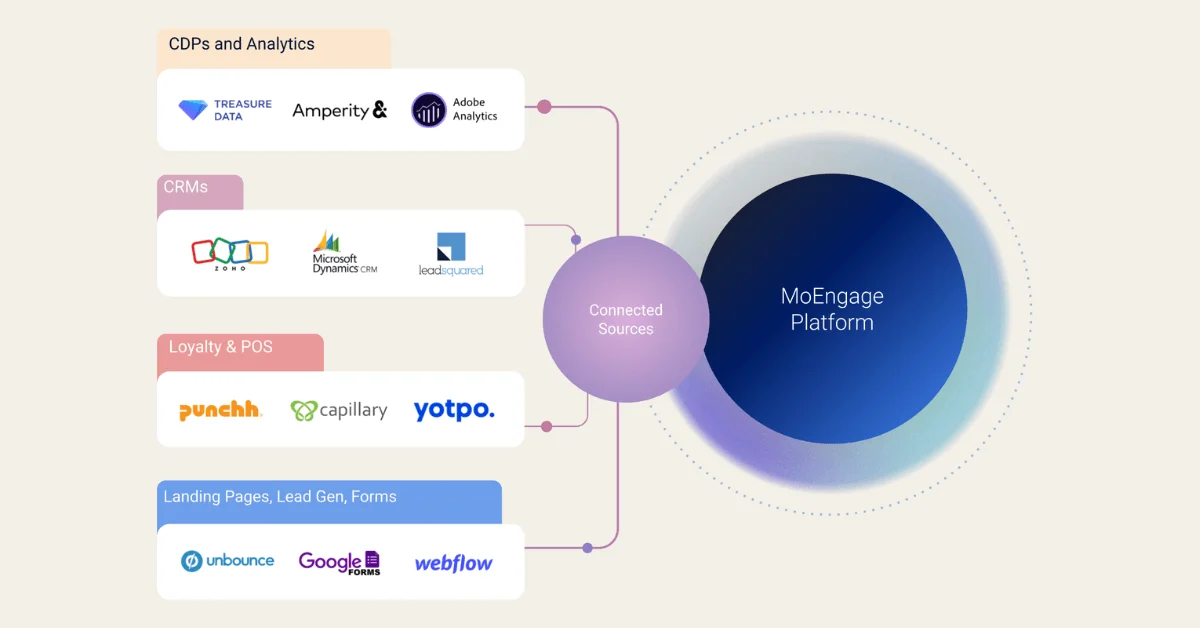
Building Your Connected Channel
PrerequisitesEnsure Connected Apps is enabled for your MoEngage Partner Sandbox. If you don’t see an option to create an App, please reach out to us.

Step 1: Before You Begin — Key Terminology
Before building, familiarize yourself with the core concepts. Here’s how the pieces fit together: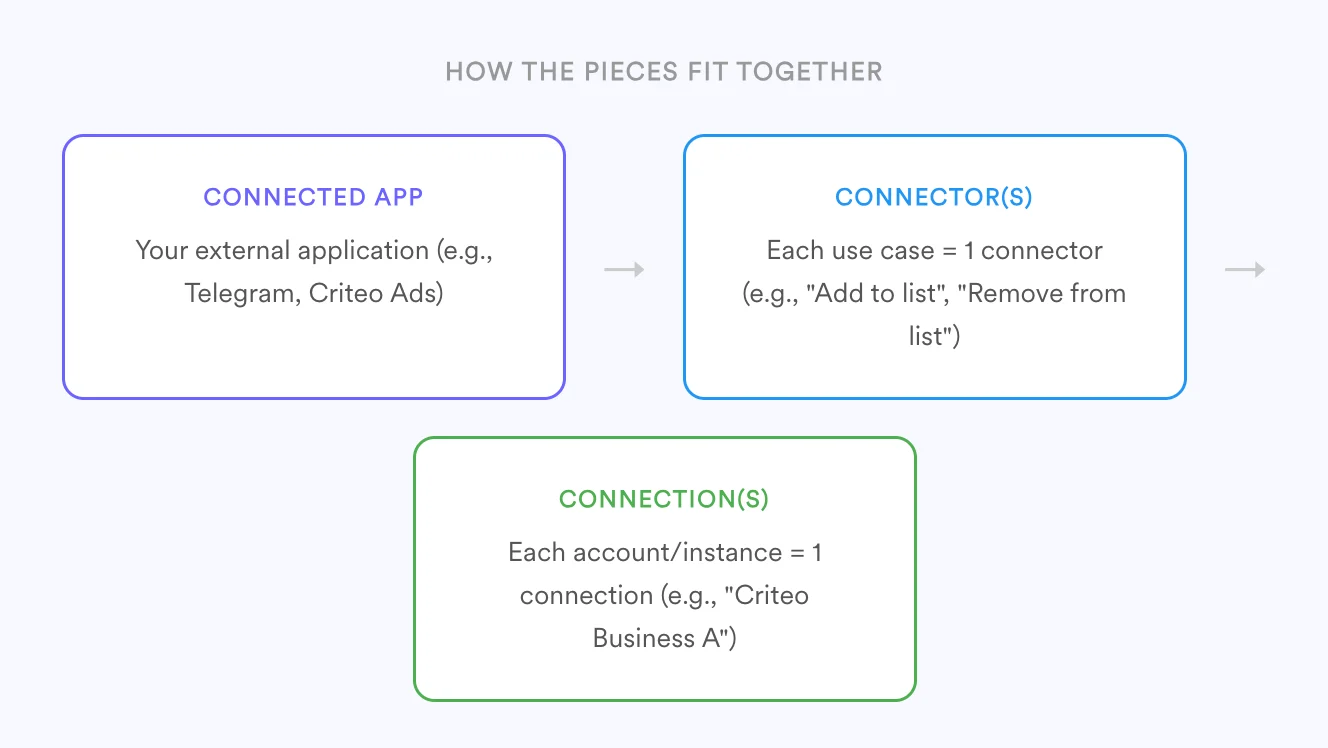
| Term | Description | Example |
|---|---|---|
| Connected App | An external third-party application or tool to which you send data from MoEngage. This can be a messaging application, an advertising or retargeting platform, or an internal tool in your marketing technology stack. |
Note: The examples listed here are illustrative and may not be currently supported by MoEngage. For a comprehensive list of currently supported applications, refer to the Supported Connected Channels section |
| Connected Channel | A type of connected app integration in MoEngage that allows you to send data from MoEngage to an external customer interaction platform. | Messaging Apps
|
| Channel Connector | A specific configuration that defines how MoEngage campaigns integrate with a connected app. Each connector links to a particular API at the destination and serves a specific use case. | A Criteo Ads Connected Channel typically has two connectors:
|
| Connection | When you integrate a Channel Connector for your connected channel, MoEngage creates a Connection. You can name new connections for easy identification within the MoEngage platform. | If you are using two different Criteo Ad accounts (for Business A and Business B), you connect them separately as:
|
💡 Helpful contextFamiliarize yourself with how Connector Campaigns work in MoEngage. Connected Apps closely follows this user journey. You can also browse existing Connected Channels to see integrations built on this platform.
Step 2: Create Your App in MoEngage
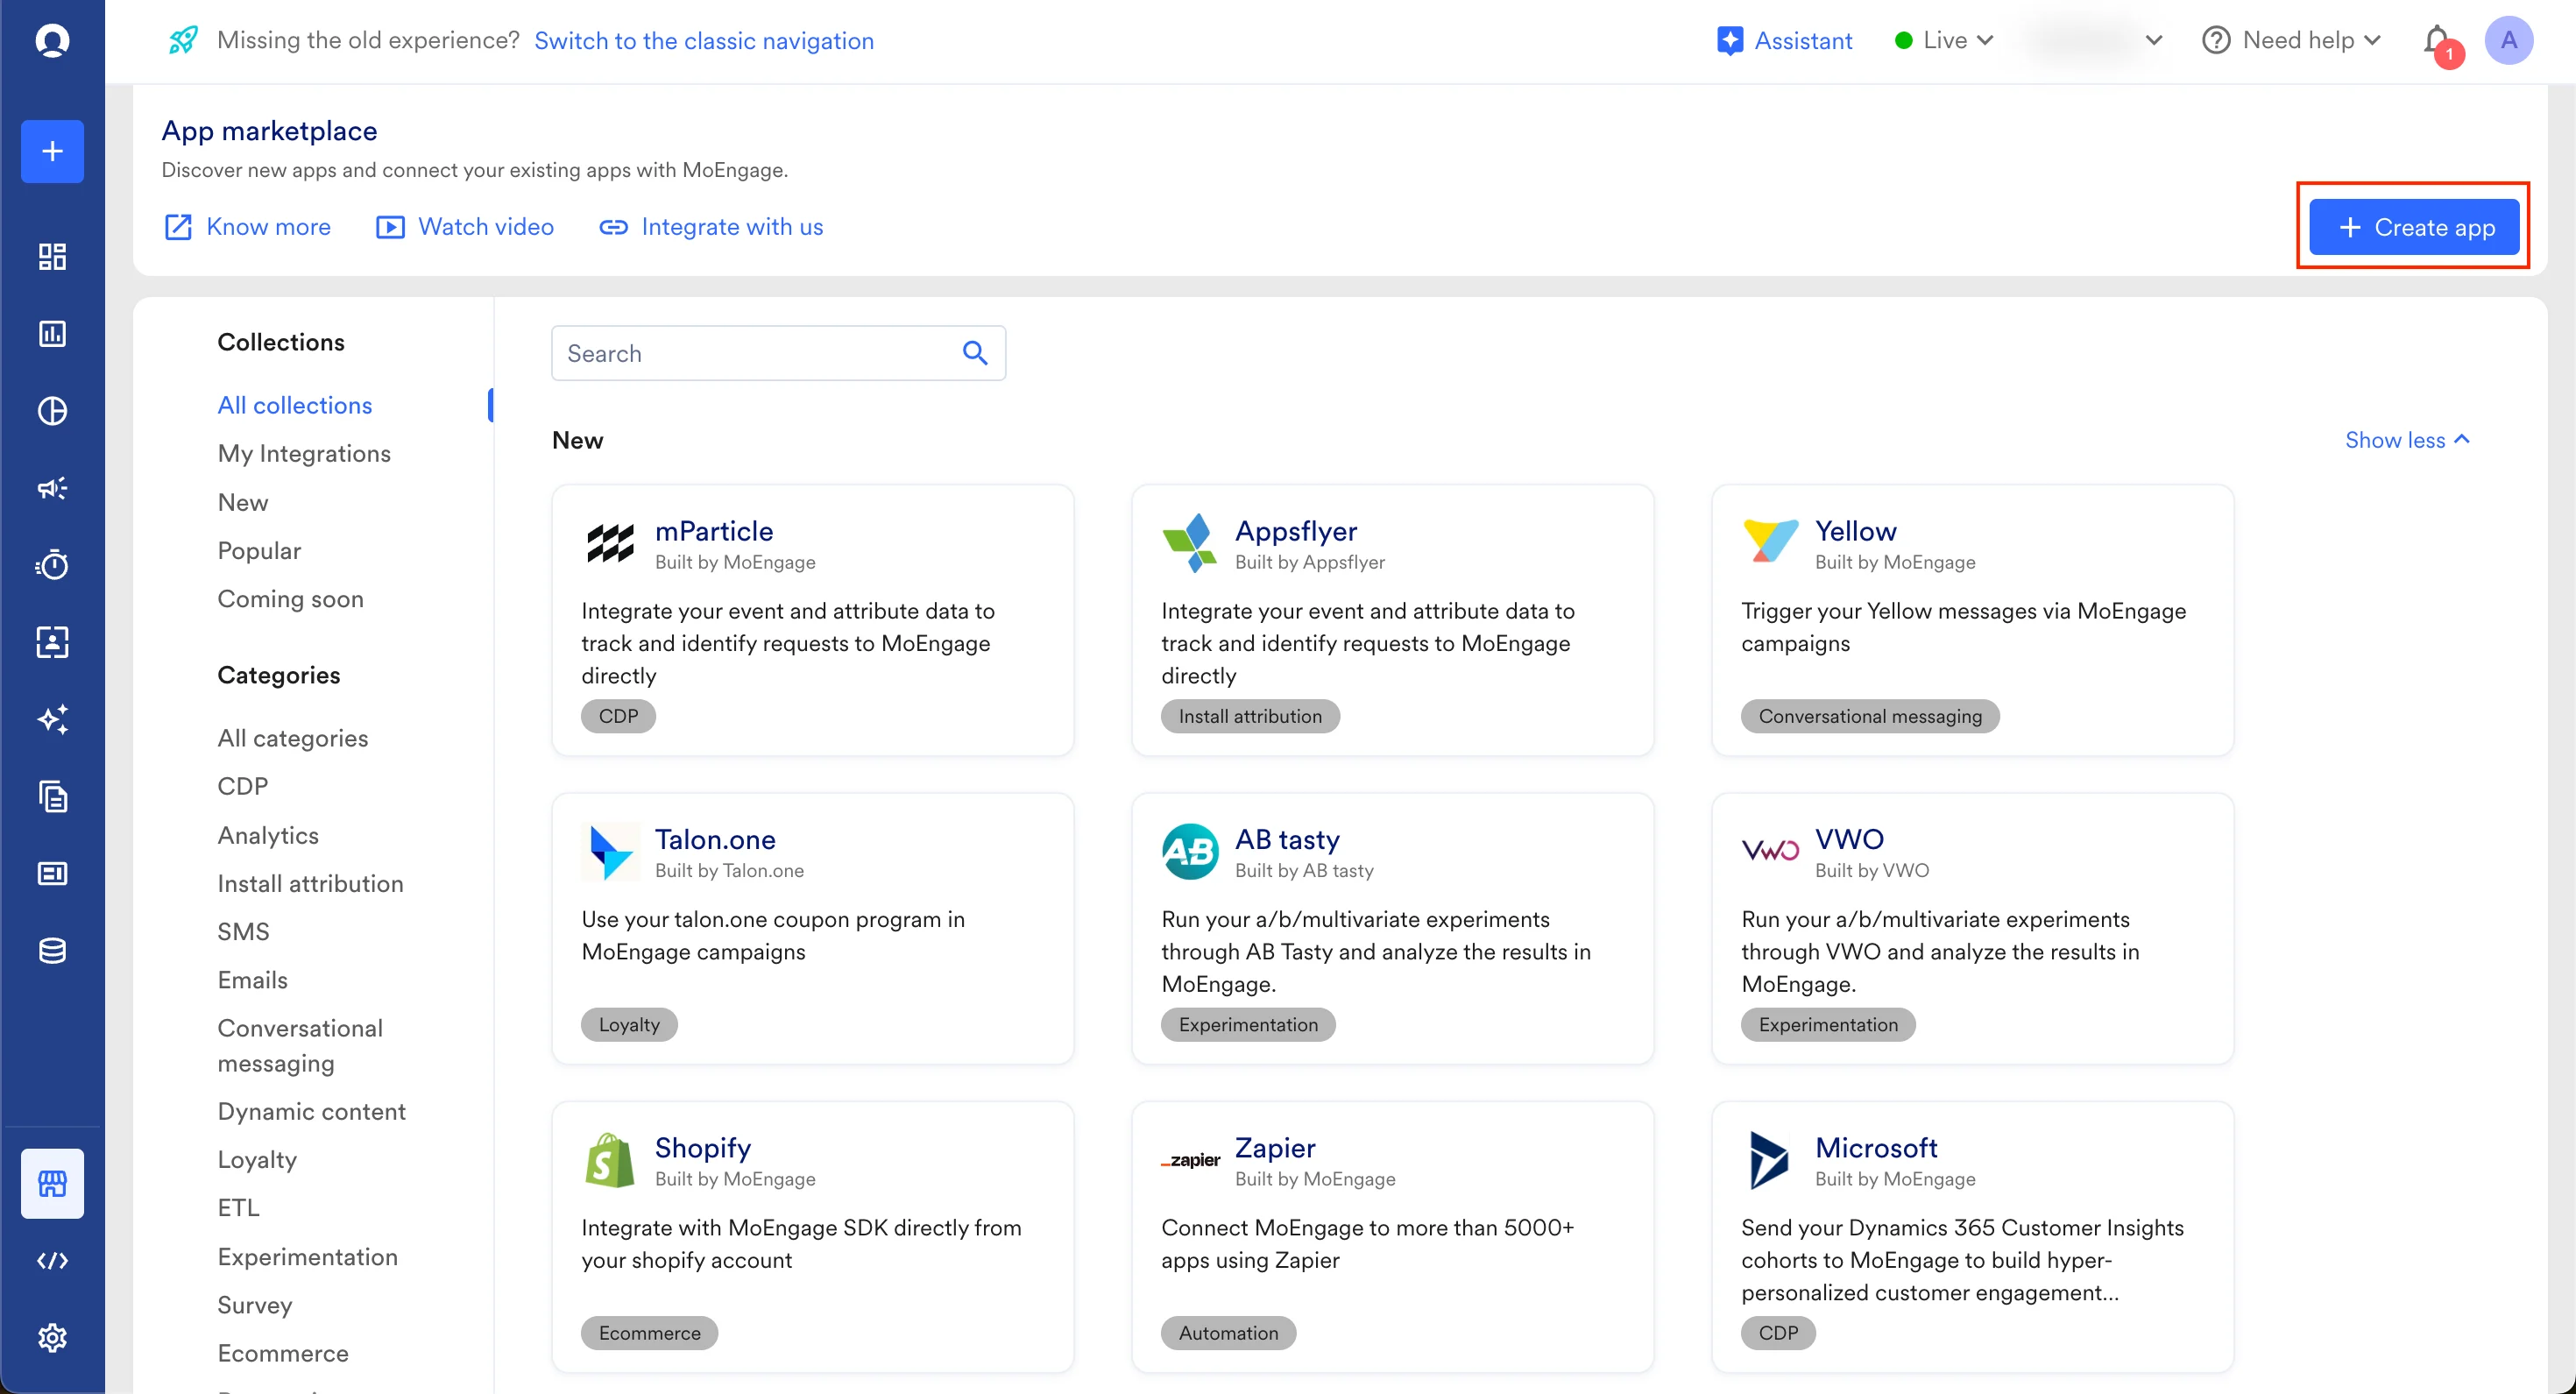
- Navigate to the App Marketplace in your MoEngage dashboard.
- Click on the + Create app button in the top right corner.
- In the dialog box:
- Enter a unique App name.
- Select Channel as the App type.
- Click Create.
Step 3: Create Your Connector
Each use case your integration supports is defined as a Connector. A single app can have multiple connectors. For example, a messaging app might have separate connectors for sending an SMS, sending an MMS, and sending a message to a group. Each Connector requires its own JSON configuration file — a blueprint that tells MoEngage how to interact with your app for that specific use case.Step 4: Create and Upload Your Configuration File
The JSON configuration file is the heart of your connector. It tells MoEngage how to interact with your API, what inputs are needed from the user, and how to handle responses.1. Create the File
Our comprehensive help documentation provides a detailed, step-by-step guide to creating this file, complete with examples and best practices. 📘 Read the full guide: Create a Channel Connector Config File2. Upload the File
Once your JSON config file is ready:- Go back to your app page in the MoEngage App Marketplace.
- Click on the Configure tab.
- Click + Add configuration.
- Upload your JSON file. If there are any validation errors, the system will notify you.
- Once the upload is successful, click Add.
Step 5: Test Your Integration
Thorough testing is essential for a smooth user experience. Follow these three sub-steps to validate your integration end-to-end.5.1: Create a Connection
- On your app page, navigate to the Integrate tab.
- Click + Add integration.
- Give your connection a unique Connection name (e.g., “My Test Connection”).
- Fill in any input variables you defined with the App Marketplace scope.
- Click Connect.
5.2: Run a Test Campaign
- Create a new campaign in MoEngage (e.g., a one-time push campaign).
- In the campaign creation process, select your new Connected Channel.
- Choose the Connection you created in the previous step.
- Fill in the campaign-specific input variables.
- Launch the campaign to a test segment.
5.3: Verify Campaign Stats
- Check the campaign performance page.
- Ensure that the “Sent” and “Failed” numbers reflect the API responses you received during the campaign. For example, if your test sent 10 messages and all received a 200 OK response, you should see 10 “Sent” events.
Submitting Your App for Publishing
Once your integration is working correctly, it’s time to submit it for review.