When a configured alert is triggered, MoEngage sends an HTTP POST request to your designated webhook URL, enabling seamless integration with your internal systems, monitoring tools, or third-party services.
MoEngage × Webhook
The Webhook integration allows you to configure a generic HTTP endpoint as an alert destination. This is designed for advanced users who want to route MoEngage alerts to internal systems, third-party monitoring tools, or data warehouses that support HTTP POST requests. When an alert is triggered, MoEngage sends a detailed JSON payload containing all relevant alert data to your specified URL. With this integration, you can do the following:- Programmatically ingest alert data into your own infrastructure.
- Trigger custom automated workflows in third-party systems based on MoEngage alerts.
- Securely validate alert authenticity using digital signatures.
Use Cases
Integrating Webhooks as an alert destination supports the following use cases:- Incident management integration: Automatically create tickets in tools like PagerDuty, OpsGenie, or Jira when critical alerts (for example, Token Expiry or Delivery Rate drops) occur.
- Custom dashboards: Ingest alert statistics into internal data visualization tools (like Grafana or Tableau) for long-term trend analysis.
- Automated remediation: Trigger server-side scripts to pause campaigns or adjust settings automatically when specific alert thresholds are breached.
Integration
Before you begin the configuration, ensure you have the following:
- A publicly accessible Endpoint URL that accepts HTTP POST requests and JSON bodies.
- Technical resources to parse the JSON payload and (optionally) validate the SHA-256 signature for security.
- Access to your MoEngage workspace with permissions to configure alert management.
Set Up Your Webhook URL
To set up a webhook destination, you must provide a URL. Your URL must be a publicly accessible endpoint that acceptsHTTP POST requests with a JSON body.
Your webhook URL is the address of your application or service that will listen for and process the incoming alert notifications.
Webhook Payload Structure
All webhook notifications follow a consistent JSON structure. The table below describes each field in the payload. Note that some fields, particularly within theentity_data object, are specific to certain alert types.
| Field Name | Data Type | Description |
|---|---|---|
alert_id | String | The unique identifier for the alert that was triggered. |
alert_name | String | The user-defined name of the alert. |
alert_type | String | The type of the alert. Possible values include:
|
db_name | String | The name of the workspace associated with the alert. |
alert_evaluation_frequency | Object | An object describing how often the alert condition is checked. |
alert_evaluation_frequency.value | Number | The numeric value for the frequency (for example, 1). |
alert_evaluation_frequency.unit | String | The unit of frequency (for example, day, hour). |
alert_triggered_at | String | The ISO 8601 timestamp indicating when the alert was triggered. |
alert_evaluation_criteria | Object | An object containing the specific conditions that triggered the alert. |
alert_evaluation_criteria.name | String | The name of the metric being evaluated (for example, DELIVERY_RATE, EXPIRY_DAYS). |
alert_evaluation_criteria.operator | String | The comparison operator used. For example, gt (greater than), lt (less than). |
alert_evaluation_criteria.threshold | Number | The threshold value that was breached. |
alert_evaluation_criteria.unit | String | The unit for the threshold (for example, percentage, count, day). |
alert_evaluation_criteria.range_start | String | The ISO 8601 timestamp for the start of the evaluation window. |
alert_evaluation_criteria.range_end | String | The ISO 8601 timestamp for the end of the evaluation window. |
alert_evaluation_criteria.moving_avg_range | Object | Available only for relative alerts. Describes the window used to calculate the moving average (for example, the last 7 days). |
entity_data | Object | A flexible object containing details about the specific entities (for example, campaigns, flows) that triggered the alert. This object is not available for certain alerts, such as APNS_TOKEN_EXPIRY. |
entity_data.count | Number | The total number of entities listed in the content array. |
entity_data.content | Array | An array of objects, where each object represents a single entity that met the alert criteria. The fields within each object vary depending on the alert_type. |
entity_data.content Object
The following table describes the possible fields in each object in theentity_data.content array.
| Field Name | Data Type | Description |
|---|---|---|
campaign_name | String | The name of the campaign. |
campaign_id | String | The unique identifier for the campaign. |
flow_name | String | The name of the flow. |
flow_id | String | The unique identifier for the flow. |
version_name | String | The name of the flow version. |
channel | String | The communication channel (for example, PUSH, EMAIL). |
delivery_type | String | The delivery type (for example, PROMOTIONAL, TRANSACTIONAL). |
current_value | Number | The metric’s current value for the entity that triggered the alert. |
moving_avg_value | Number | The metric’s calculated moving average value. Available only for relative alerts. |
expiry_in_days | Integer | The number of days until the campaign expires. |
event_type | String | The type of the event being tracked. |
event_name | String | The name of the event being tracked. |
Verify the Webhook Signature
To ensure that webhook requests are authentic and originate from MoEngage, we include a digital signature in the request headers.Info It is recommended to validate this signature on your server to prevent unauthorized access and ensure data integrity.
Signature HTTP header. It is generated by creating a SHA-256 hash of your API key concatenated with the raw request body.
Generate and Verify the Signature
- Get your Campaign Report API Key: You can find this key in your MoEngage UI by navigating to Settings > Account > APIs.
- Prepare the Signature String: Concatenate your Campaign Report API key, a pipe character (
|), and the raw JSON request body.
Format:YOUR_API_KEY + "|" + RAW_REQUEST_BODY - Calculate the Hash: Create a SHA-256 hash of the signature string and encode it as a hexdigest.
- Compare Signatures: Compare the hash you generated with the value from the
Signatureheader in the incoming request. If they match, the request is authentic.
Sample Payloads and cURL Requests
Below are samples ofcURL commands demonstrating the POST request and JSON payload your webhook endpoint will receive. Replace 'https://your-webhook-url.com/endpoint' with your actual endpoint URL.
Campaign Stats (CAMPAIGN_STATS)
Absolute Threshold Alert
This alert triggers when a metric crosses a fixed value.Relative Threshold Alert (with Moving Average)
This alert triggers when a metric deviates from its historical moving average. A moving average is the average of a metric over a specific number of past periods (for example, the last 7 days), which helps identify significant deviations from recent performance trends.Flow Stats (FLOW_STATS)
These alerts are similar to Campaign Stats but focus on flow-level metrics.Campaign Expiry (CAMPAIGN_EXPIRY)
This alert notifies you when campaigns are nearing their expiration date.APNS Token Expiry (APNS_TOKEN_EXPIRY)
This alert warns you when your Apple Push Notification Service (APNS) token is about to expire. Note that this payload does not contain anentity_data object.
Facebook Token Expiry (FACEBOOK_TOKEN_EXPIRY)
This alert warns you when your Facebook token is about to expire. This payload also does not contain anentity_data object.
Integrate Alert Management via Webhook URL
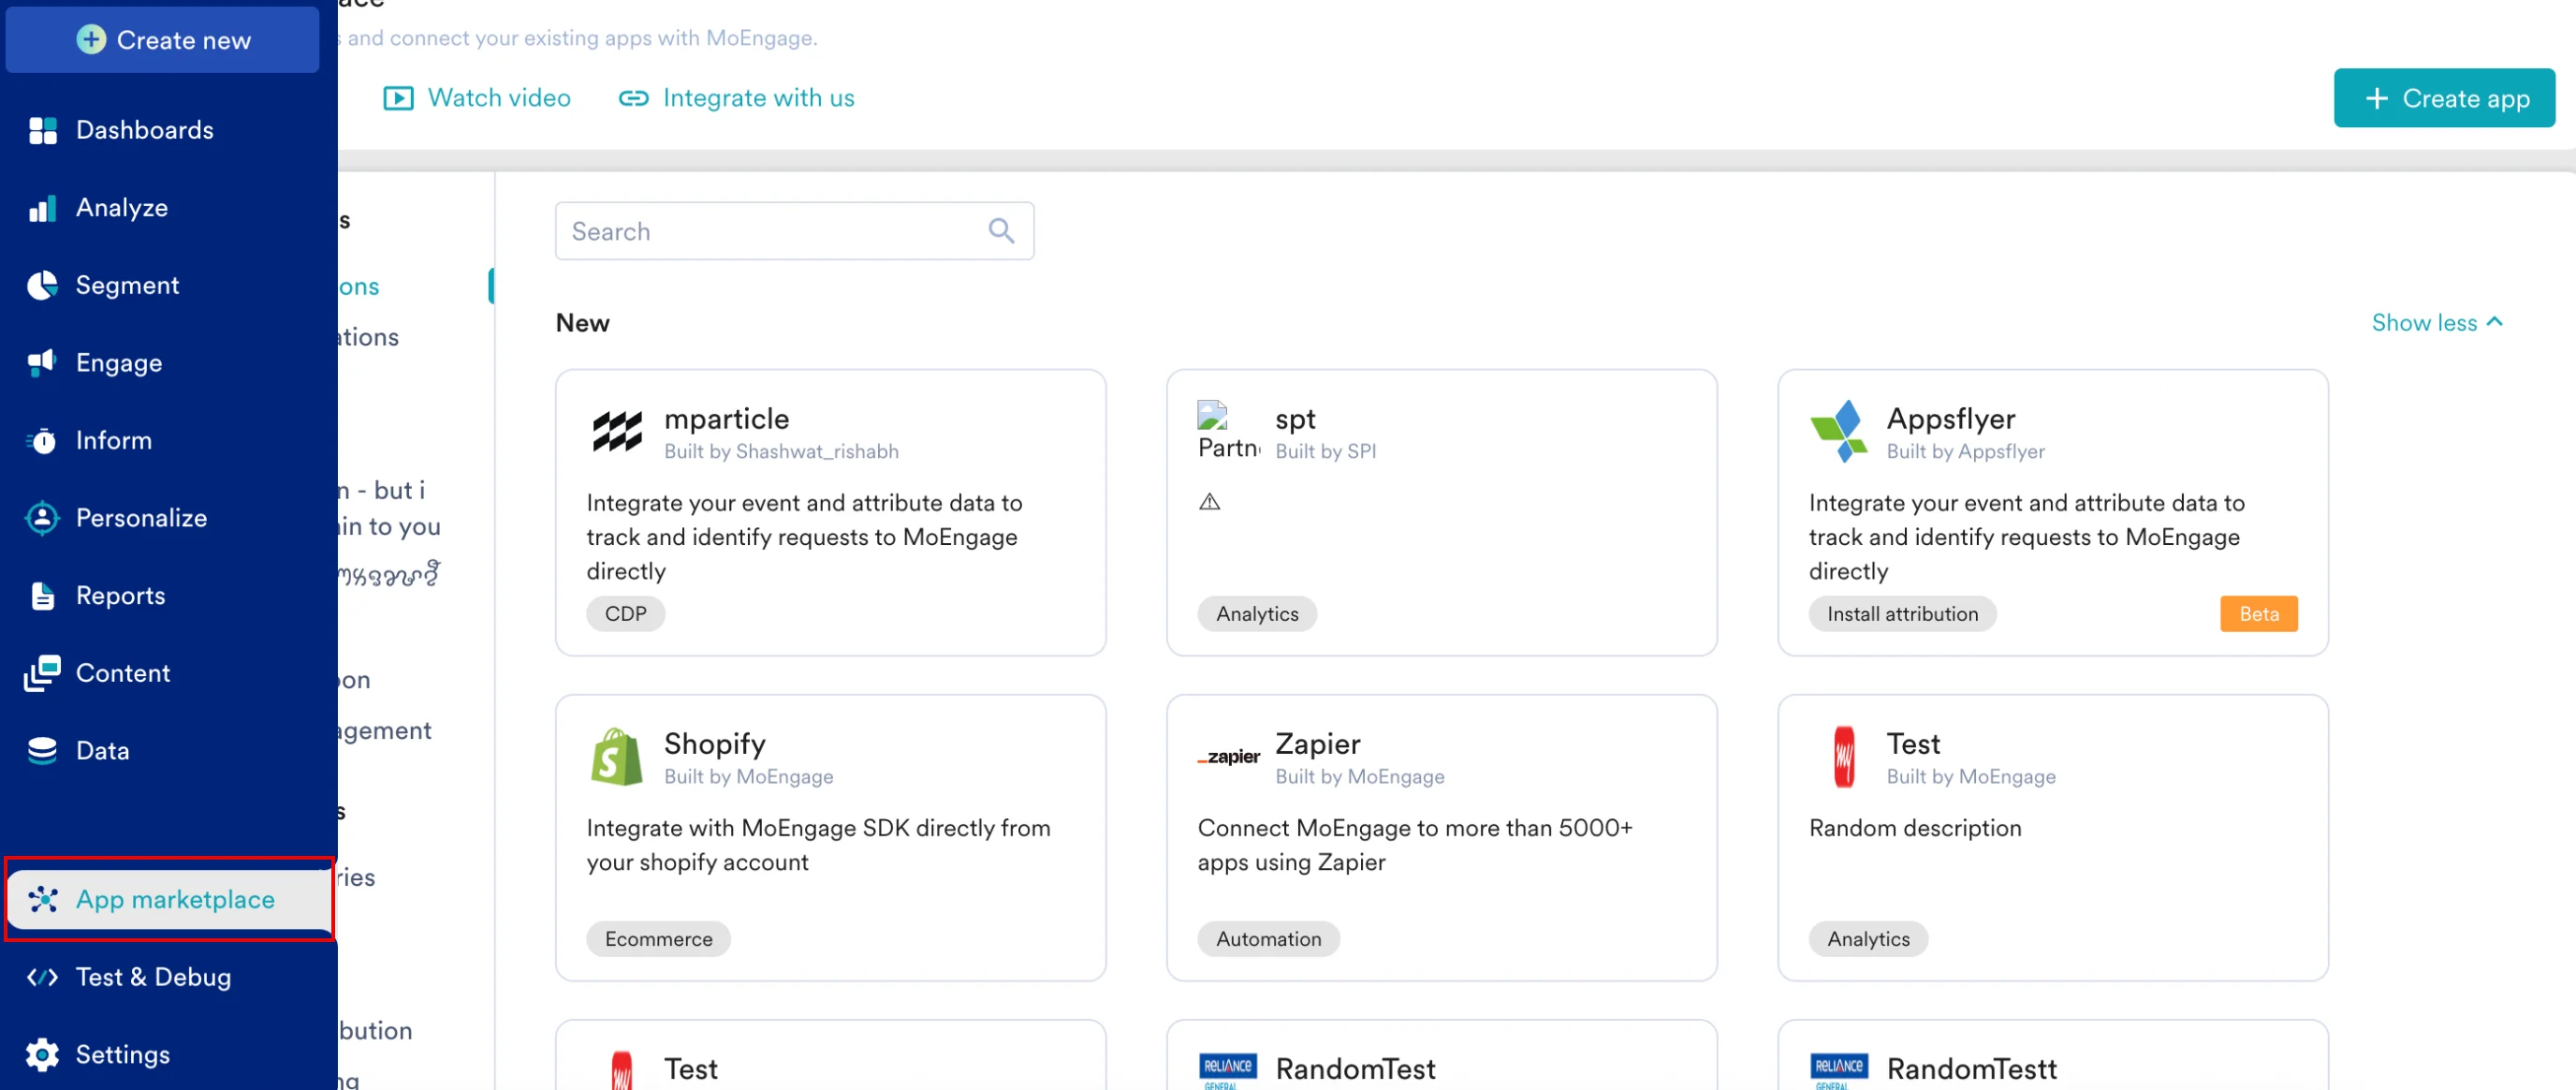
- On the left navigation menu of your MoEngage UI, click App marketplace.
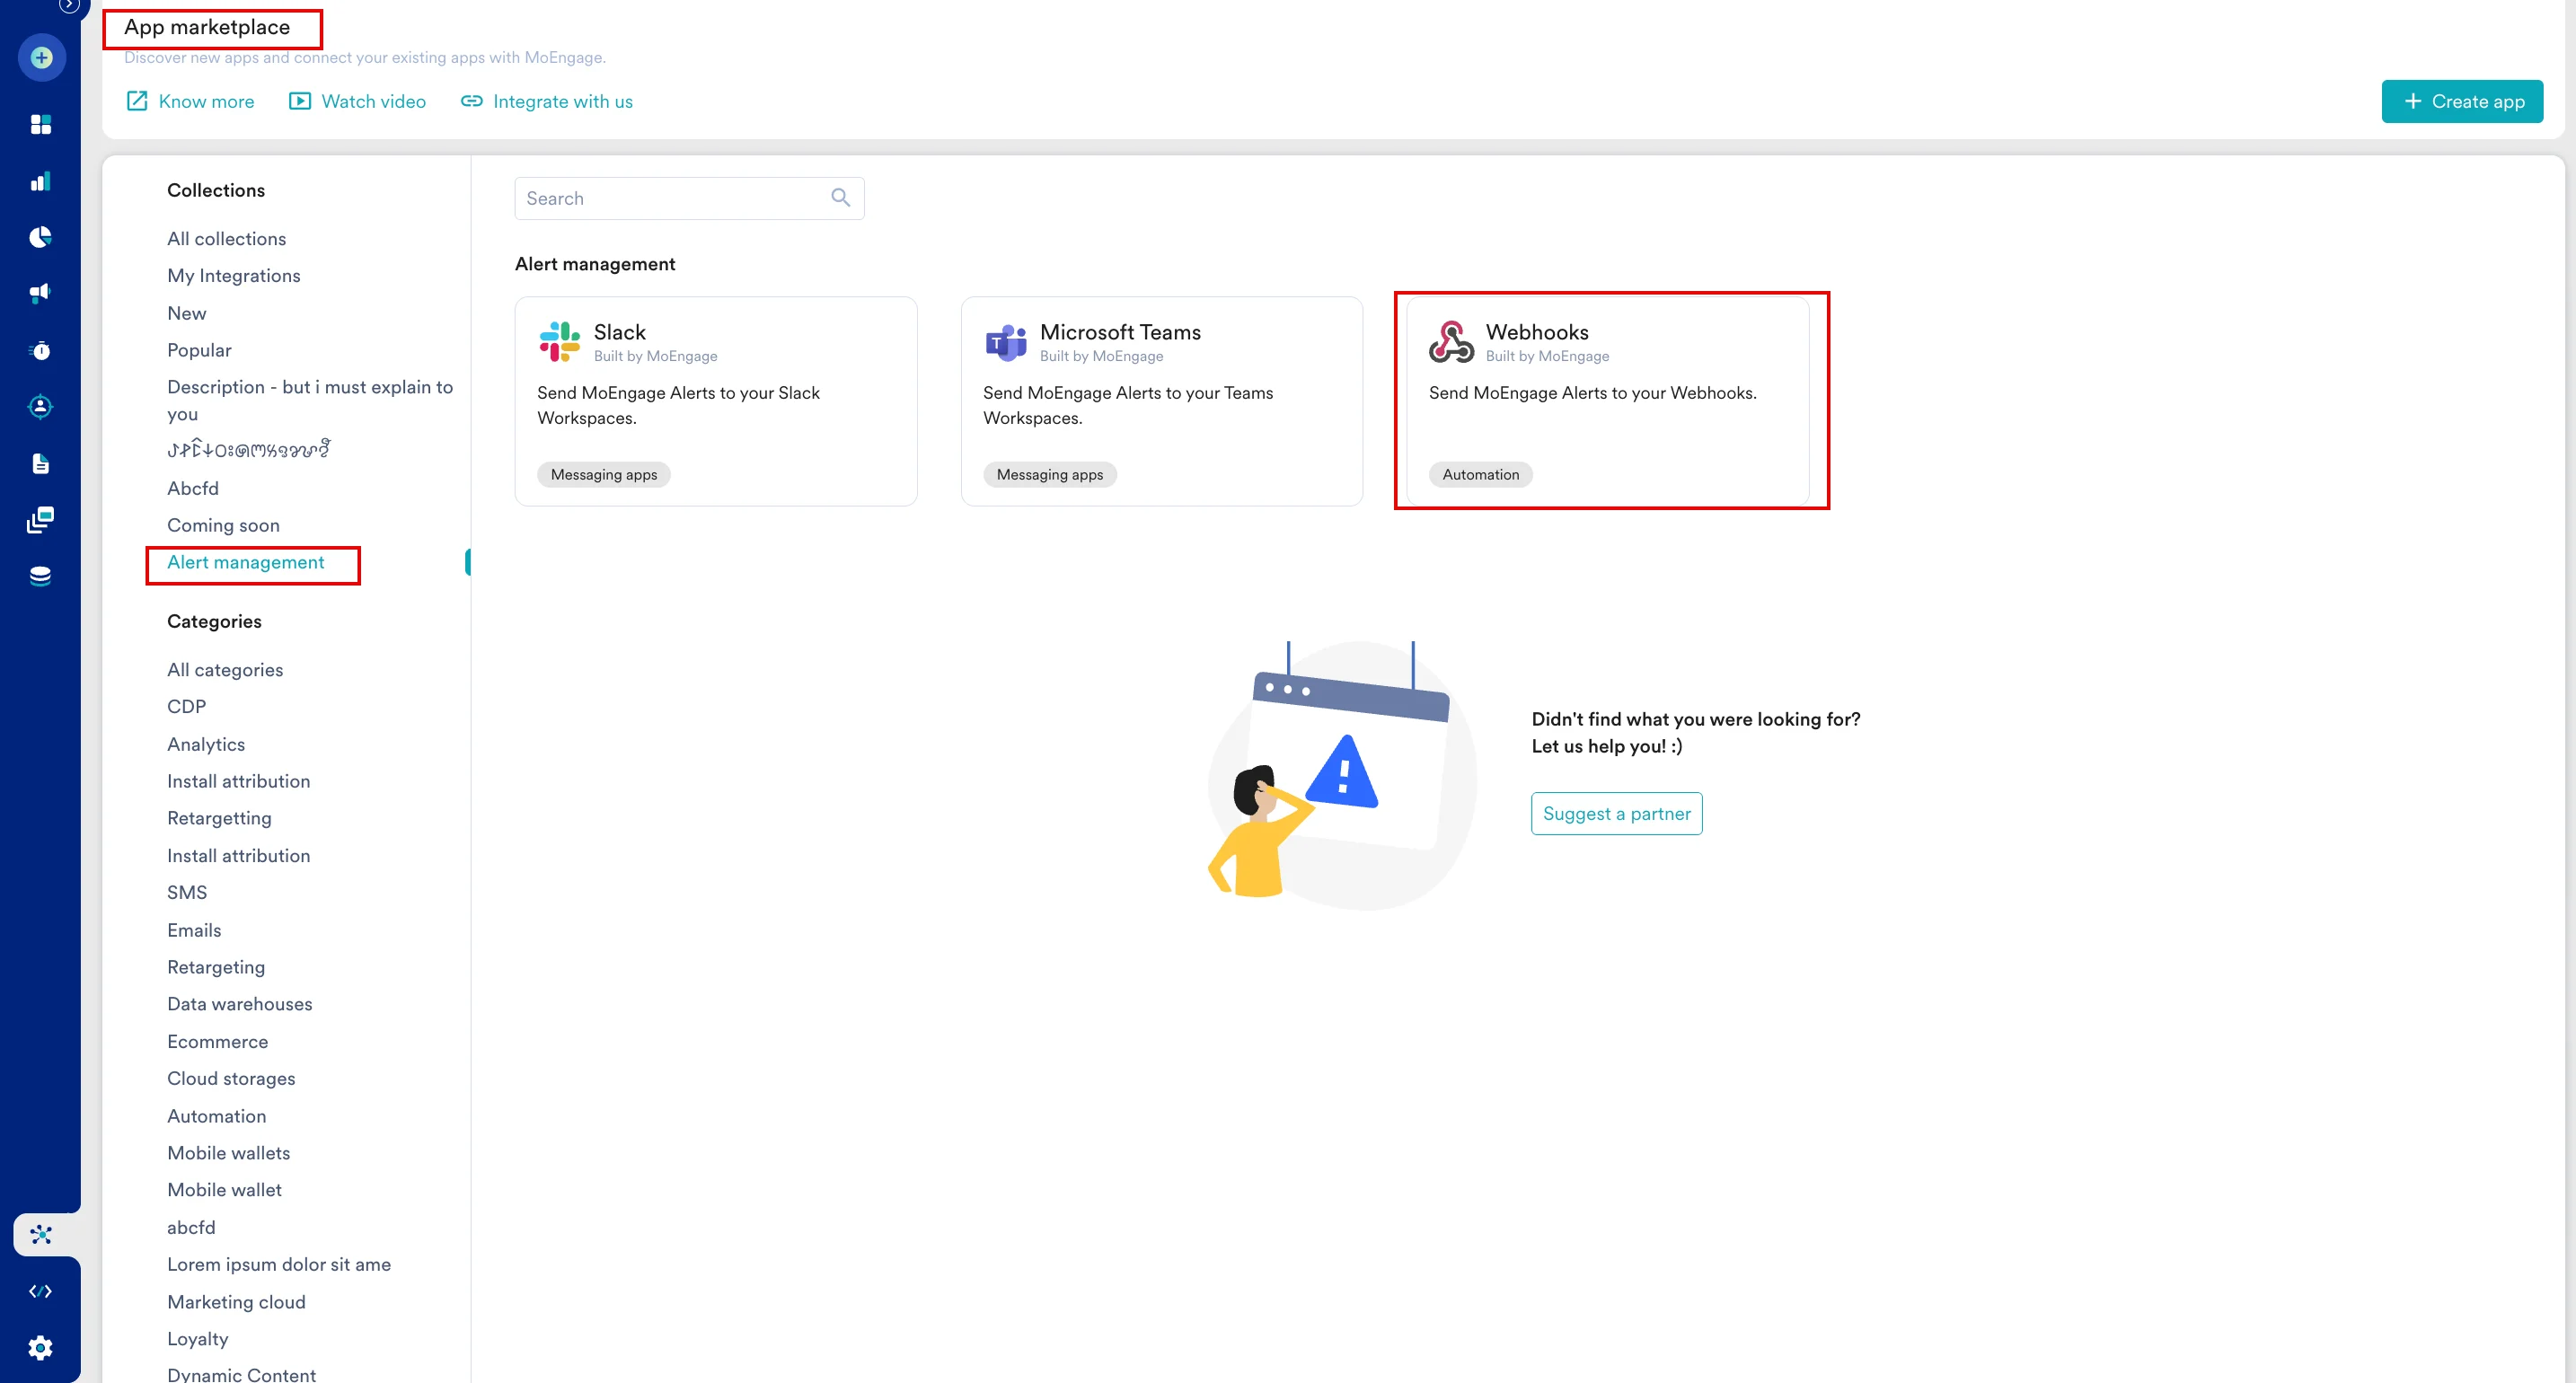
- On the App marketplace page, click Alert management , and then select Webhooks.
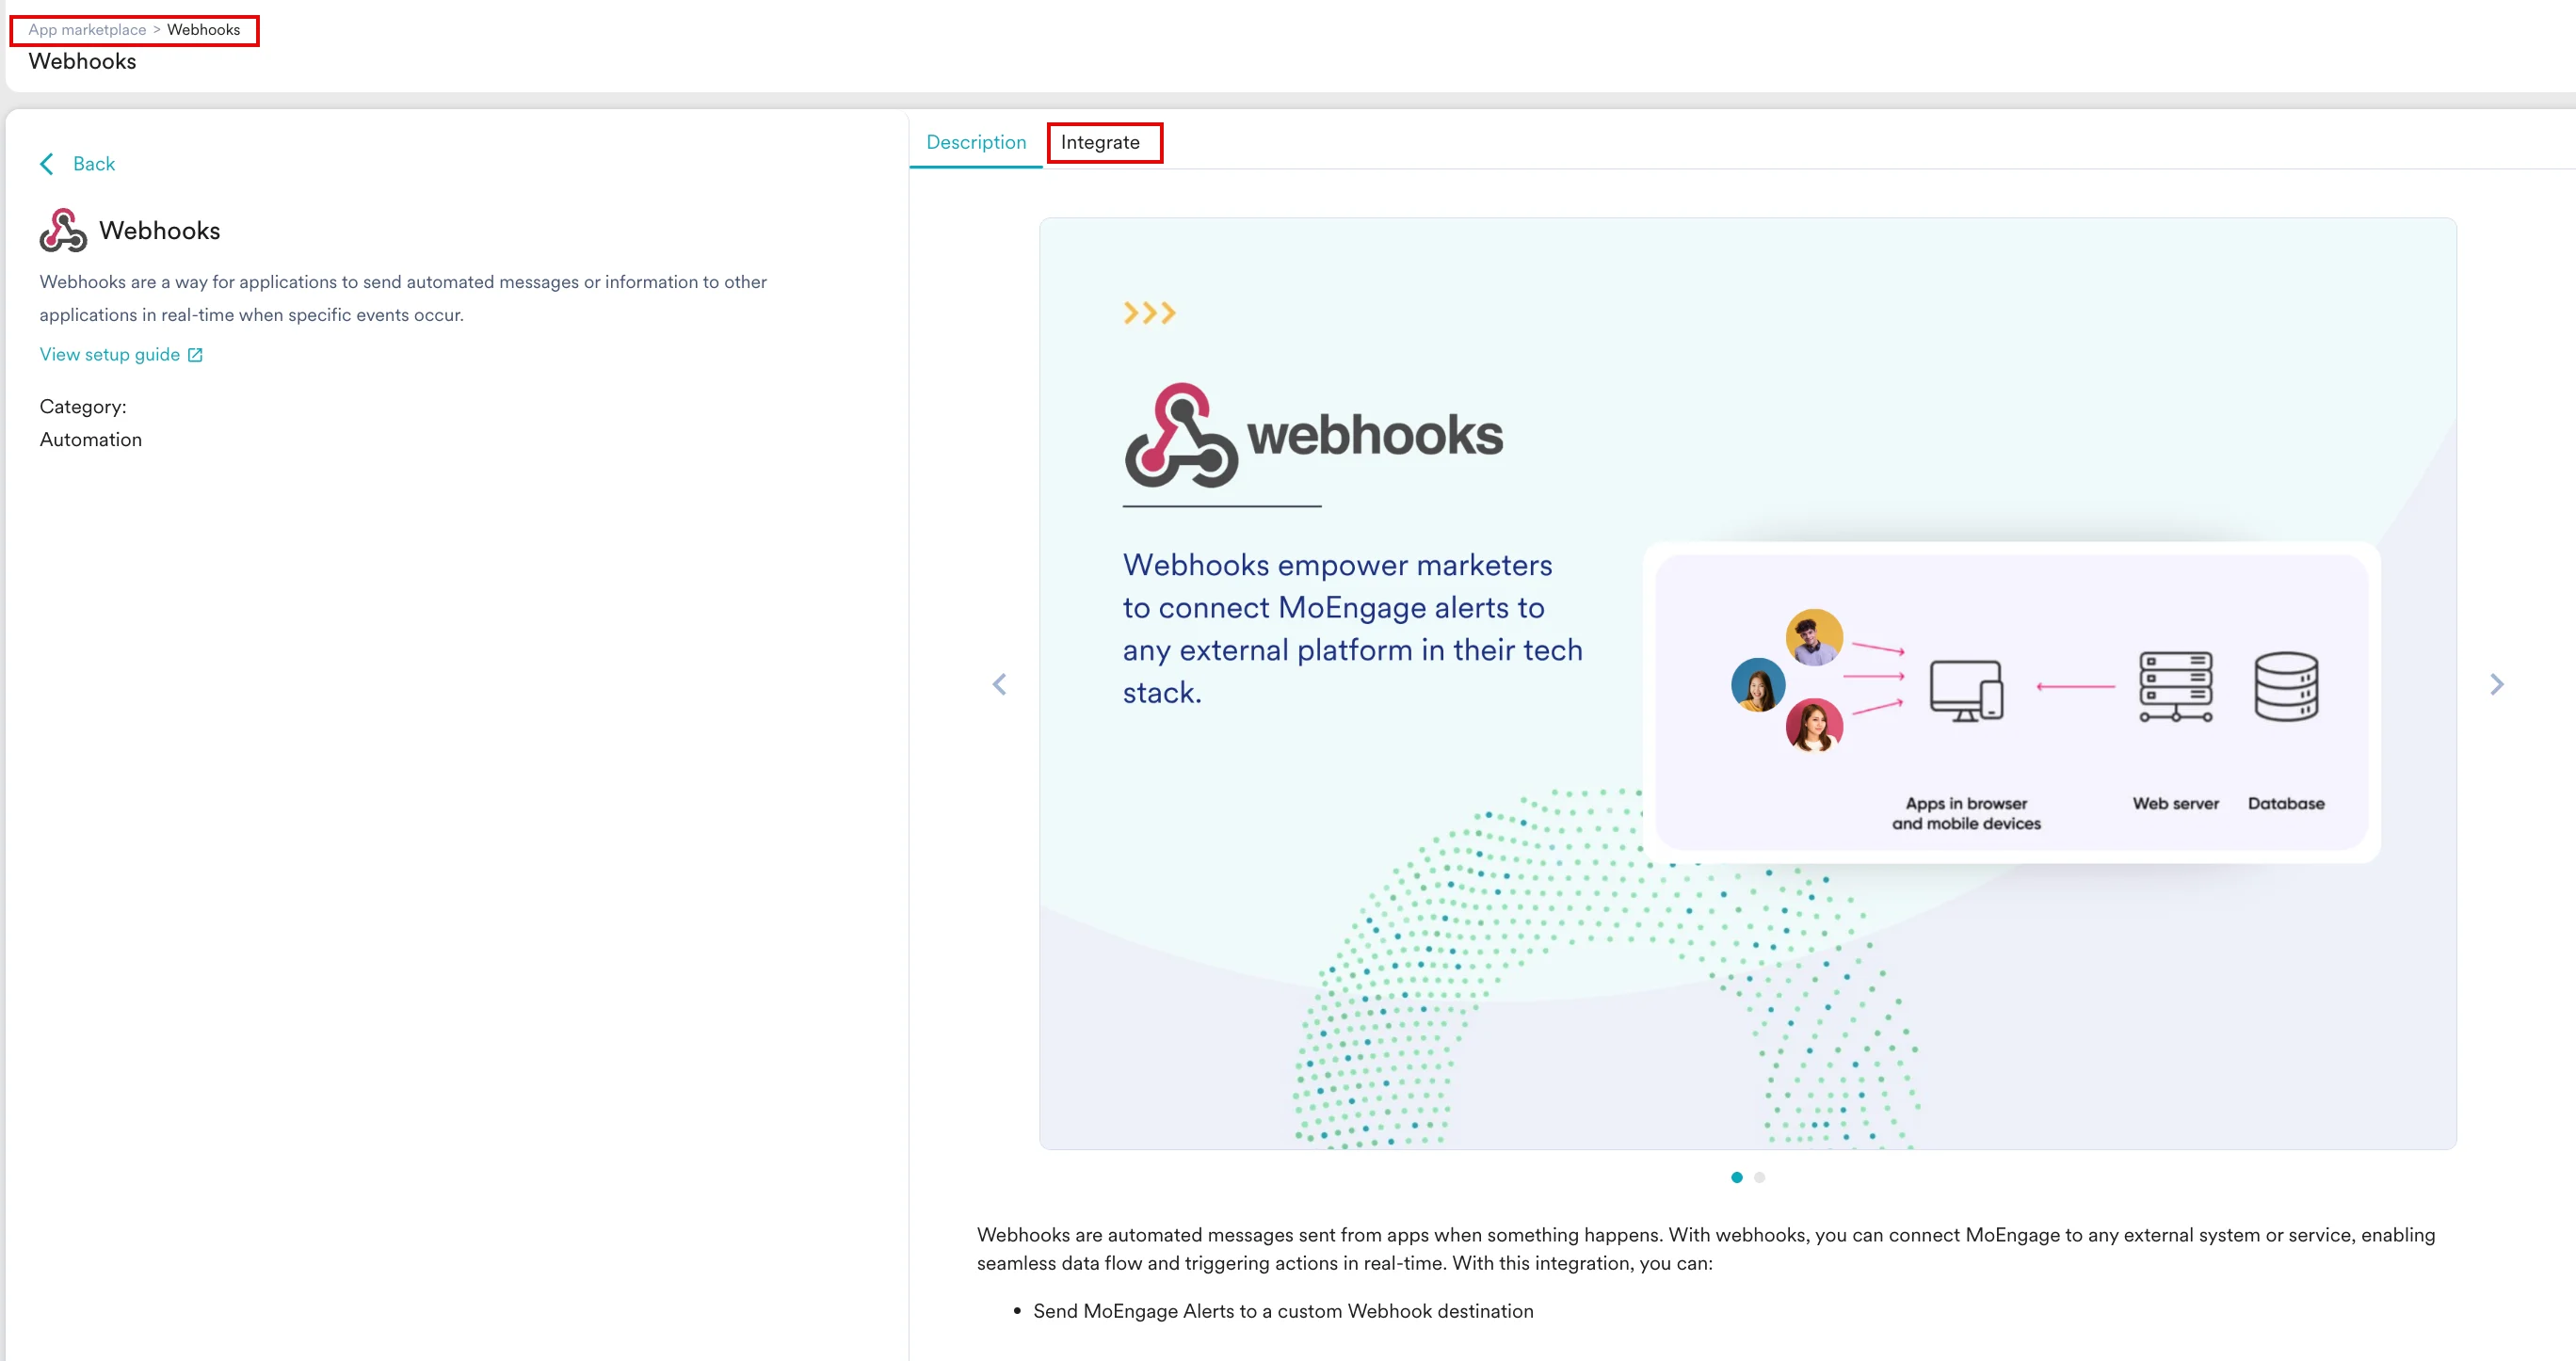
- On the Webhooks page, click the Integrate tab.
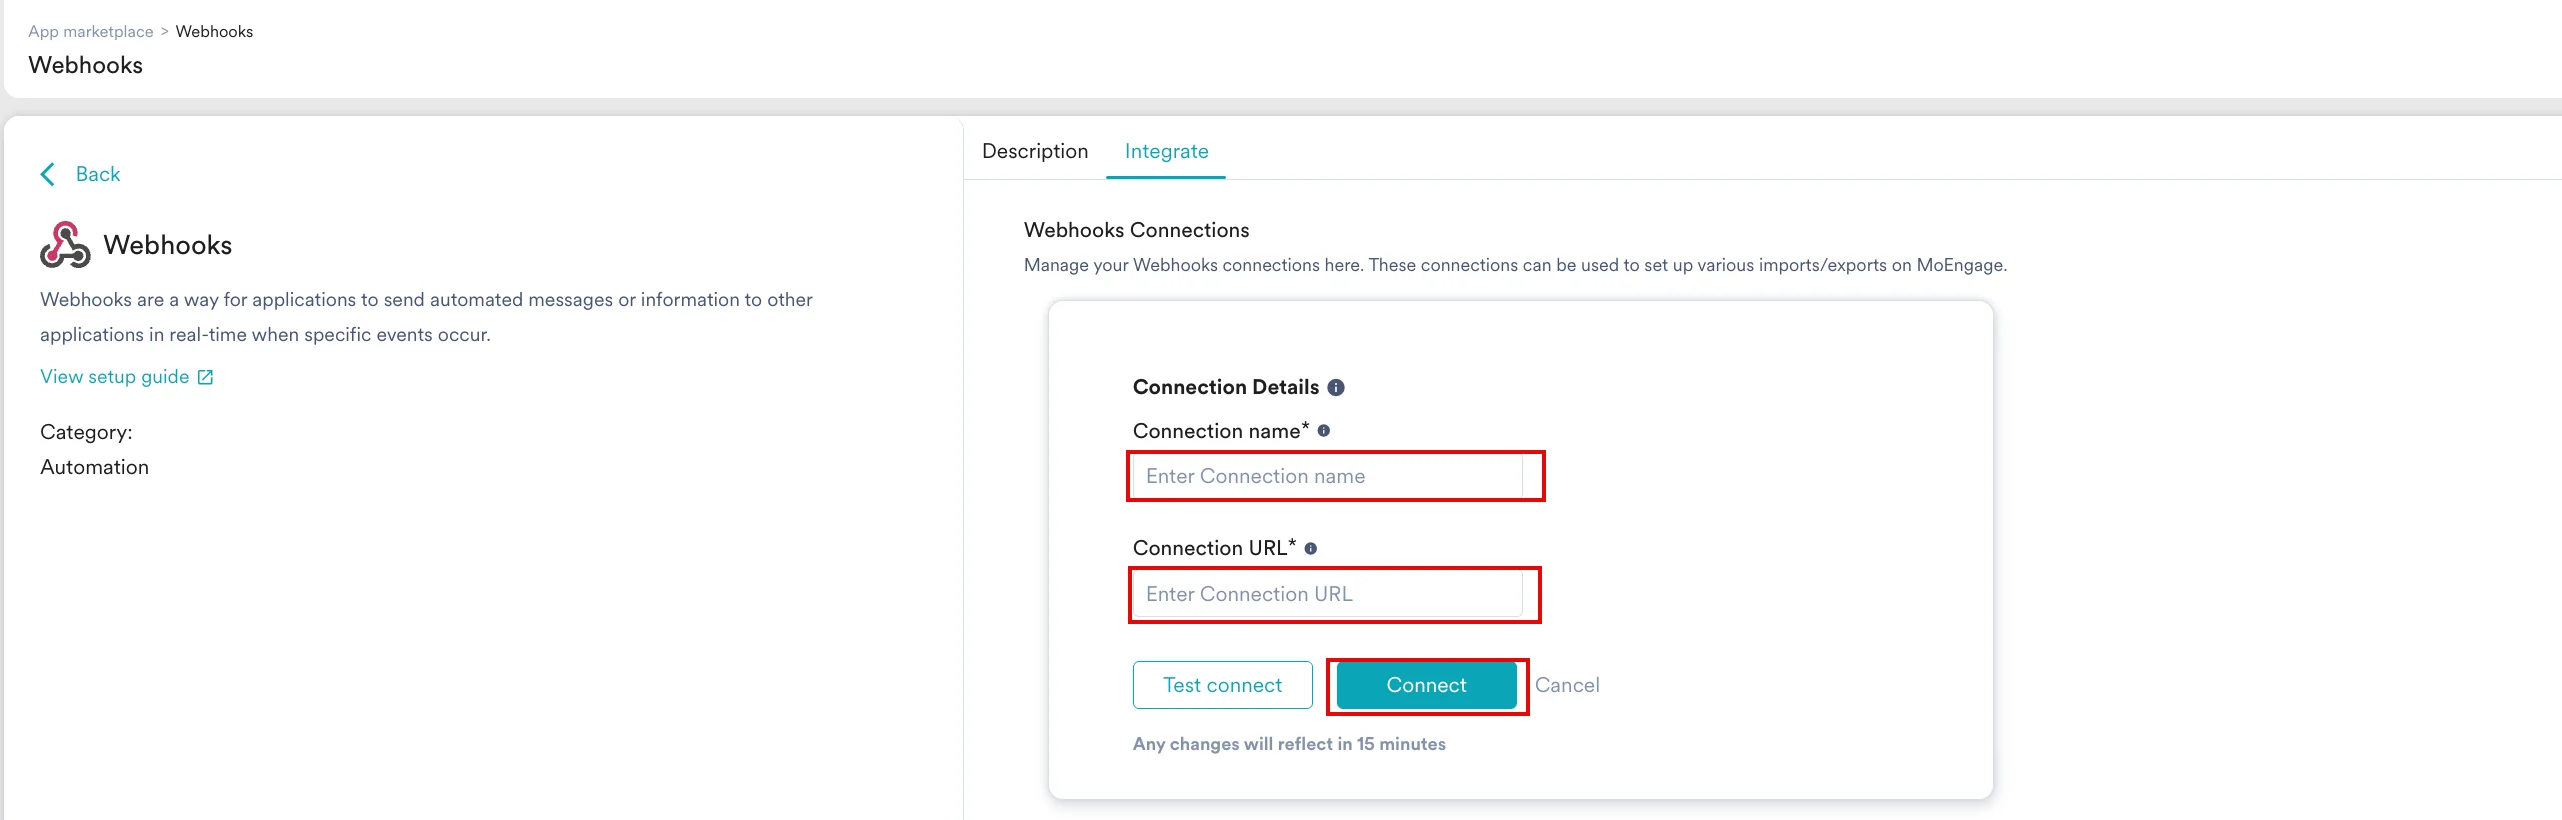
- On the Integrate tab, enter the following details:
- Connection name : Enter the connection name.
- Connection URL : Enter the Webhook URL created as mentioned here.
- Click Connect.
- After the connection is defined, you can select the defined new destination from the Send Alerts On list while creating an alert on the Alert management page.
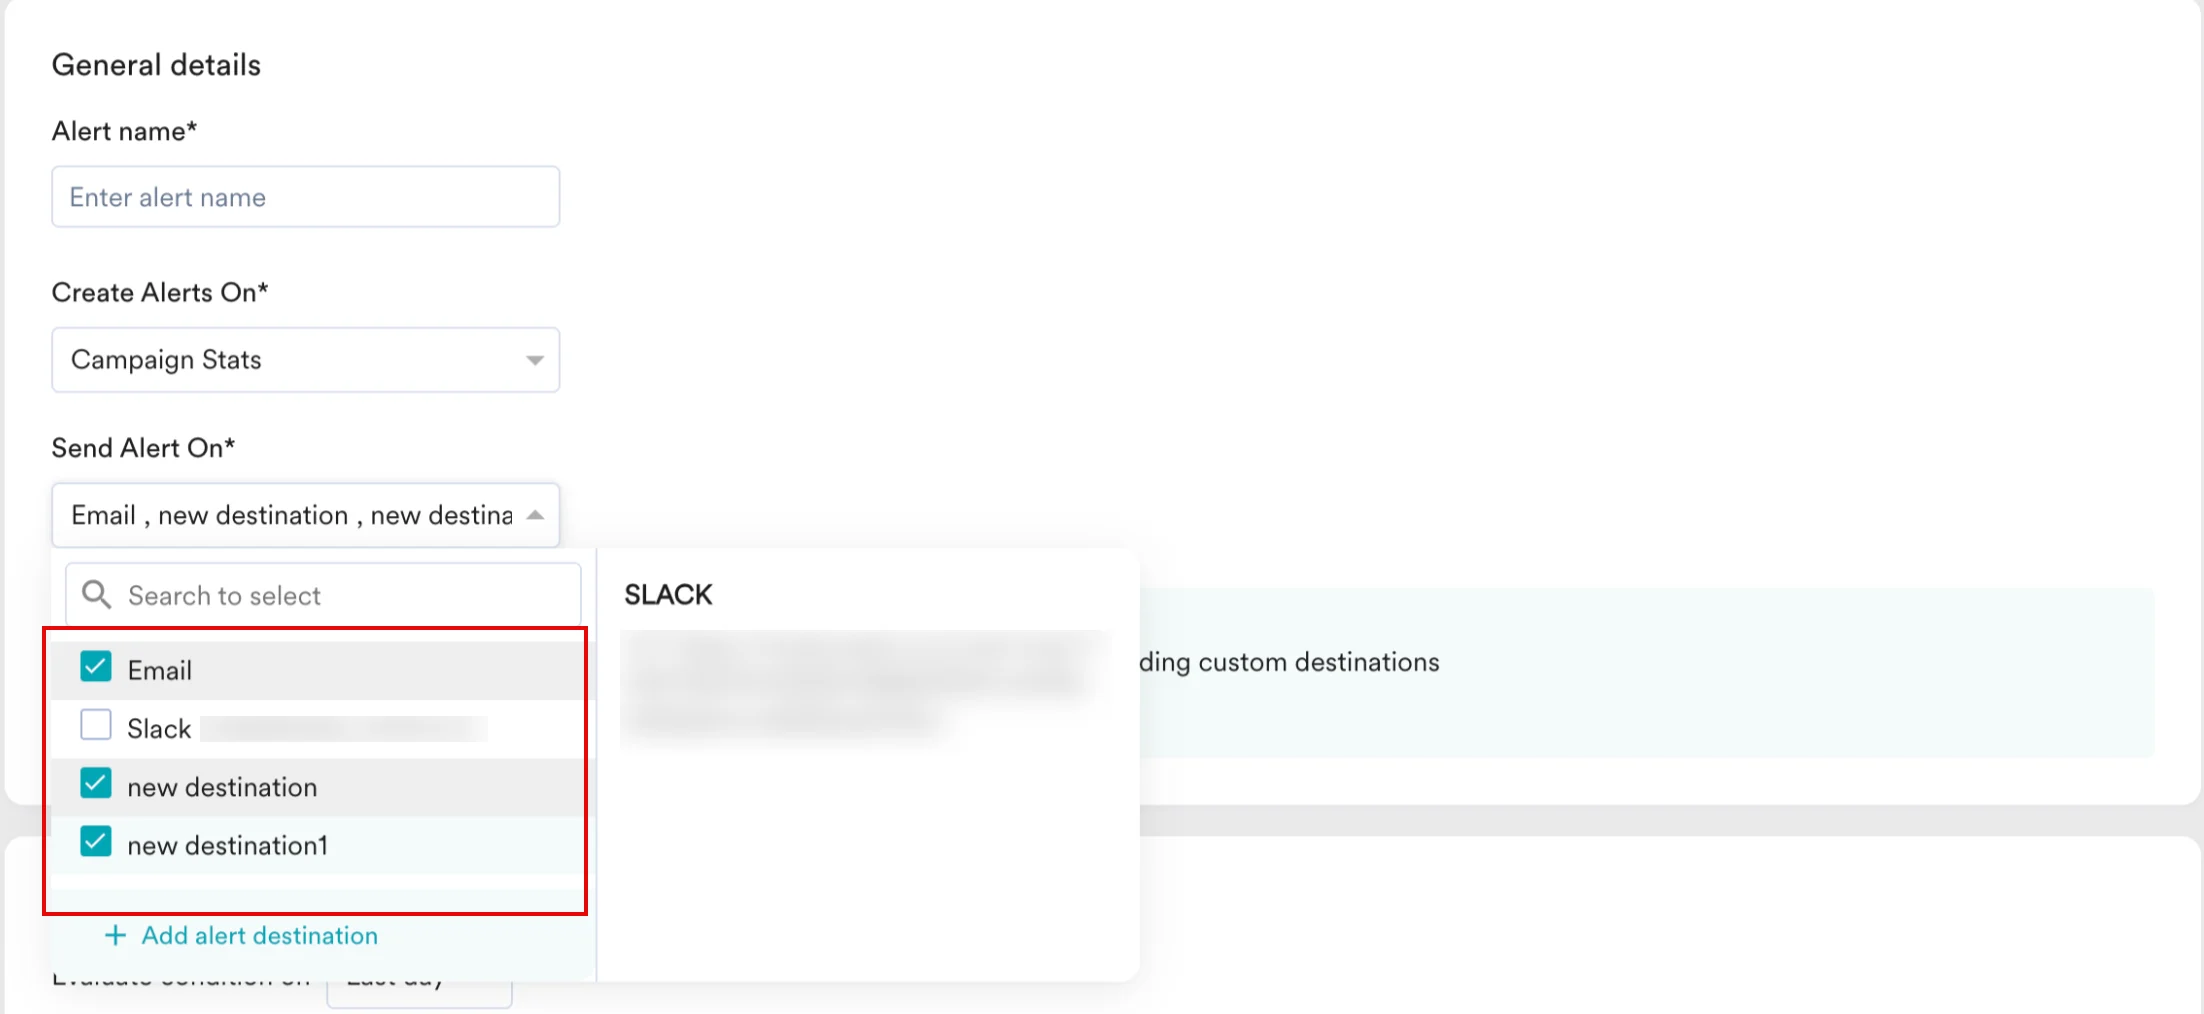
- After adding the destinations, you can view the defined alert destinations on the Alert management page.
