

Introduction
Punchh is a loyalty and engagement platform that empowers brands to deliver omnichannel customer loyalty programs both in-store and online.MoEngage × Punchh
Using MoEngage and Punchh together, you can sync data between the two platforms to empower your loyalty and coupon workflows. With this integration, you can:- Forward loyalty data from Punchh to MoEngage in real-time
- Capture new users inside MoEngage and send them to Punchh to create personalized loyalty programs for them
- Display dynamic coupon codes generated on Punchh inside MoEngage Campaigns
Integration
- Access to your Punchh Dashboard.
- Access to your Punchh APIs and Webhooks Manager. Contact your Punchh representative if you do not have access to Punchh Webhook Manager.
- Access to your MoEngage Dashboard.
A. Forward events from Punchh to MoEngage
Step 1: Add external_source_id to Punchh users
Before you begin the integration, ensure you have set theexternal_source_id field when you create new users inside Punchh. This will act as the common identifier between the two platforms and will be synced to the ID field of MoEngage user profiles.
Punchh offers several endpoints for updating your users’ external_source_ids. The Punchh help docs explain how to set them up for new and existing users.
Step 2: Get your MoEngage endpoint
To get a dedicated endpoint for your integration, please contact the MoEngage Support team. In your request, you must specify the common identifier used to link user profiles between MoEngage and the partner platform.Step 3: Set up your endpoint as a webhook in Punchh
If you already have access to the Webhooks Manager,- On your Punchh Dashboard’s Left Navigation >> Webhook Manager.\
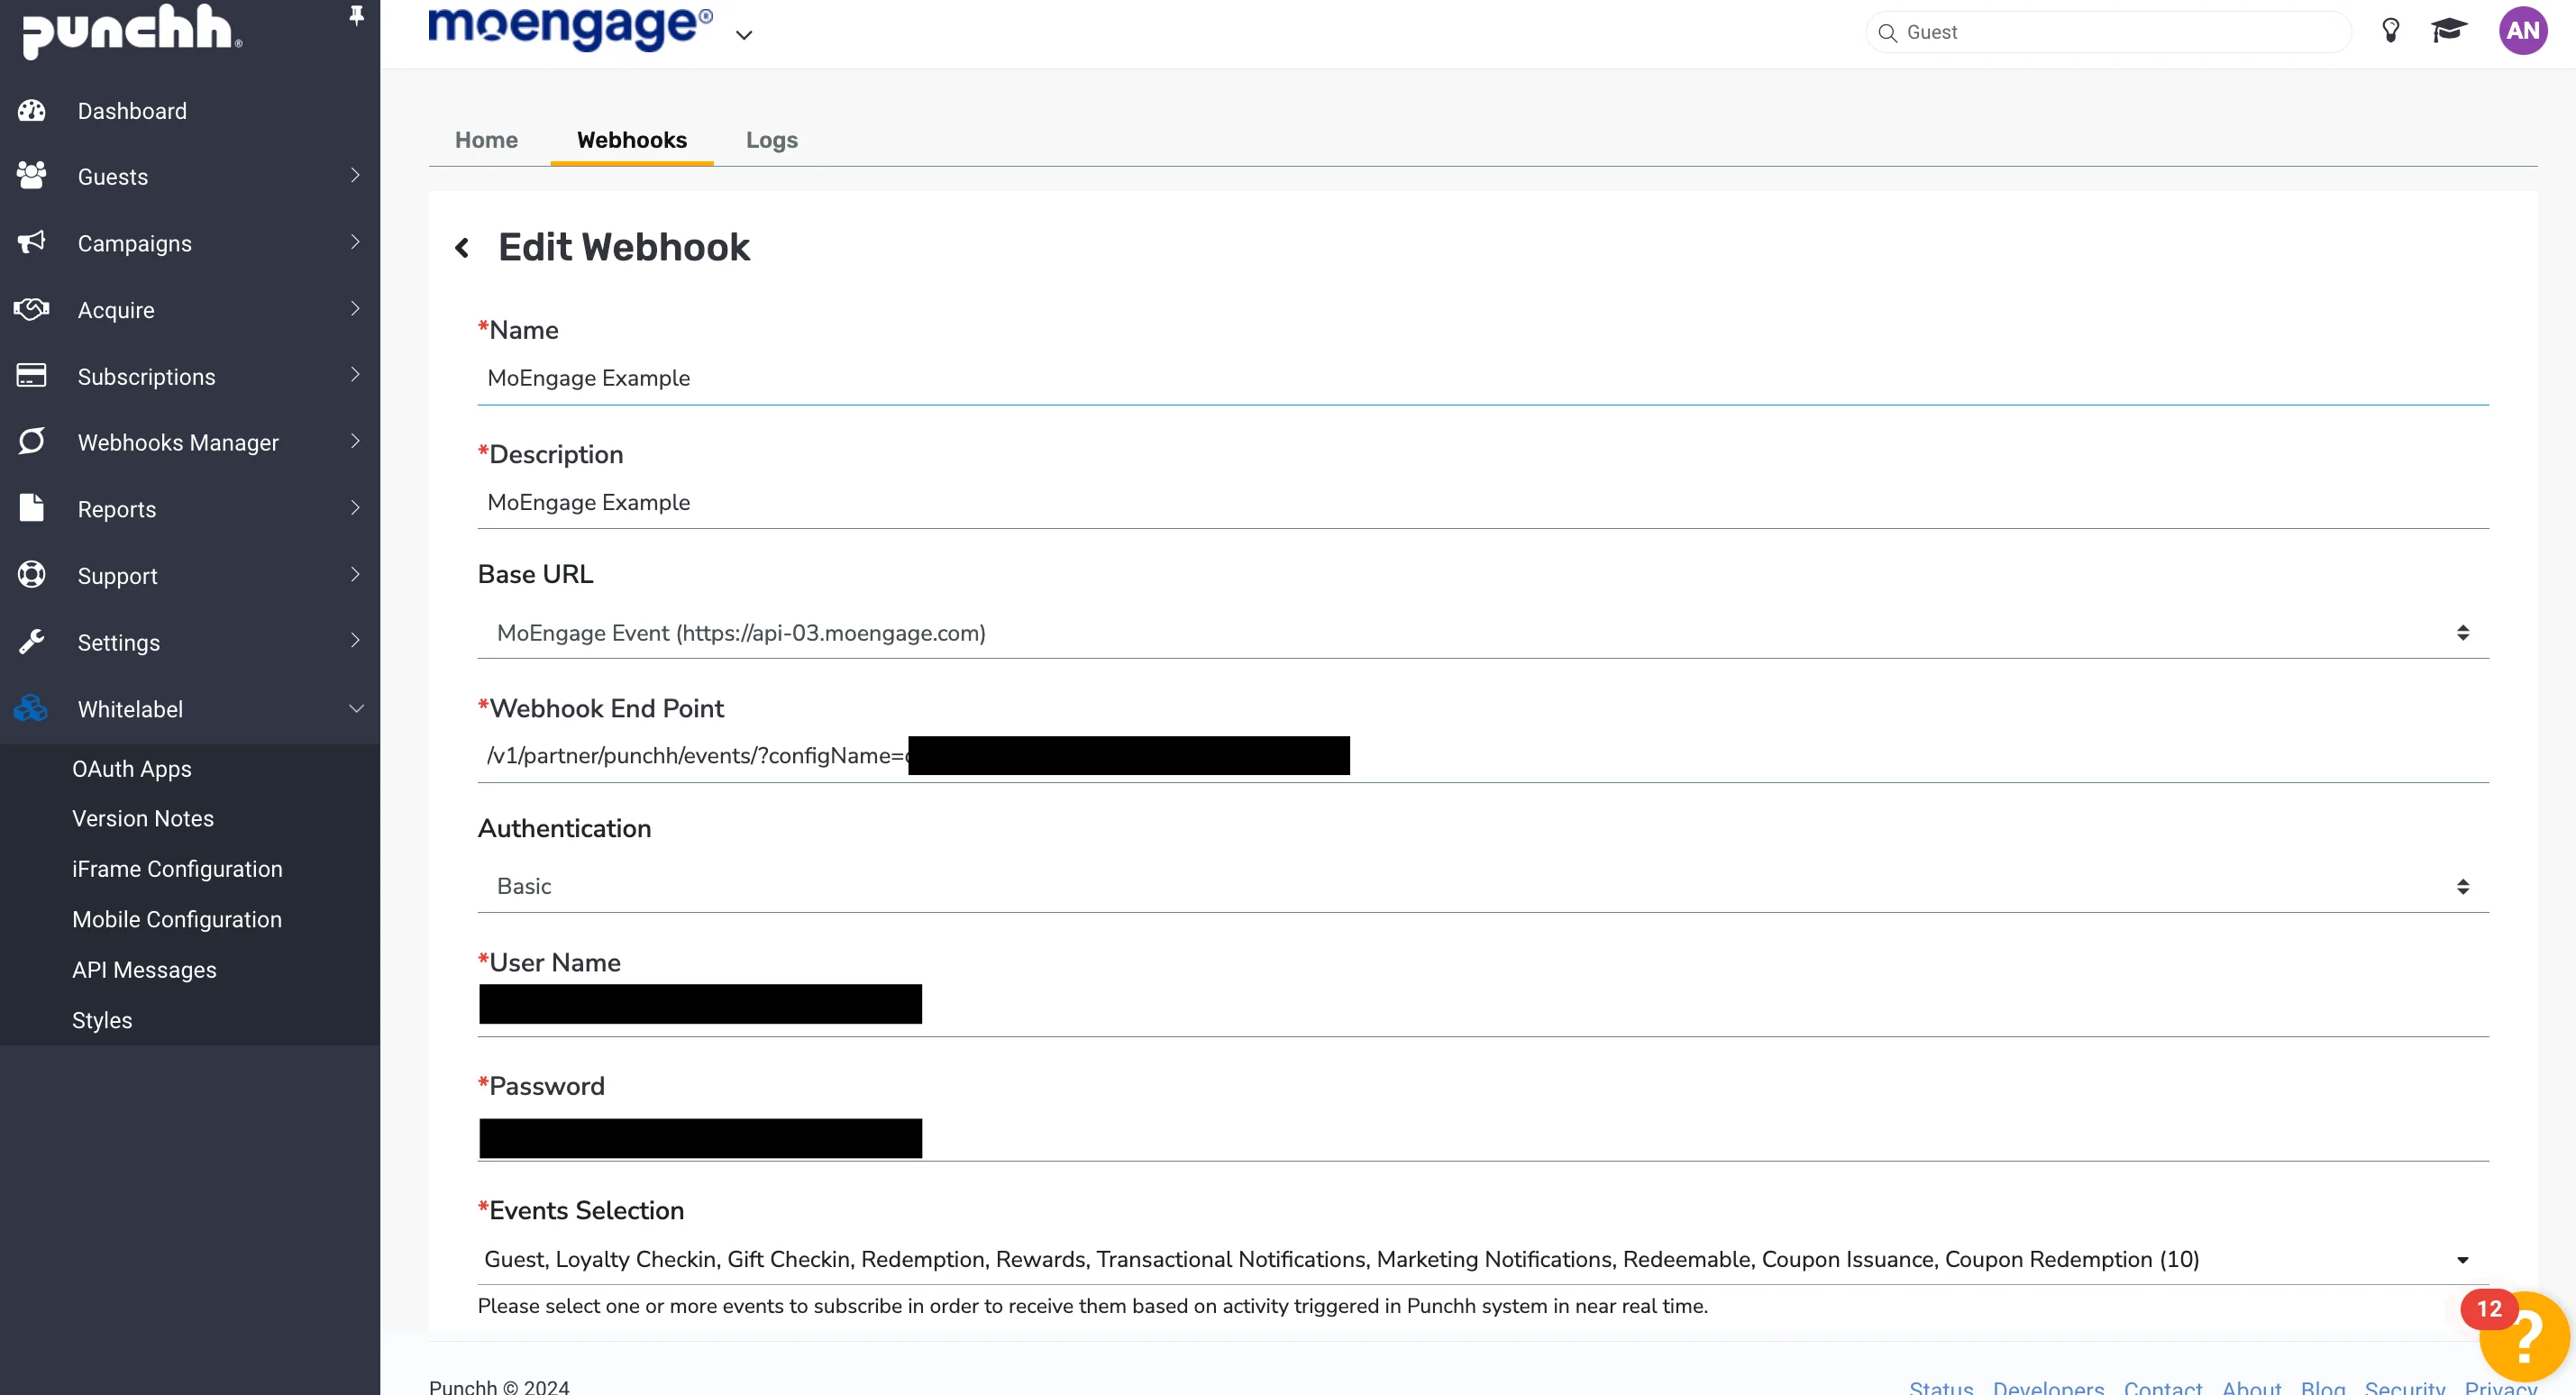
- In the Webhooks section, an admin needs to click the Base URL button to set up the base URL and name. This base URL will be displayed while setting up the webhook. Your Base URL will depend on your MoEngage Data Center:
- In the Webhooks section, create a new webhook by clicking the Create Webhook button:
- Click the Submit button to save it. In case of any issue, it will display an error message.
- If verification is completed during creation, the webhook will be ready to receive the subscribed events with “Active” status. If verification is not successful, the status will remain “Inactive” and no data will be pushed to that webhook.
- From the webhooks list, you can select another operation via the ellipsis button in the Actions column to test with some dummy event samples. You can also edit or delete webhooks from here and see logs specific to the selected webhook.
Events available to export to MoEngage
- Users
- Loyalty check-ins
- Gift check-ins
- Redemptions
- Rewards
- Redeemables
- Marketing notifications
- Transactional notifications
- Coupons
Step 4: Find your events in MoEngage
Below is the meta data that is added to each of the events coming from Punchh:
Once the events are in MoEngage, you can create segments using MoEngage’s powerful Segmentation capabilities and perform Analytics to gain even deeper actional insights.
B. Create users in Punchh from MoEngage
Create MoEngage campaign to connect to Punchh Create users API
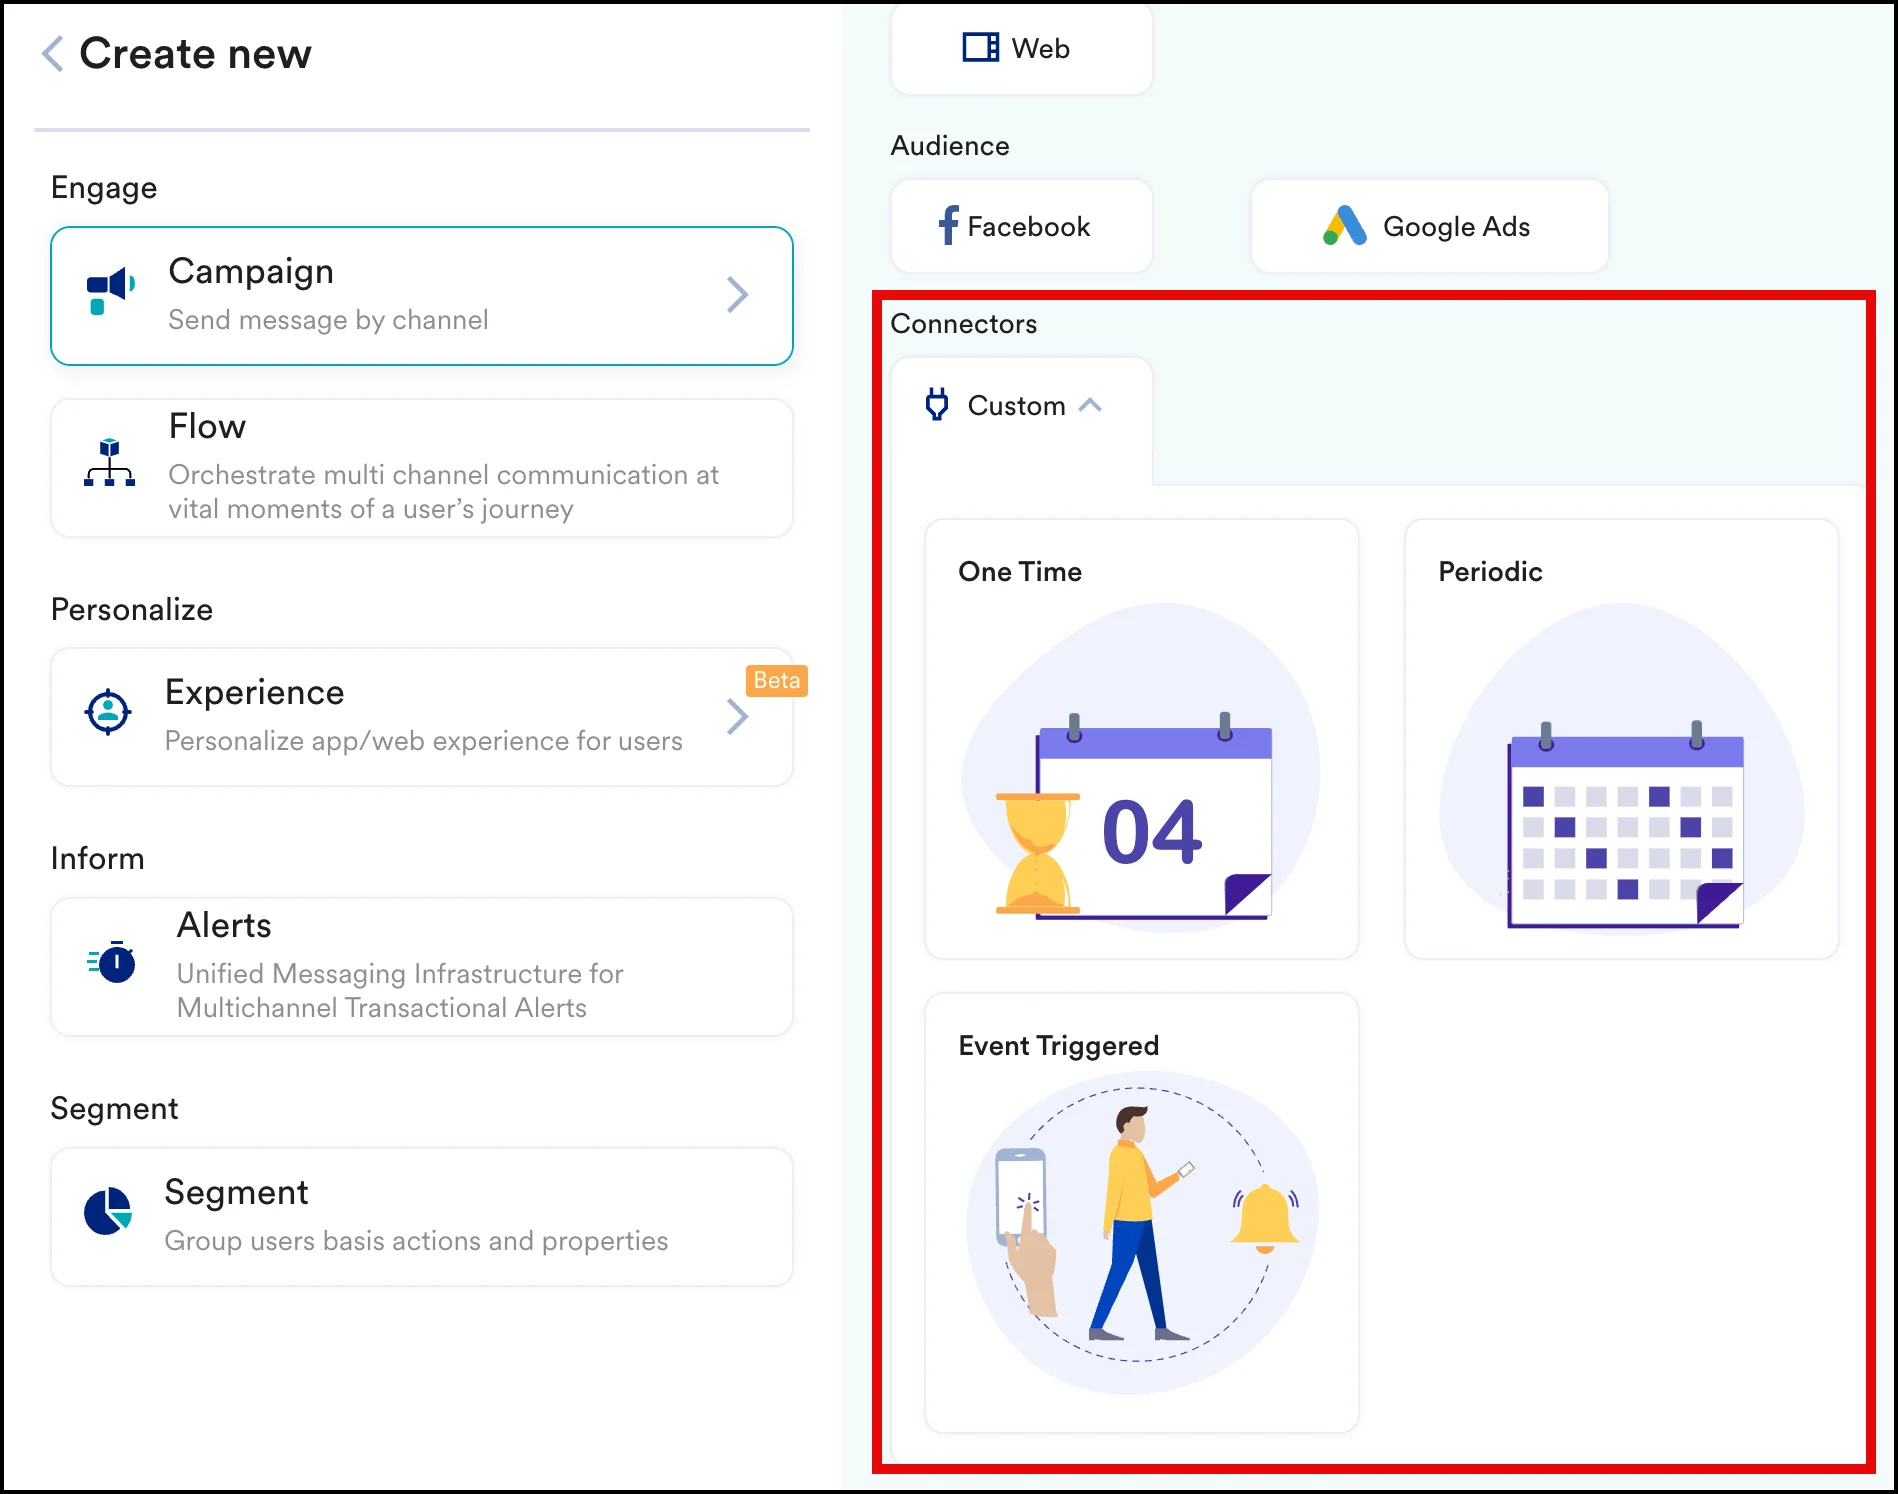
To create a connector campaign on MoEngage:- Navigate to Create Campaign > Connectors > Custom and choose the delivery type most suitable to your needs
- On step 2 of the campaign, connect to the Punchh Create Users API. First, you need an OAuth App setup in the Punchh Dashboard. Refer to the detailed Punchh document.
- Method: POST
- URL: https://server_name_goes_here.punchh.com/api/auth/customers.json
- Headers:
- Body:
- Here,
external_sourceandexternal_source_idare optional fields. - In the above example,
customer_idis a unique identifier in MoEngage and hence being passed againstexternal_source_id. If there is any other unique user identifier that you are already using, you can pass that instead ofcustomer_id.
Preview your request
At this point, your campaign should be ready to test and send. You can also test your connector configuration using the Test functionality available in Step 2 of Create Connector Campaign.