

Tracked Events
MoEngage tracks the following events when you enable them on your Shopify app during integration.Types of Events
Two sources generate events in the MoEngage Shopify integration:- Webhook: Shopify generates these events and sends them directly to MoEngage via the Shopify webhook system. These represent server-side signals that the Shopify backend triggers, for example, when a user places an order or starts a checkout.
- Web SDK: The MoEngage JavaScript SDK running in the browser generates these events based on user behavior on your store frontend — for example, a product page view or a search action.
Recommended Event Version for Campaigns and Segmentation
For any event that both Webhook and the Web SDK track, use the Webhook version when building segments or triggering campaigns.MoEngage receives webhook events directly from the Shopify backend; they are the more reliable signal for campaign logic. Web SDK events are useful for triggering on-site messages that must fire in real time within the browser session.If you use both versions of the same event in a single campaign or journey, you will cause conflicts and prevent a single consistent event-triggered flow from running.
Event Attribute Requirements
Product URL and Image URL in Webhook Events
Webhook events do not include the product URL or image URL in their payloads. These attributes are present only when you capture the event by using the Web SDK. To obtain these attributes: If you sync your product catalog to MoEngage, you can pull the product URL and image URL from the catalog at send time by using Product set-based personalization. For more information, refer to the User Actions Model.Shopify Customer Metafields
MoEngage does not sync Shopify customer metafields, custom data fields attached to the Shopify customer object, to MoEngage user profiles by default. MoEngage also does not include them in event attributes. To pass this data in a custom manner, refer to the Track Custom User Attributes section below.Track Custom Events via Shopify Liquid
If you must track events beyond the MoEngage default set, for example, a wishlist action or a custom button click, you can add them using the MoEngage Web SDK in your Shopify theme’s Liquid files.Before You StartThis procedure requires editing your Shopify theme files, which requires developer access. Check with your web team before you make changes.
Step 1: Identify the Correct Liquid File to Edit
Shopify themes use Liquid template files to render pages. To find the right file, perform the following steps:- Log in to your Shopify Admin.
- Go to Online Store > Themes.
- Locate the theme you want to edit and click the Actions (three dots) button.
- Select Edit code from the drop-down menu.
- Browse the
sections/folder.
- Product page actions: Edit
sections/product-template.liquidorsections/main-product.liquid. - Collection page actions: Edit the relevant collection section file.
- All pages: Edit
layout/theme.liquid. Use this file sparingly.
Step 2: Add the Track-Event Call
In the Liquid file, locate the HTML element the user interacts with. Add a JavaScript call to the MoEngage track_event method.Step 3: Validate That the Event Fires
To validate that the event fires correctly, refer to the Validate Integration documentation.Track Custom User Attributes
You can pass custom attributes (such as metafields) to MoEngage profiles by using the following workarounds.Liquid-Based Method for Public Metafields
If you enable storefront access for the metafield, it can be read directly in Shopify Liquid. To find the correct file and add the code, perform the following steps:- Log in to your Shopify Admin.
- Go to Online Store > Themes.
- Locate the theme you want to edit and click the Actions (three dots) button.
- Select Edit code from the drop-down menu.
- Open
layout/theme.liquid. - Inside the
<body>tag, after you initialize the MoEngage SDK, add the following code:
{% if customer %} guard ensures the code only runs when a customer is logged in.
Server-Side Sync for App-Owned Metafields
If a third-party app created the metafield, storefront access is typically set to None. In this case, you must perform a server-side integration:- Subscribe to the
customers/updateShopify webhook. - In your webhook handler, use the Shopify Admin API to read the customer’s metafield values.
- Call the MoEngage Data API to update the corresponding user attributes on the customer’s profile.
Sample Event Payloads
The payload samples below show the attributes available for reference when building segments and personalizing event data. Full payload samples for each event are shown below.Sample Payloads for Webhook Events
Sample Payloads for Web SDK Events
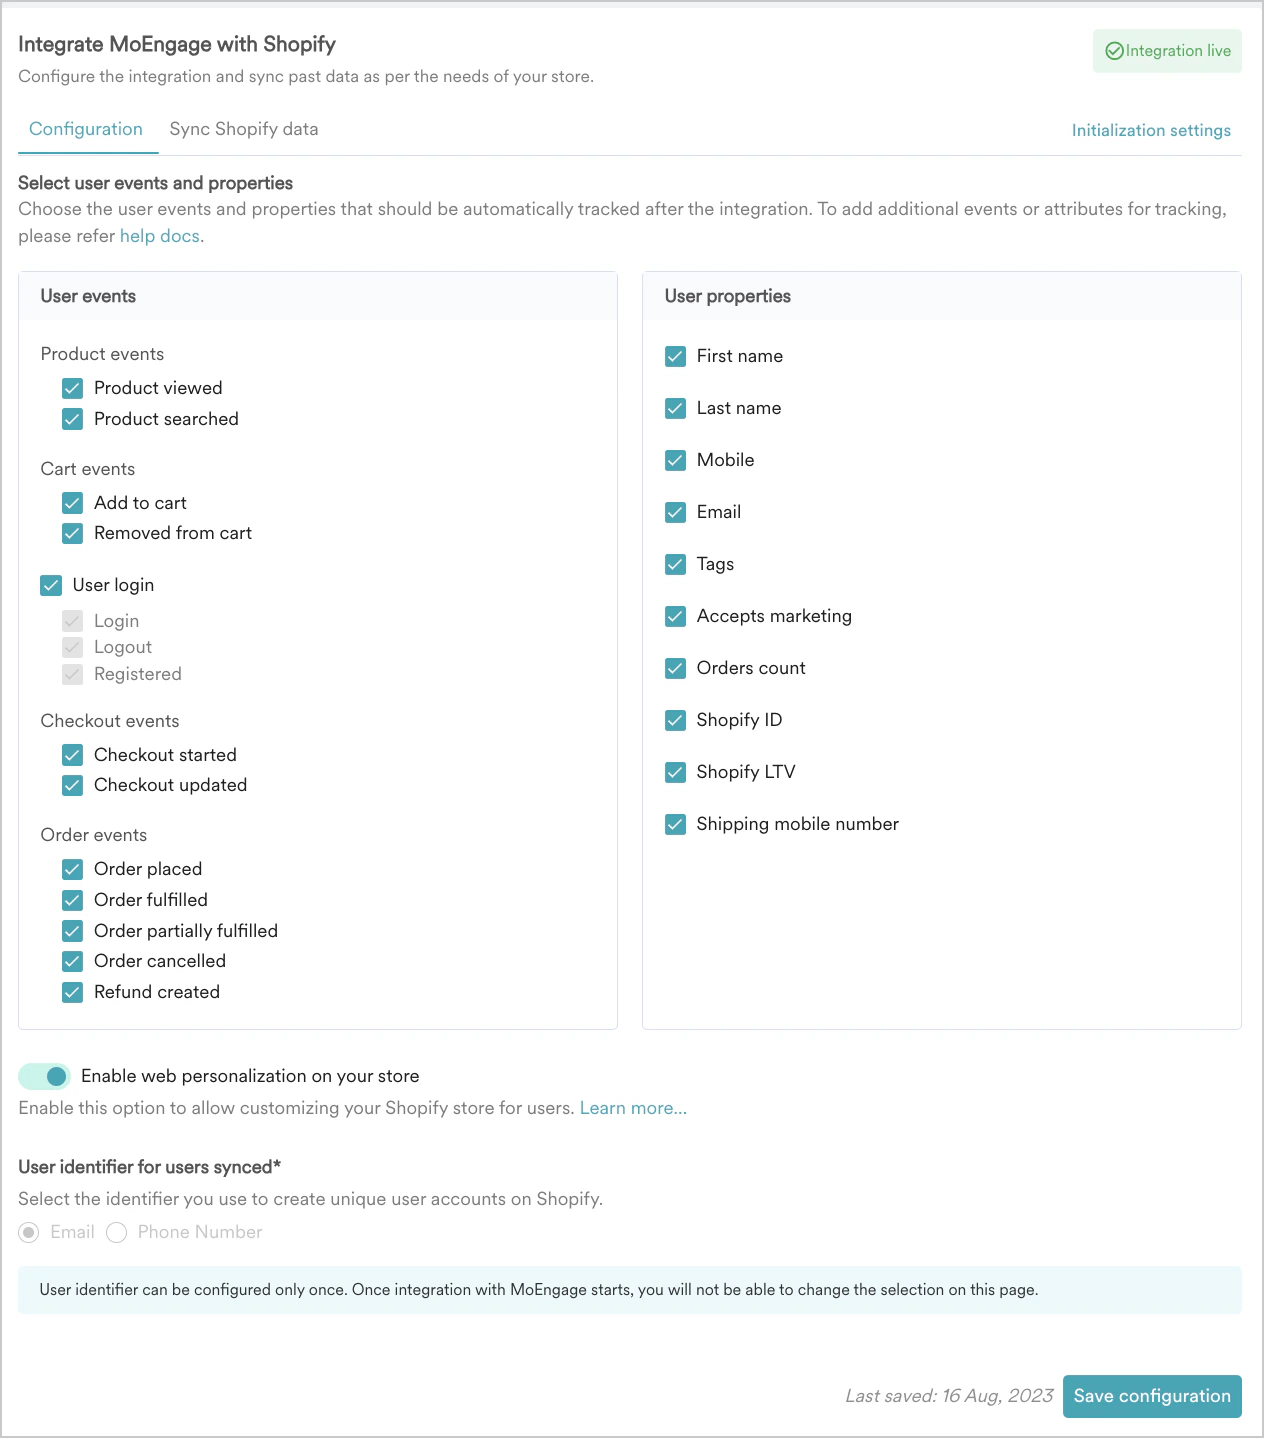
Tracked User Properties
MoEngage tracks the following user attributes when you enable them during integration.Configuration for Event and User Tracking
To select the events and user properties that MoEngage tracks, perform the following steps:- Navigate to the Configuration tab in your Shopify app.
- Select the user events and properties you want to track.
- Click Save configuration.
If you have questions about your Shopify integration, refer to the MoEngage Shopify FAQs.