> ## Documentation Index
> Fetch the complete documentation index at: https://moengage.com/docs/llms.txt
> Use this file to discover all available pages before exploring further.
# Personalize Email Content
> Personalize MoEngage email campaigns using user attributes, event data, business events, and campaign variables for higher open rates and conversions.
## Overview
Personalized emails have higher open rates and conversions because they leverage the email context and are relevant. You can personalize your email campaigns based on:
* **User attributes**: Name, Location\*,\* or other attributes (for both general and event-triggered emails).
* **Event attributes**: Product Image, Product Price, Product Name, and so on of an event- *Added to Cart*(only for event-triggered emails).
* **Business Event attributes**: Product ID, Item Code, Product Image, Price, Series Name, Genre of the Series, Case, and so on.
* **Campaign attributes**: Campaign Name, Campaign id, and Campaign Tags.
Before starting with personalization, ensure you have [configured Email Settings](/docs/user-guide/campaigns-and-channels/email/getting-started-with-email/configure-email-channel) and read about [how to create email campaigns](/docs/user-guide/campaigns-and-channels/email/create/create-an-email-campaign).
Personalization is supported in:
* Email Subject
* Email Content
* Sender Name
* From email address
* Reply-to email address
Along with Email content personalization, MoEngage also supports the following:
* [Personalized Images](https://moengage-user-guide.mintlify.app/user-guide/campaigns-and-channels/email/create/personalize-email-content#personalize-images) for Cart Abandonment, Search Drop-offs, and so on
* [Personalized URLs](https://moengage-user-guide.mintlify.app/user-guide/campaigns-and-channels/email/create/personalize-email-content#personalize-urls) to increase conversions by redirecting the user to the right link
When you create a personalization condition or logic for *Email* campaigns using the *Custom HTML Editor,* it appears as a chip. To know more about Chip Actions, refer [here](/docs/user-guide/campaigns-and-channels/getting-started/message-personalization/dynamic-content-personalization#chip-actions).
## Insert Personalization
To insert personalization in the Email Subject/Content Text, enter "@" and select the user/event attribute.
 On selecting the attribute, you will be prompted to select the Fallback mechanism for this user attribute.
When Fallback Mechanism is unavailable through the MoEngage UI, you can define the fallback using [Jinja](/docs/user-guide/campaigns-and-channels/getting-started/message-personalization/jinja-templating-language).
Example:
Dear `{{UserAttribute['u\_fn']|default('MOE\_NOT\_SEND')}}` OR Dear `{{UserAttribute['u\_fn']|default('Guest')}}`
* default('MOE\_NOT\_SEND') will suppress the message from going out.
* default('Guest') will use 'Guest' when the value for the personalization attribute is unavailable.
## Fallback Mechanism
The fallback mechanism is useful when personalization fails due to the attribute not being present for the user or the non-resolution of the specific user attribute.
On selecting the attribute, you will be prompted to select the Fallback mechanism for this user attribute.
When Fallback Mechanism is unavailable through the MoEngage UI, you can define the fallback using [Jinja](/docs/user-guide/campaigns-and-channels/getting-started/message-personalization/jinja-templating-language).
Example:
Dear `{{UserAttribute['u\_fn']|default('MOE\_NOT\_SEND')}}` OR Dear `{{UserAttribute['u\_fn']|default('Guest')}}`
* default('MOE\_NOT\_SEND') will suppress the message from going out.
* default('Guest') will use 'Guest' when the value for the personalization attribute is unavailable.
## Fallback Mechanism
The fallback mechanism is useful when personalization fails due to the attribute not being present for the user or the non-resolution of the specific user attribute.
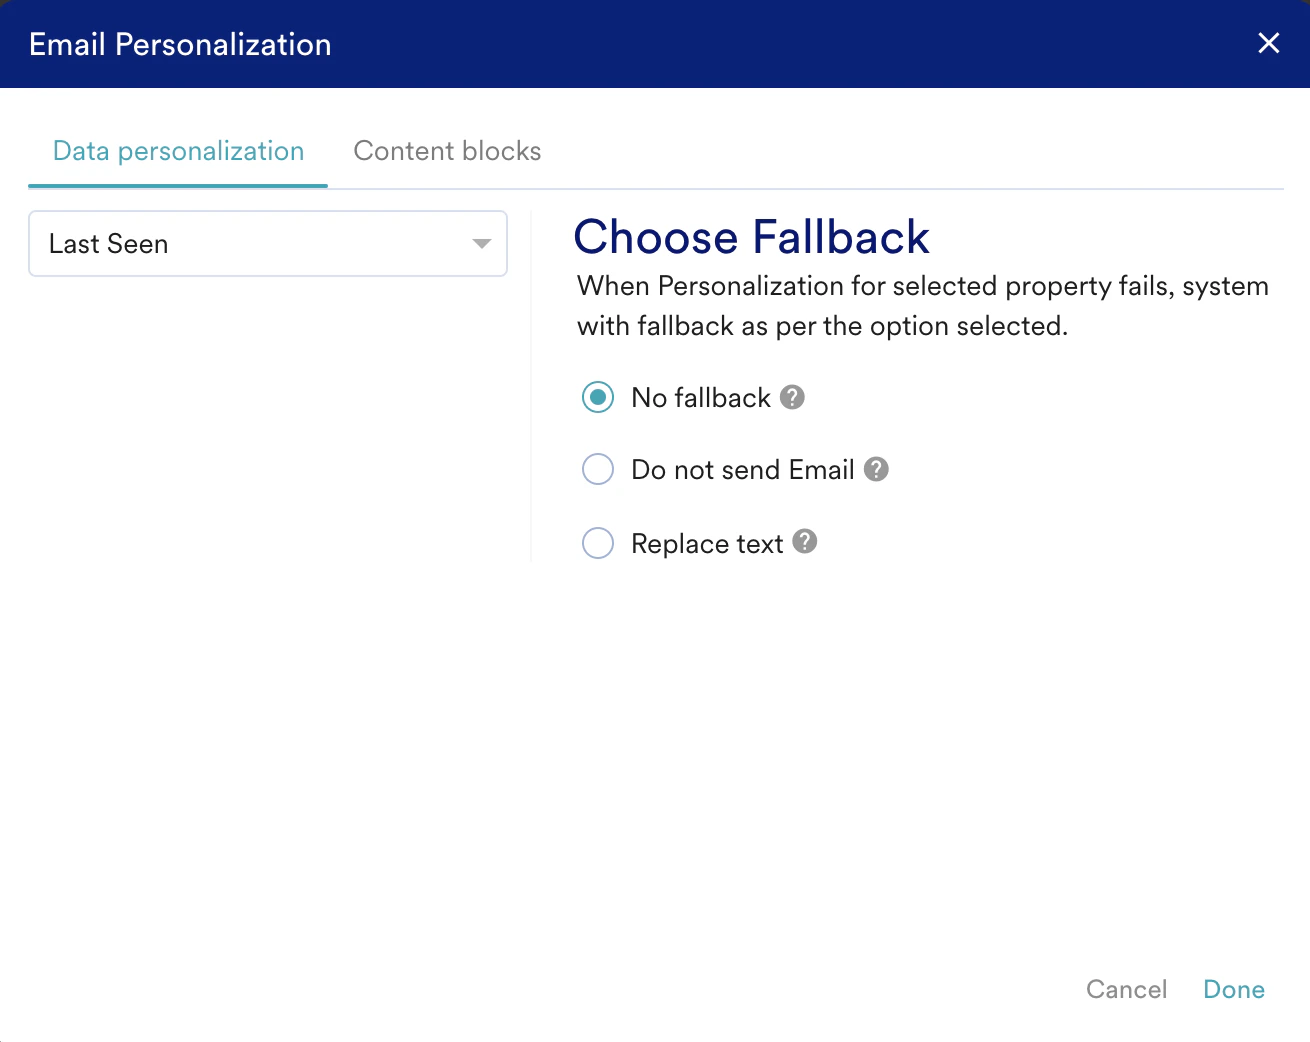 You can select one of the following fallback options:
* **No Fallback text**: The user attribute will be removed if not present/resolved for that user.\
**Note**: The No fallback option is not available for the **Sender Name** field.
* **Enter the Fallback text**: The user attribute will be replaced with the text you have entered.
* **Do not send this email if personalization fails**: The email will not be sent to the user if the personalized user attribute is not present/resolved for that user.
- Campaign attributes cannot be edited in personalized previews.
- During campaign creation, if the campaign ID is added for personalization, a dummy value is used in its place in the personalized preview, as the campaign ID gets generated only after the campaign is created.
- Ensure that custom attributes do not have the same names as standard attributes of MoEngage. If a custom attribute and a standard attribute having the same name are used for personalization, it can result in incorrect personalization.
Email content can also be personalized using [Content Blocks](/docs/user-guide/campaigns-and-channels/getting-started/message-personalization/personalize-content-using-content-blocks), [Auxiliary Data](/docs/user-guide/campaigns-and-channels/getting-started/message-personalization/personalize-content-using-auxiliary-data), [Content APIs](/docs/user-guide/campaigns-and-channels/getting-started/message-personalization/personalize-content-using-content-apis), and [Recommendations](/docs/user-guide/campaigns-and-channels/getting-started/message-personalization/personalize-content-using-recommendations).
## Personalize Business Event-Triggered Campaigns
In business event-triggered Email campaigns, you can use the attribute of the business event that is mapped to the campaign to personalize the campaign. For more information, refer to [Personalize Business Event Triggered Campaigns](https://moengage-user-guide.mintlify.app/user-guide/campaigns-and-channels/getting-started/message-personalization/overview#event-attributes).
## Personalize Content Using Content Blocks
Content Blocks are reusable content that can be used across various campaigns. These are particularly useful for headers, footers, signature blocks, terms and conditions, and so on for email campaigns. For more information, refer to [Personalize Content Using Content Blocks](/docs/user-guide/campaigns-and-channels/getting-started/message-personalization/personalize-content-using-content-blocks).
Both HTML and Text type content blocks can be added when personalizing content for email campaigns.
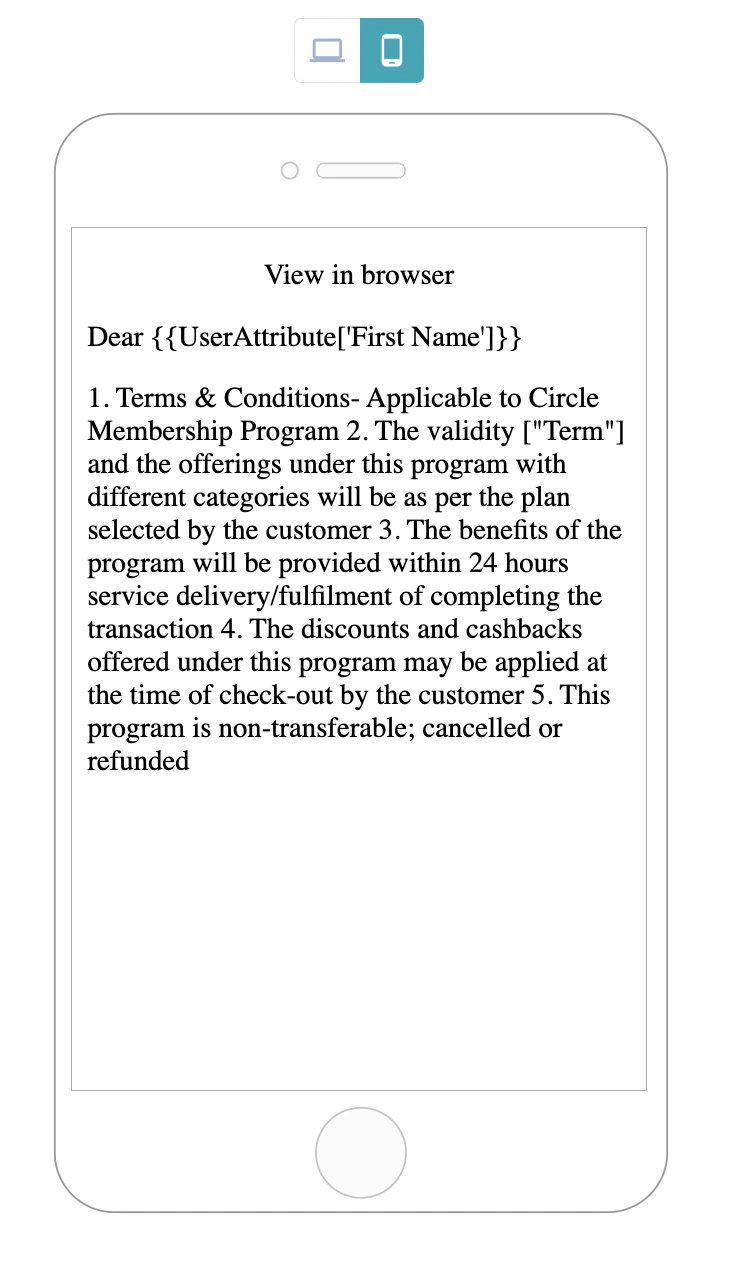
After adding the content block, you can preview the content as shown below:
You can select one of the following fallback options:
* **No Fallback text**: The user attribute will be removed if not present/resolved for that user.\
**Note**: The No fallback option is not available for the **Sender Name** field.
* **Enter the Fallback text**: The user attribute will be replaced with the text you have entered.
* **Do not send this email if personalization fails**: The email will not be sent to the user if the personalized user attribute is not present/resolved for that user.
- Campaign attributes cannot be edited in personalized previews.
- During campaign creation, if the campaign ID is added for personalization, a dummy value is used in its place in the personalized preview, as the campaign ID gets generated only after the campaign is created.
- Ensure that custom attributes do not have the same names as standard attributes of MoEngage. If a custom attribute and a standard attribute having the same name are used for personalization, it can result in incorrect personalization.
Email content can also be personalized using [Content Blocks](/docs/user-guide/campaigns-and-channels/getting-started/message-personalization/personalize-content-using-content-blocks), [Auxiliary Data](/docs/user-guide/campaigns-and-channels/getting-started/message-personalization/personalize-content-using-auxiliary-data), [Content APIs](/docs/user-guide/campaigns-and-channels/getting-started/message-personalization/personalize-content-using-content-apis), and [Recommendations](/docs/user-guide/campaigns-and-channels/getting-started/message-personalization/personalize-content-using-recommendations).
## Personalize Business Event-Triggered Campaigns
In business event-triggered Email campaigns, you can use the attribute of the business event that is mapped to the campaign to personalize the campaign. For more information, refer to [Personalize Business Event Triggered Campaigns](https://moengage-user-guide.mintlify.app/user-guide/campaigns-and-channels/getting-started/message-personalization/overview#event-attributes).
## Personalize Content Using Content Blocks
Content Blocks are reusable content that can be used across various campaigns. These are particularly useful for headers, footers, signature blocks, terms and conditions, and so on for email campaigns. For more information, refer to [Personalize Content Using Content Blocks](/docs/user-guide/campaigns-and-channels/getting-started/message-personalization/personalize-content-using-content-blocks).
Both HTML and Text type content blocks can be added when personalizing content for email campaigns.
After adding the content block, you can preview the content as shown below:
 ## Personalize Content Using Auxiliary Data
You can personalize your Email content using auxiliary data by selecting the auxiliary data attributes in the personalization editor. For more information, refer to [Personalize Content Using Auxiliary Data](/docs/user-guide/campaigns-and-channels/getting-started/message-personalization/personalize-content-using-auxiliary-data).
## Personalize Content Using Content APIs
[Content APIs](/docs/user-guide/campaigns-and-channels/getting-started/campaign-content/content-apis) allow you to create personalized campaigns by fetching data dynamically at the time of sending the campaign based on Recommendations, Coupons or other Personalization APIs. Such targeted, relevant, and timely communication has been proven to have much better engagement and conversion rates than generic email campaigns. For more information, refer to [Personalize Content Using Content APIs](/docs/user-guide/campaigns-and-channels/getting-started/message-personalization/personalize-content-using-content-apis).
## Personalize Content Using Recommendations
Recommendations are a group of related products often sold or marketed together. They are common in e-commerce, retail, and digital platforms. Personalized recommendations tailor the selection of products based on user preferences or purchase history. For more information, refer to [Personalize Content Using Recommendations](/docs/user-guide/campaigns-and-channels/getting-started/message-personalization/personalize-content-using-recommendations).
## Personalize Images
Image personalization helps you insert contextual images in emails, which are mainly useful for cart abandonment emails.
### Personalize Images Using the Drag and Drop Editor
* Select the "Cart Abandonment" template in the "Content" section or use your own email template.
## Personalize Content Using Auxiliary Data
You can personalize your Email content using auxiliary data by selecting the auxiliary data attributes in the personalization editor. For more information, refer to [Personalize Content Using Auxiliary Data](/docs/user-guide/campaigns-and-channels/getting-started/message-personalization/personalize-content-using-auxiliary-data).
## Personalize Content Using Content APIs
[Content APIs](/docs/user-guide/campaigns-and-channels/getting-started/campaign-content/content-apis) allow you to create personalized campaigns by fetching data dynamically at the time of sending the campaign based on Recommendations, Coupons or other Personalization APIs. Such targeted, relevant, and timely communication has been proven to have much better engagement and conversion rates than generic email campaigns. For more information, refer to [Personalize Content Using Content APIs](/docs/user-guide/campaigns-and-channels/getting-started/message-personalization/personalize-content-using-content-apis).
## Personalize Content Using Recommendations
Recommendations are a group of related products often sold or marketed together. They are common in e-commerce, retail, and digital platforms. Personalized recommendations tailor the selection of products based on user preferences or purchase history. For more information, refer to [Personalize Content Using Recommendations](/docs/user-guide/campaigns-and-channels/getting-started/message-personalization/personalize-content-using-recommendations).
## Personalize Images
Image personalization helps you insert contextual images in emails, which are mainly useful for cart abandonment emails.
### Personalize Images Using the Drag and Drop Editor
* Select the "Cart Abandonment" template in the "Content" section or use your own email template.
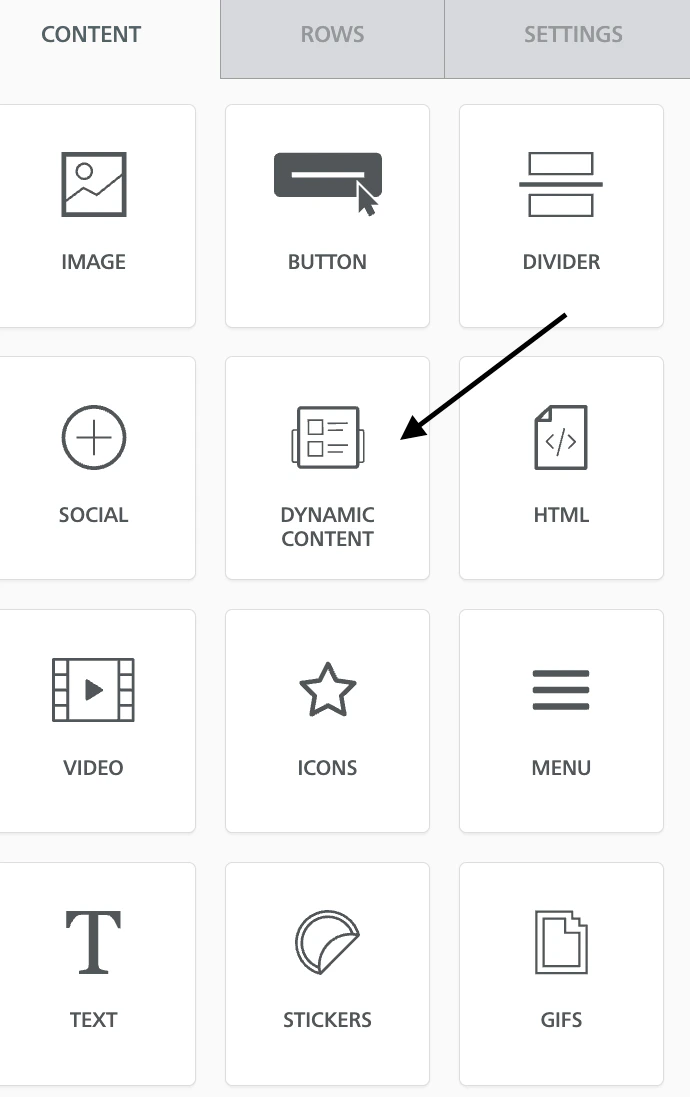
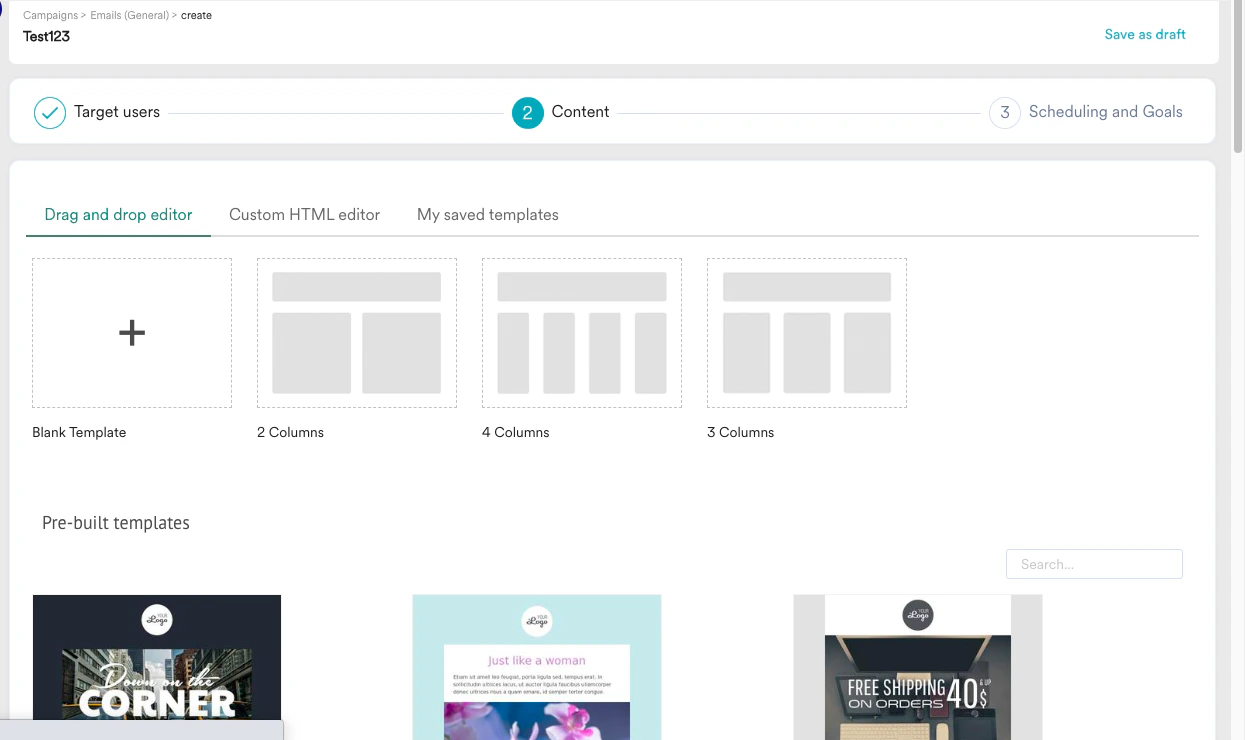 * Drag and drop the 'Dynamic Content' icon from the content tab into the template.
* Click the Dynamic Content inside the template. The **Add** button in the content tab that lets you personalize the image.
* Drag and drop the 'Dynamic Content' icon from the content tab into the template.
* Click the Dynamic Content inside the template. The **Add** button in the content tab that lets you personalize the image.
 * Click **Add** and the following screen is displayed.
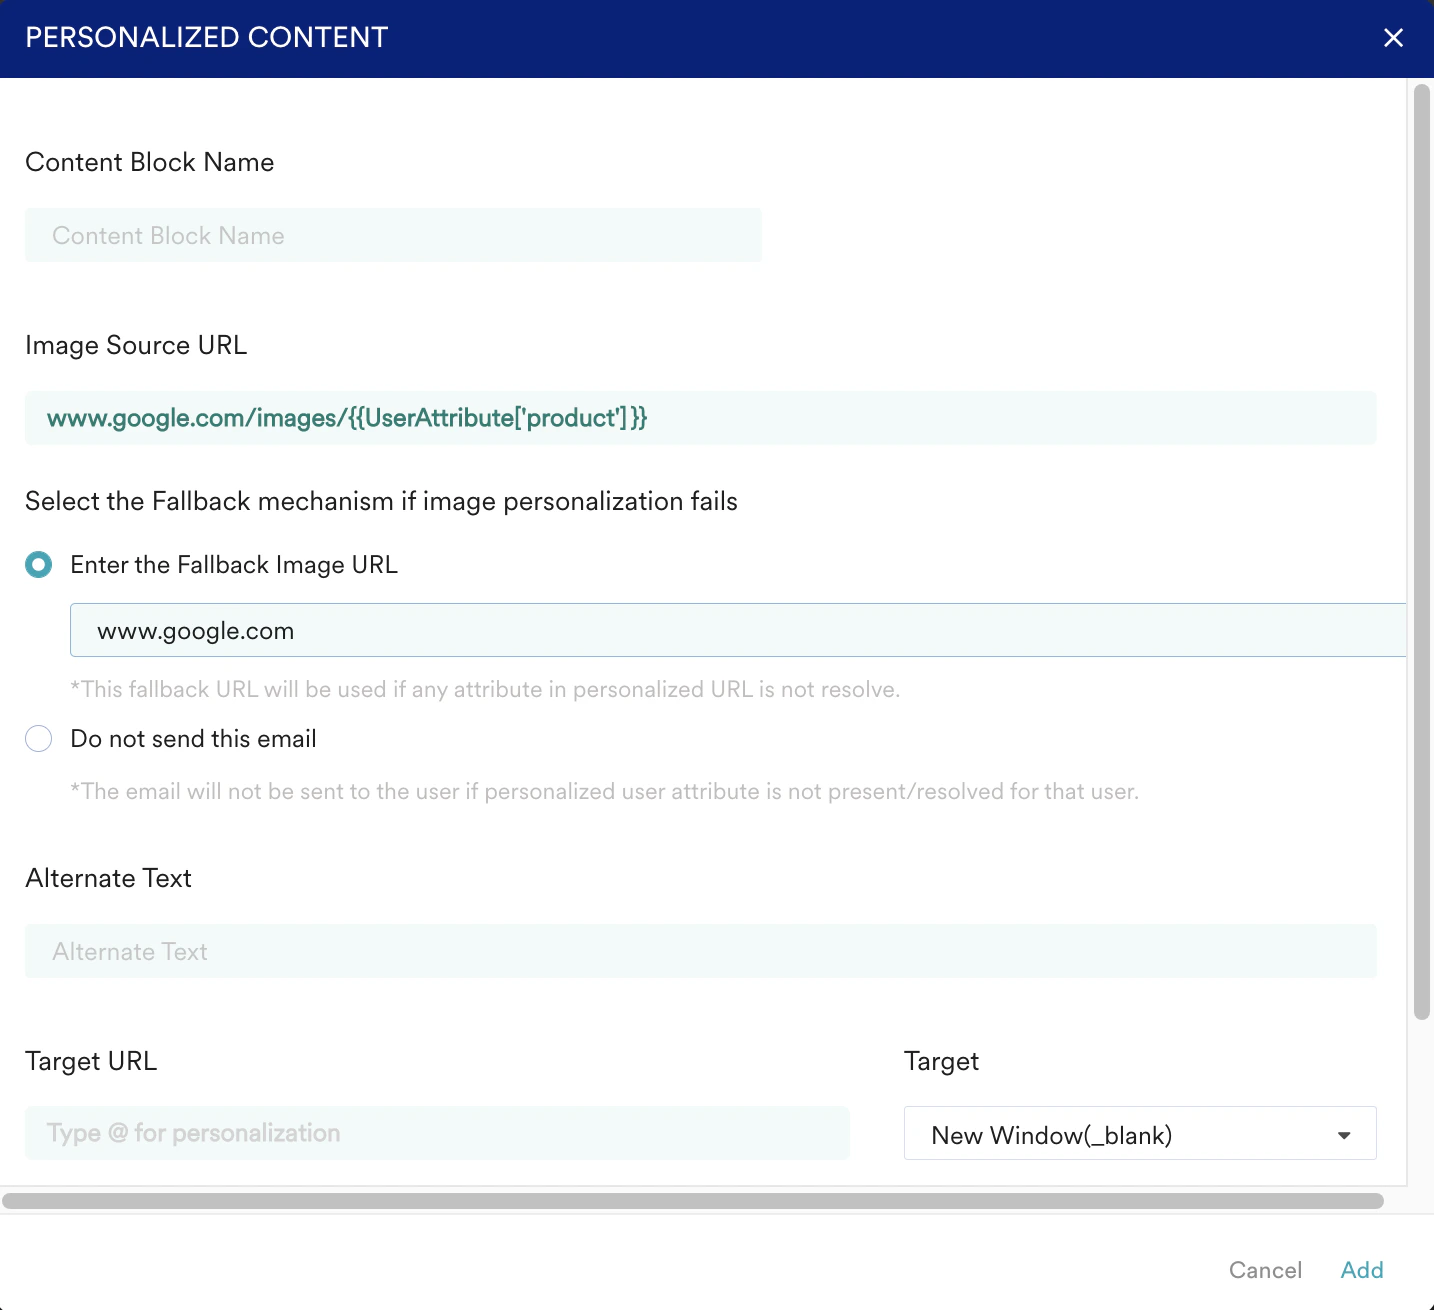 * Enter the image URL and personalize using "@". If you are tracking the entire image URL as an attribute, you can directly refer to that attribute using "@".
* Select the fallback mechanism. This is applicable if the attribute is not correctly resolved or there is no image present at the URL after resolving the attribute. You can either enter a fallback image (this will be shown if personalization fails) or decide not to send the email if the image is not personalized.
* Click **Add** to get the personalized image added to the template.
### Personalization Images Using the Custom HTML Editor
1. Click the **Custom HTML Editor** in Step 2 of the campaign creation and choose the **Edit/Paste HTML Template** option. The following screen is displayed.
* Enter the image URL and personalize using "@". If you are tracking the entire image URL as an attribute, you can directly refer to that attribute using "@".
* Select the fallback mechanism. This is applicable if the attribute is not correctly resolved or there is no image present at the URL after resolving the attribute. You can either enter a fallback image (this will be shown if personalization fails) or decide not to send the email if the image is not personalized.
* Click **Add** to get the personalized image added to the template.
### Personalization Images Using the Custom HTML Editor
1. Click the **Custom HTML Editor** in Step 2 of the campaign creation and choose the **Edit/Paste HTML Template** option. The following screen is displayed.
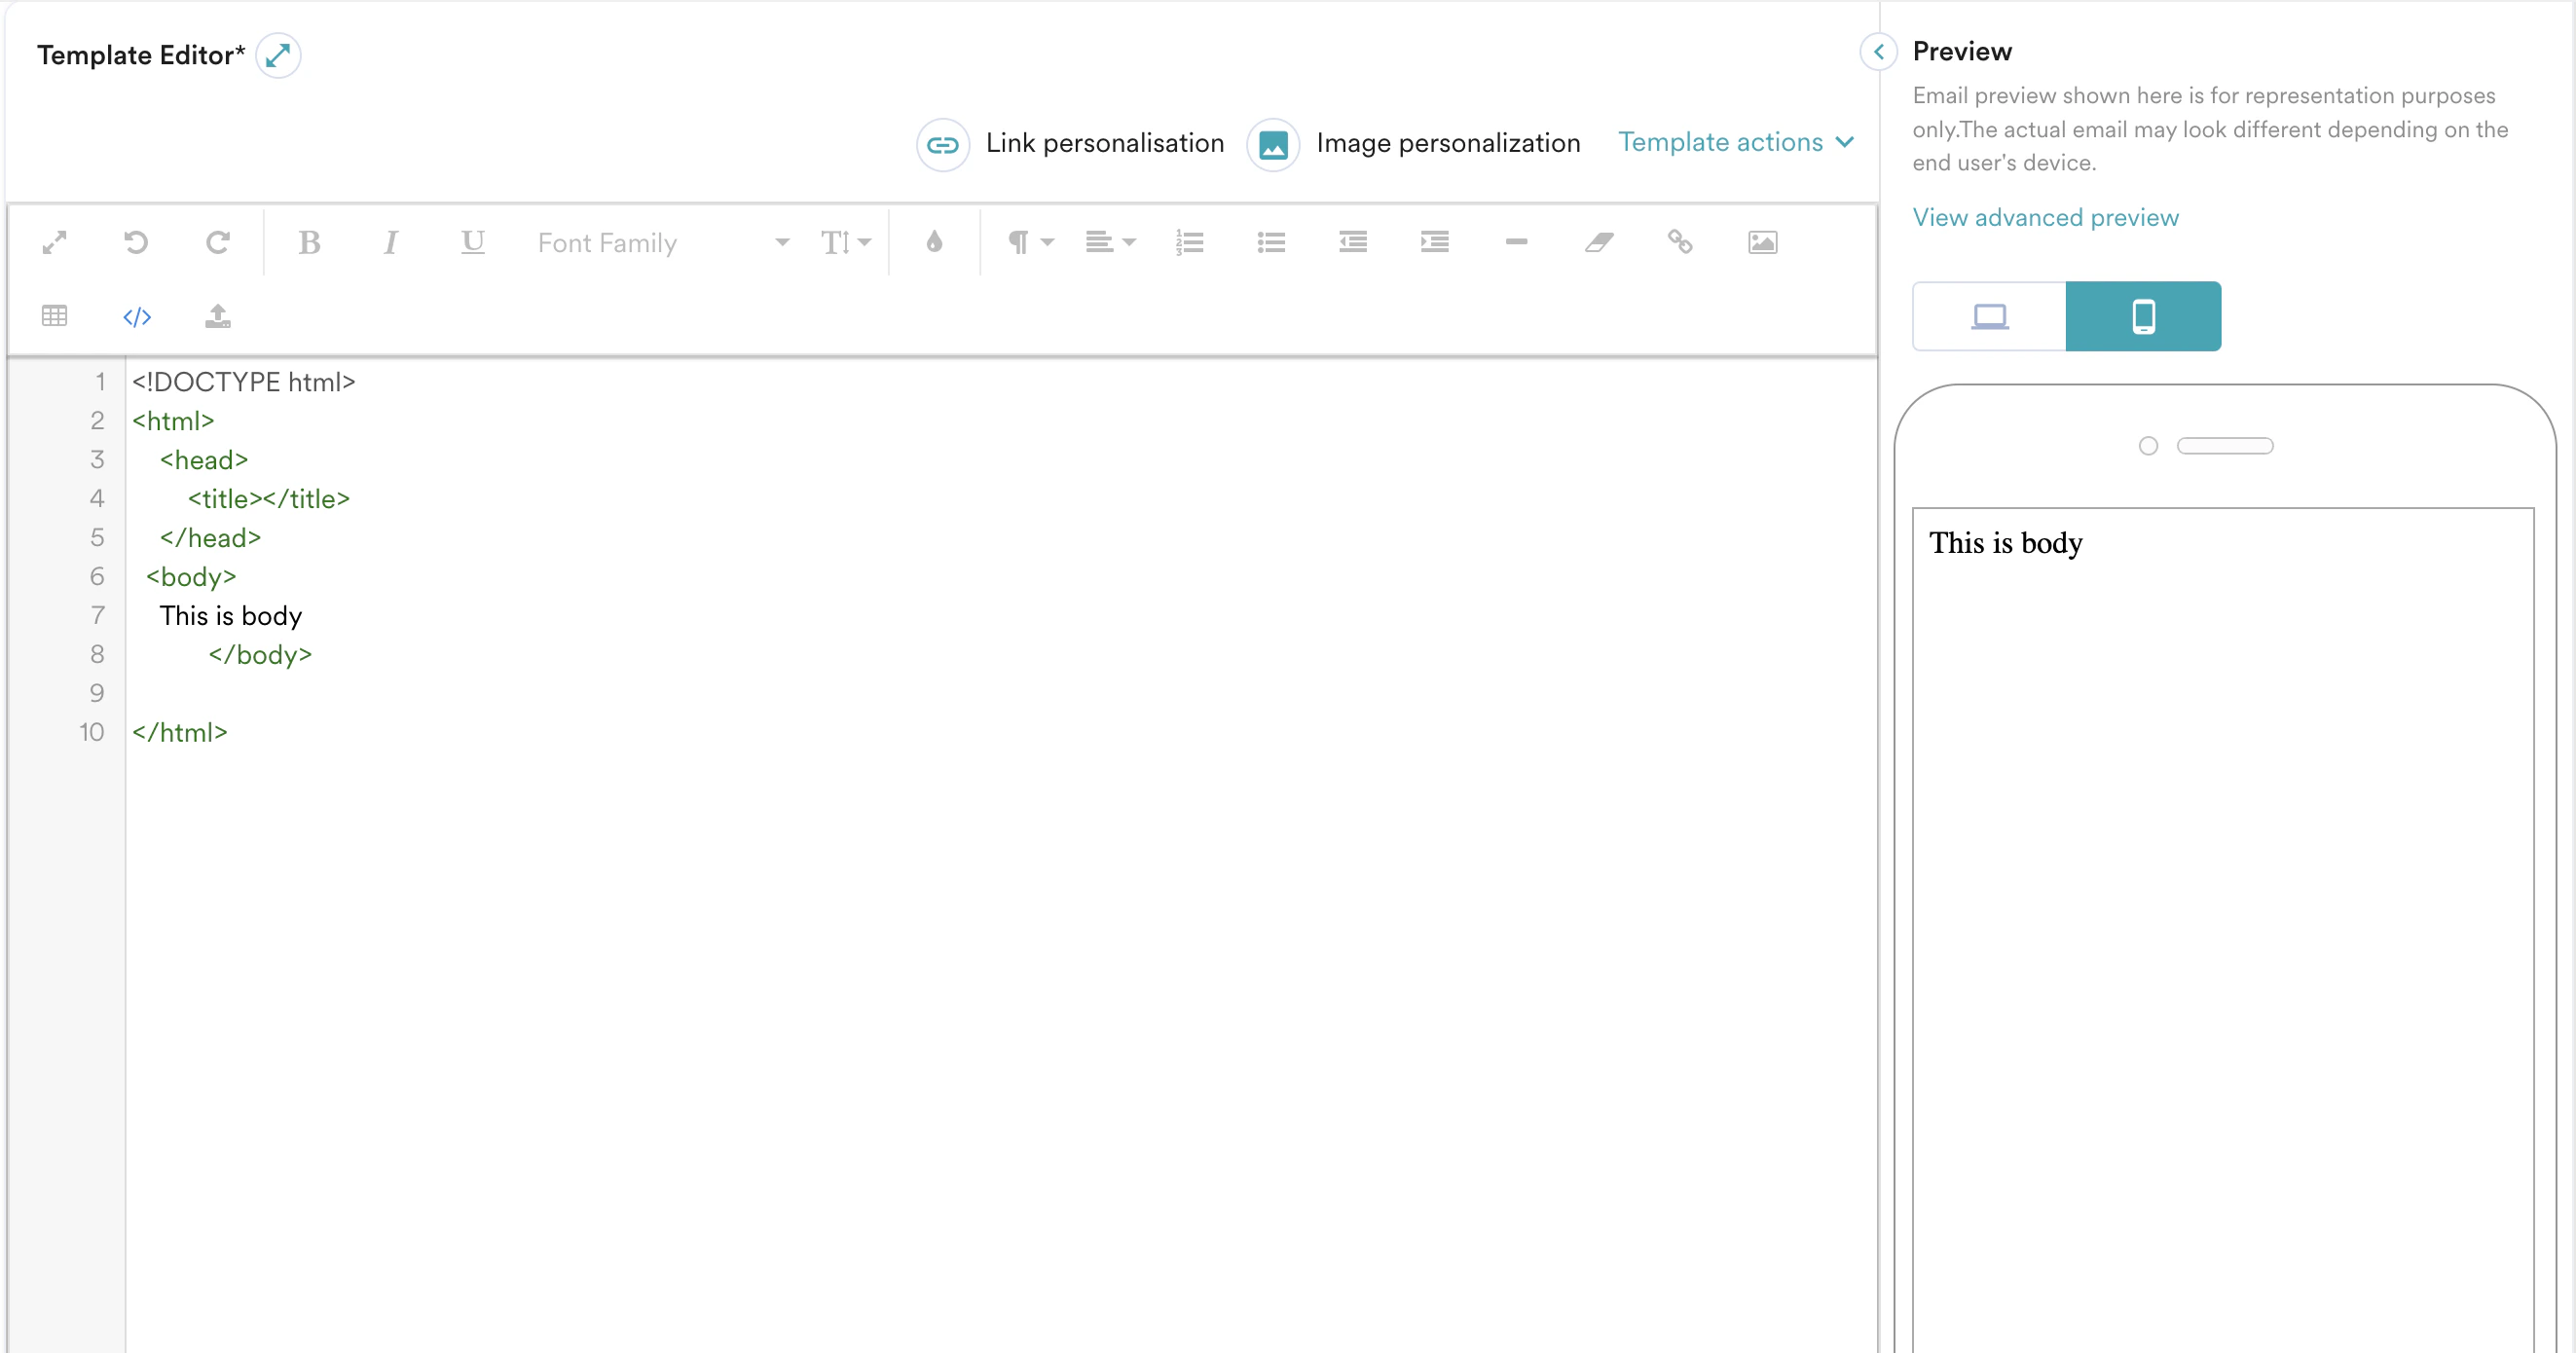 2. Click **Image personalization** on the top pane. The following screen is displayed.
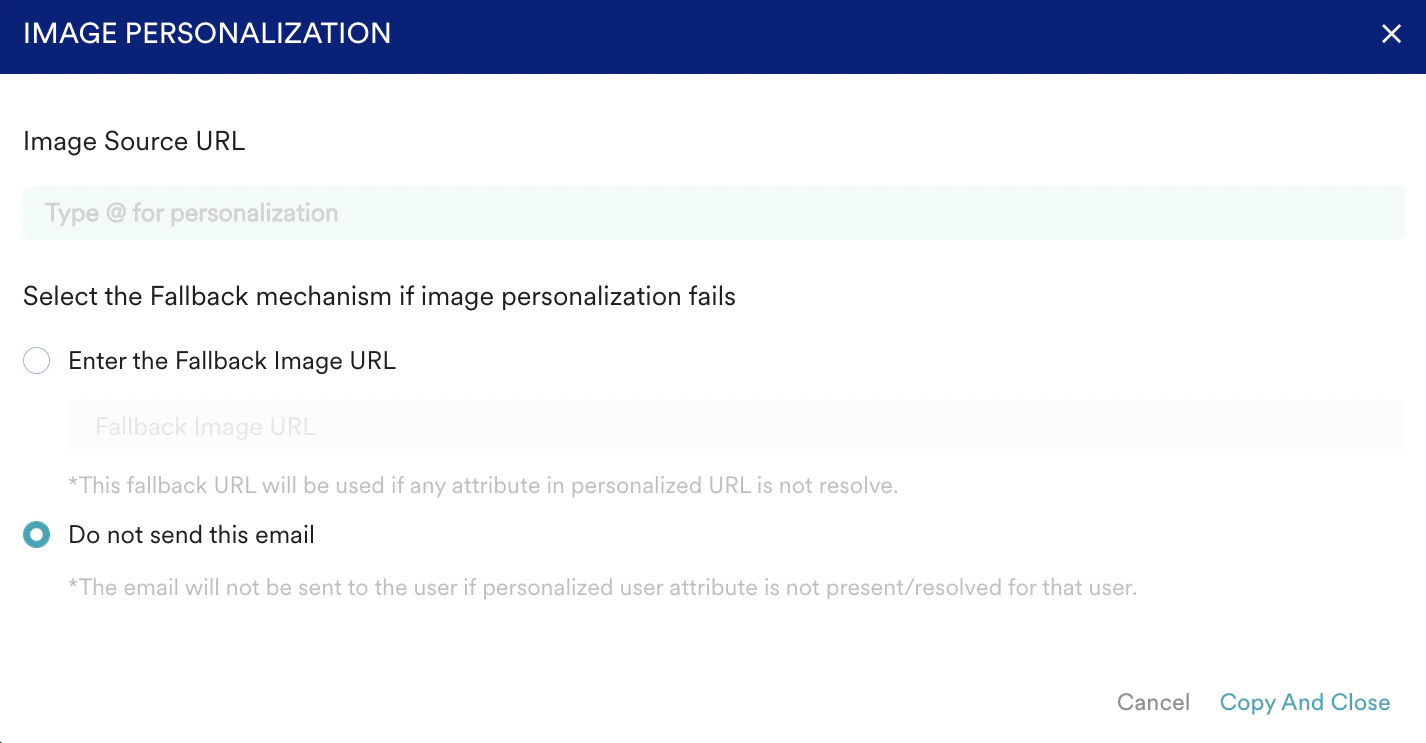 3. Enter the image URL and personalize using "@". If you are tracking the entire image URL as an attribute, you can directly refer to that attribute using "@".
4. You can select a fallback mechanism. This is applicable if the attribute is not correctly resolved or there is no image present at the URL after resolving the attribute. You can enter a fallback image (this will be shown if personalization fails) or decide not to send the email if the image is not personalized.
3. Enter the image URL and personalize using "@". If you are tracking the entire image URL as an attribute, you can directly refer to that attribute using "@".
4. You can select a fallback mechanism. This is applicable if the attribute is not correctly resolved or there is no image present at the URL after resolving the attribute. You can enter a fallback image (this will be shown if personalization fails) or decide not to send the email if the image is not personalized.
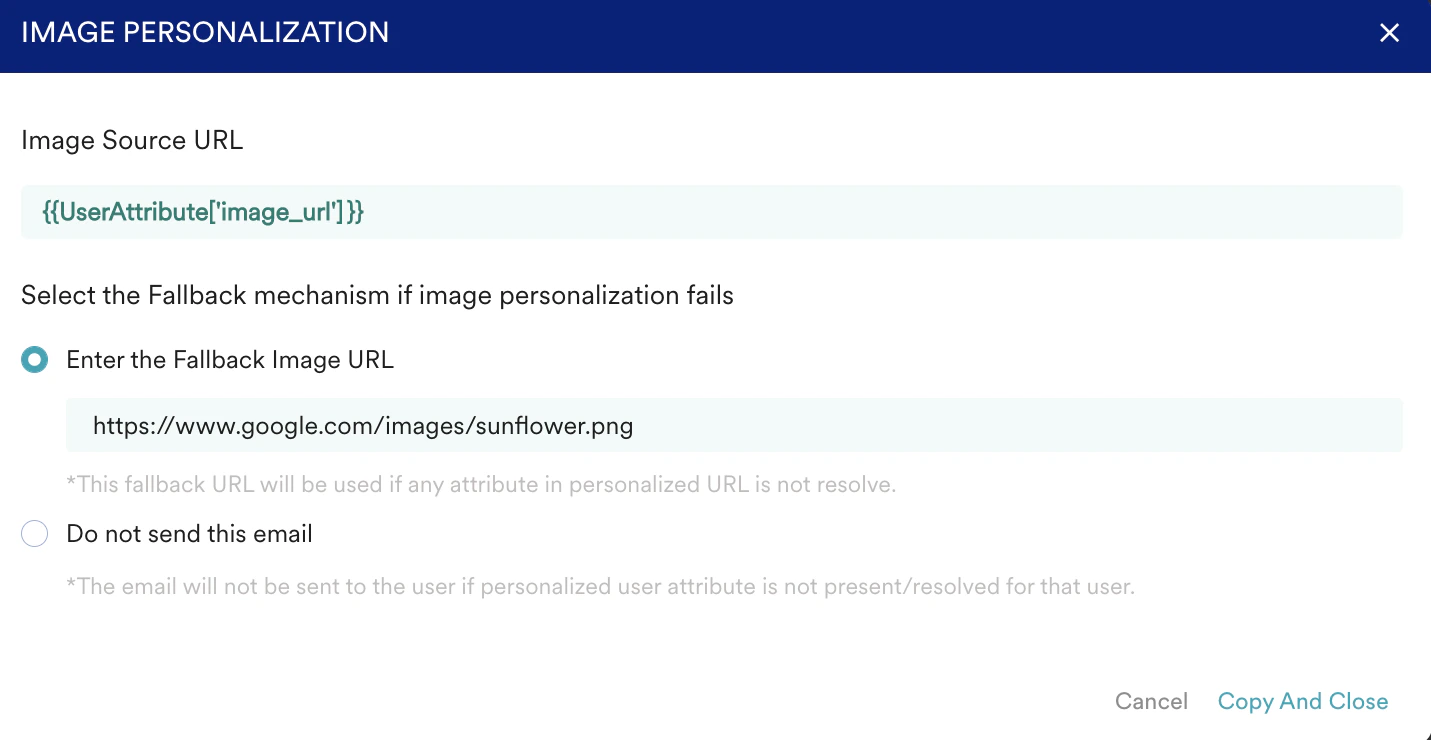 5. Click **Copy And Close** to copy and insert this image URL. This will copy the image URL to the clipboard and close the Personalization window. A **URL Copied** pops up at the bottom right corner near the custom HTML editor.
6. Click the icon in the custom HTML editor to insert the personalized image.
5. Click **Copy And Close** to copy and insert this image URL. This will copy the image URL to the clipboard and close the Personalization window. A **URL Copied** pops up at the bottom right corner near the custom HTML editor.
6. Click the icon in the custom HTML editor to insert the personalized image. 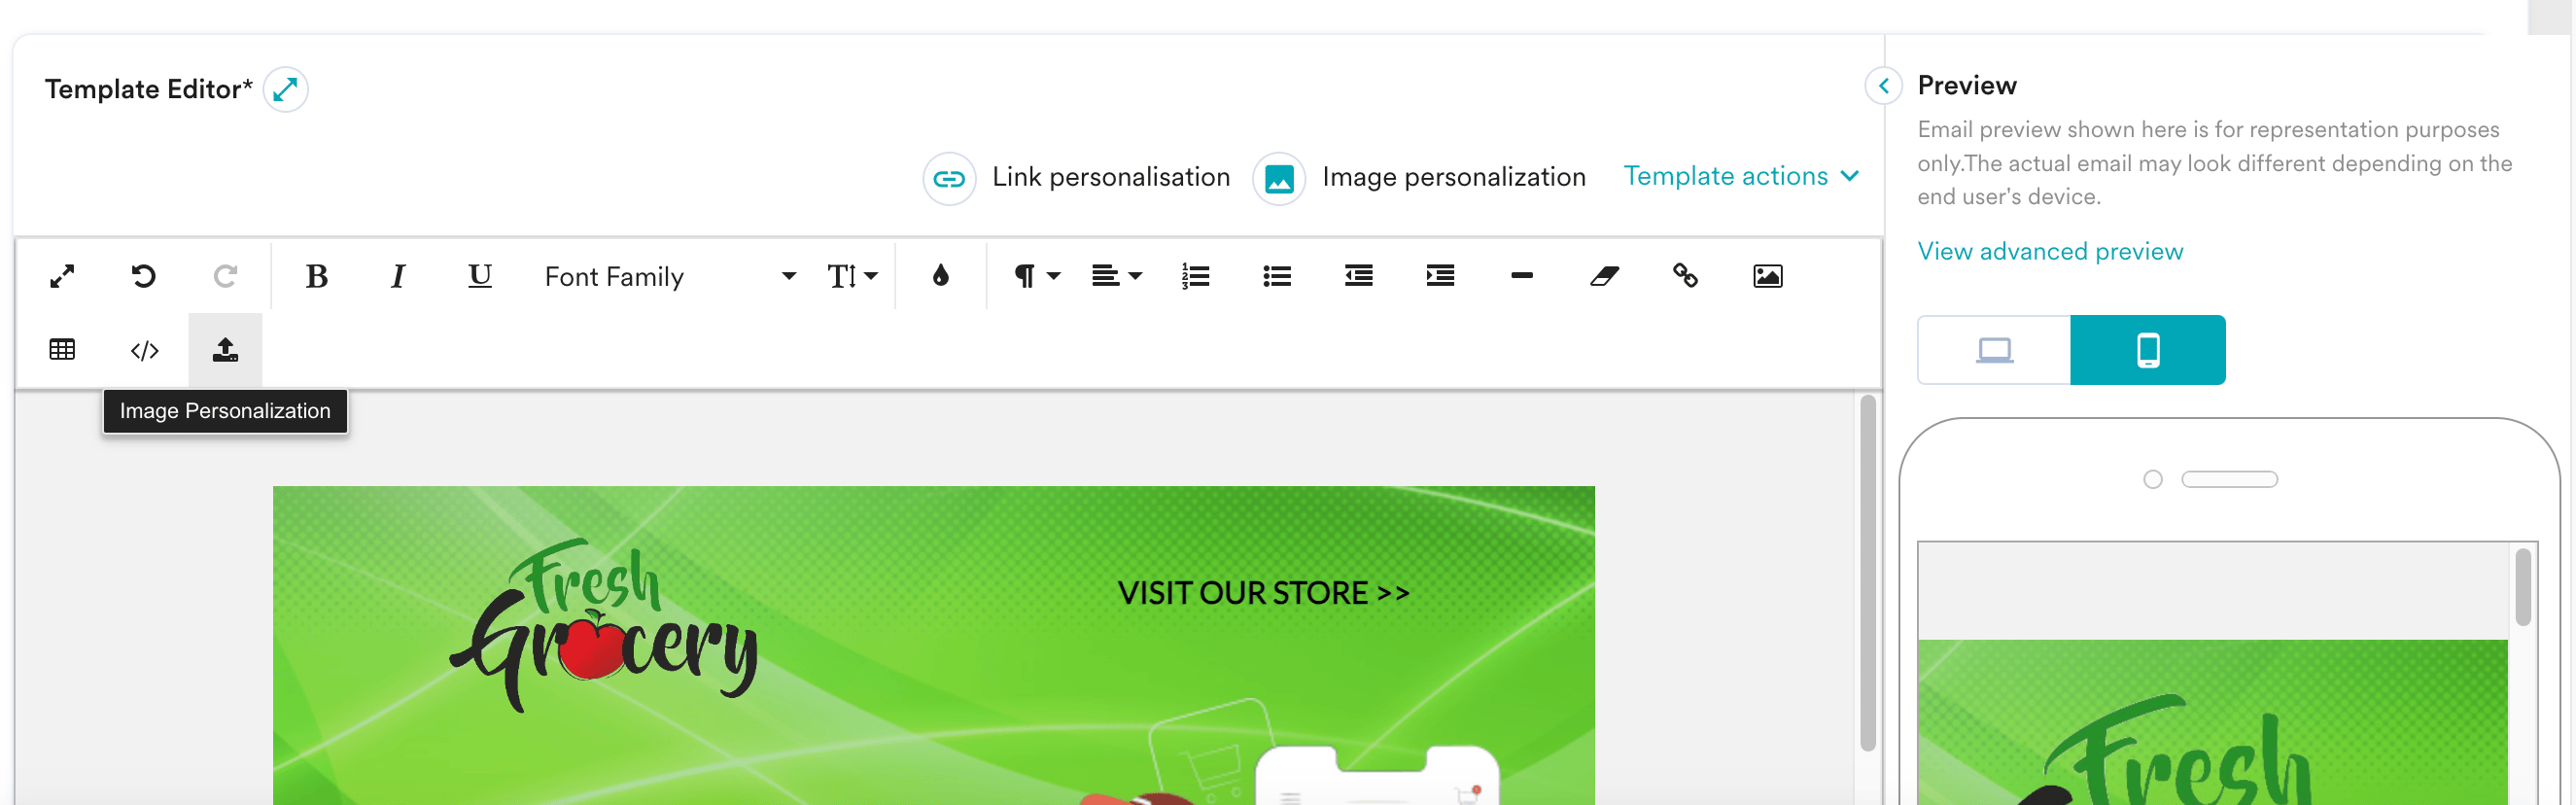 You can replace the existing image or insert a new image in the template.
#### Replace an Existing Image in the Template
1. Select the image and click **Replace**.
You can replace the existing image or insert a new image in the template.
#### Replace an Existing Image in the Template
1. Select the image and click **Replace**.
 2. Enter the personalized URL under the **Image personalization** tab and click **Replace**.
 #### Insert a New Image in the Template
1. Click **Insert Image** in the top bar of the editor.
#### Insert a New Image in the Template
1. Click **Insert Image** in the top bar of the editor.
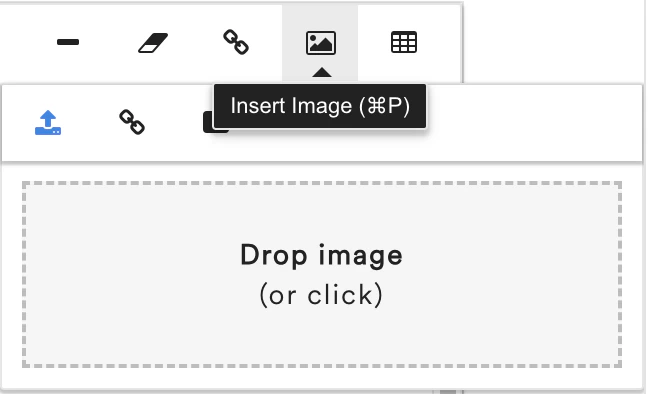 2. Enter the personalized URL under the **Image personalization** tab and click **Insert**.
After this personalized image is inserted/replaced, you can change the image size by extending/reducing the borders or by specifying a size in the **Resize** option on selecting the image. Make sure the image size matches the actual and fallback images. Otherwise, the resolution might result in image distortion.
## Personalize URLs
You can also personalize the URLs or deep links where you redirect the user upon a click by the user.
1. Click **Link personalization** as shown below:
2. Enter the personalized URL under the **Image personalization** tab and click **Insert**.
After this personalized image is inserted/replaced, you can change the image size by extending/reducing the borders or by specifying a size in the **Resize** option on selecting the image. Make sure the image size matches the actual and fallback images. Otherwise, the resolution might result in image distortion.
## Personalize URLs
You can also personalize the URLs or deep links where you redirect the user upon a click by the user.
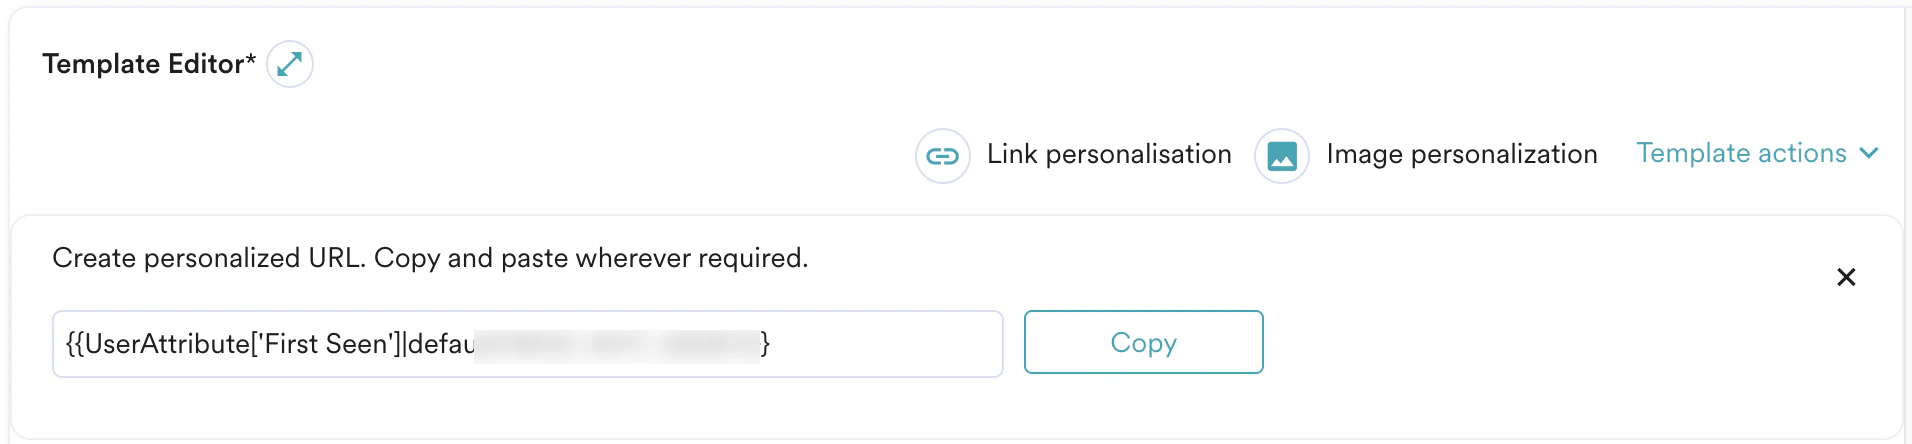
1. Click **Link personalization** as shown below: 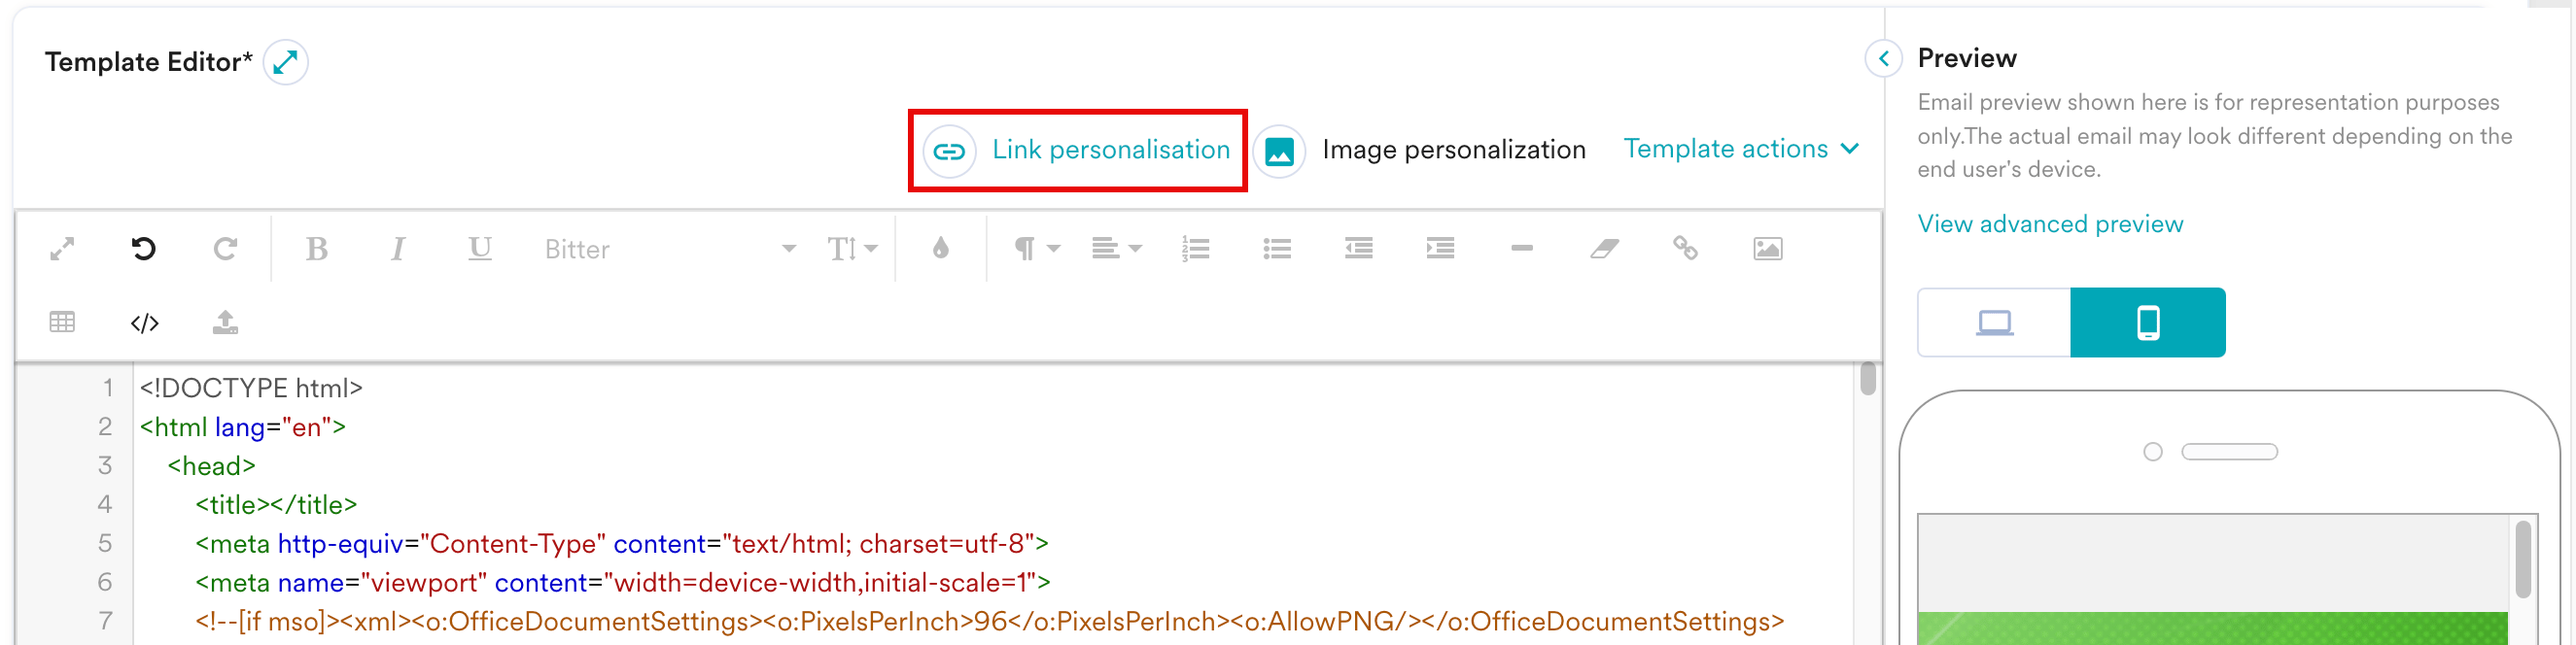
 2. Create a personalised URL in the text box that appears. Enter @ in the text box provided.
3. In the following **Email Personalization** dialog box that appears, choose the attribute and click **Done**.
2. Create a personalised URL in the text box that appears. Enter @ in the text box provided.
3. In the following **Email Personalization** dialog box that appears, choose the attribute and click **Done**. 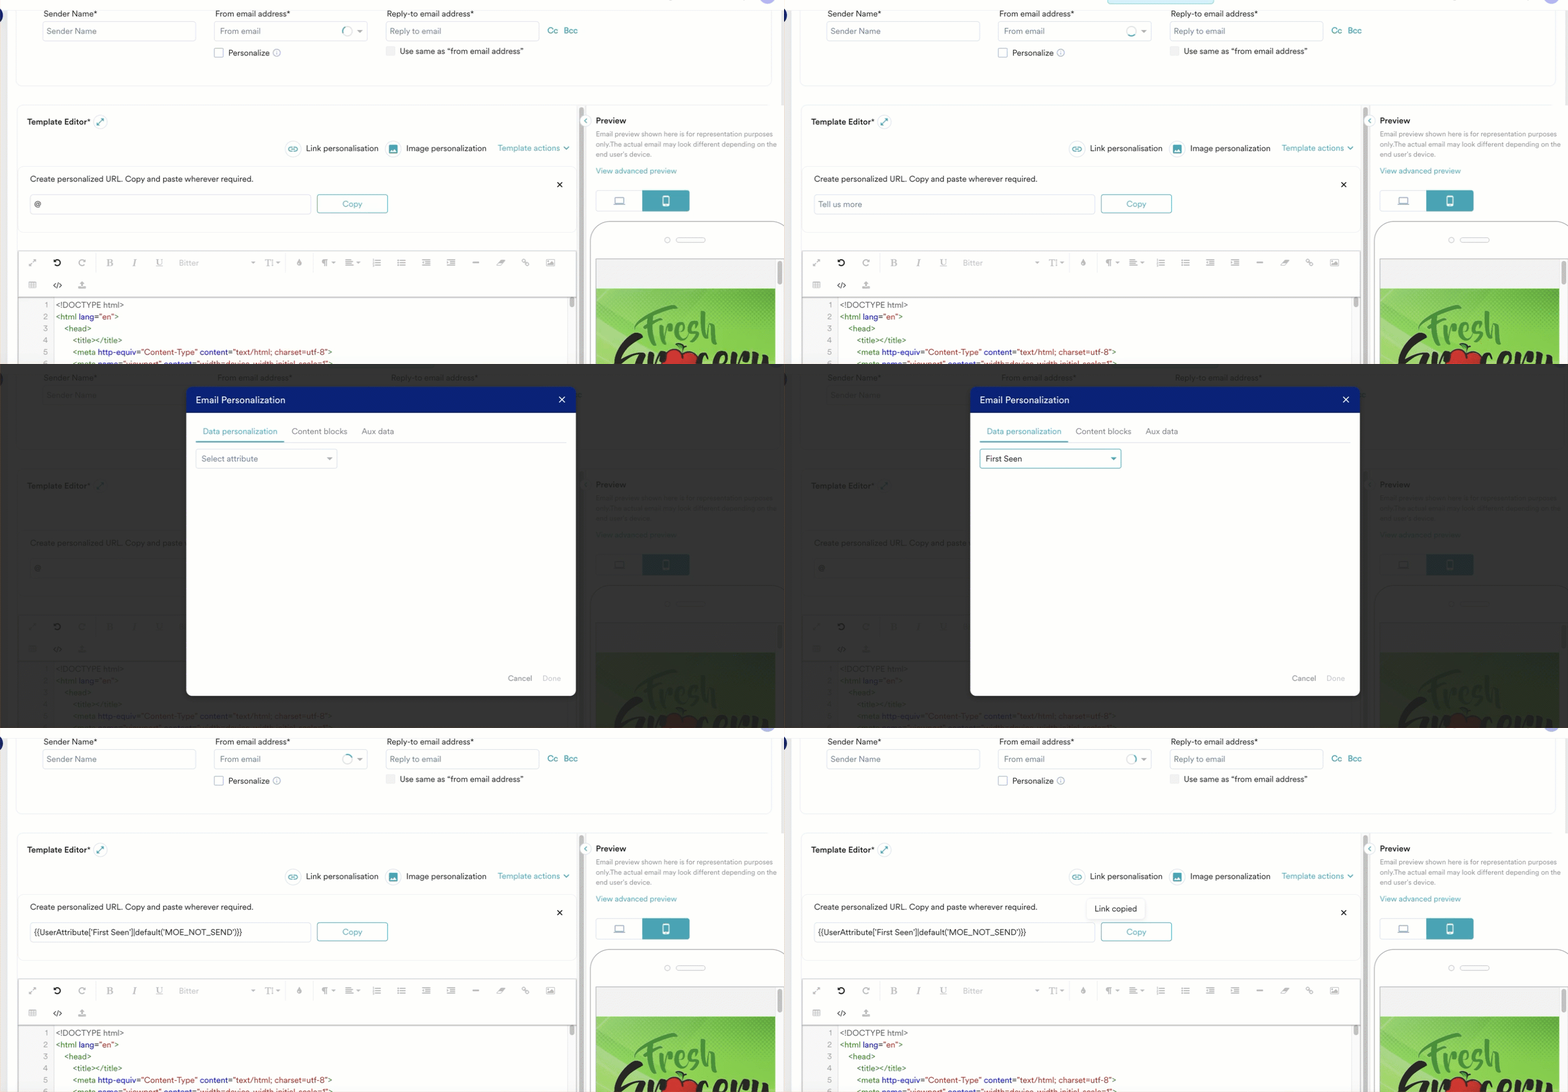 4. You can then copy this link and paste it wherever required, into the HTML code.
  If the personalized URL fails to find/resolve the user attribute, the email will not be sent to the user. There is no fallback mechanism for personalized URLs. If you have any issues creating personalized email campaigns, please contact your MoEngage Customer Success Manager (CSM) or the Support team.