> ## Documentation Index
> Fetch the complete documentation index at: https://moengage.com/docs/llms.txt
> Use this file to discover all available pages before exploring further.
# Vizard
## Introduction
[Vizard](https://vizard.ai/)'s no-code and low-code template editors help marketers generate dynamic, personalized images on the fly. You can then use those images inside MoEngage campaigns to deliver ultra-personalized messages.
## MoEngage and Vizard
The MoEngage and Vizard integration lets you use personalized dynamic images (rendered on the fly) in MoEngage campaigns. The integration supports push, email, in-app, and on-site channels.
## Integration
**Prerequisites**
* A Vizard account.
There are two integration approaches:
1. Use your Vizard creatives directly in MoEngage campaigns by adding them as image URLs.
2. Fetch personalized Vizard creatives (rendered on the fly based on user attributes) through MoEngage Content APIs.
## Option 1: Use direct image URLs
### Step 1: Create a new project on Vizard
Create a new project using the required template.
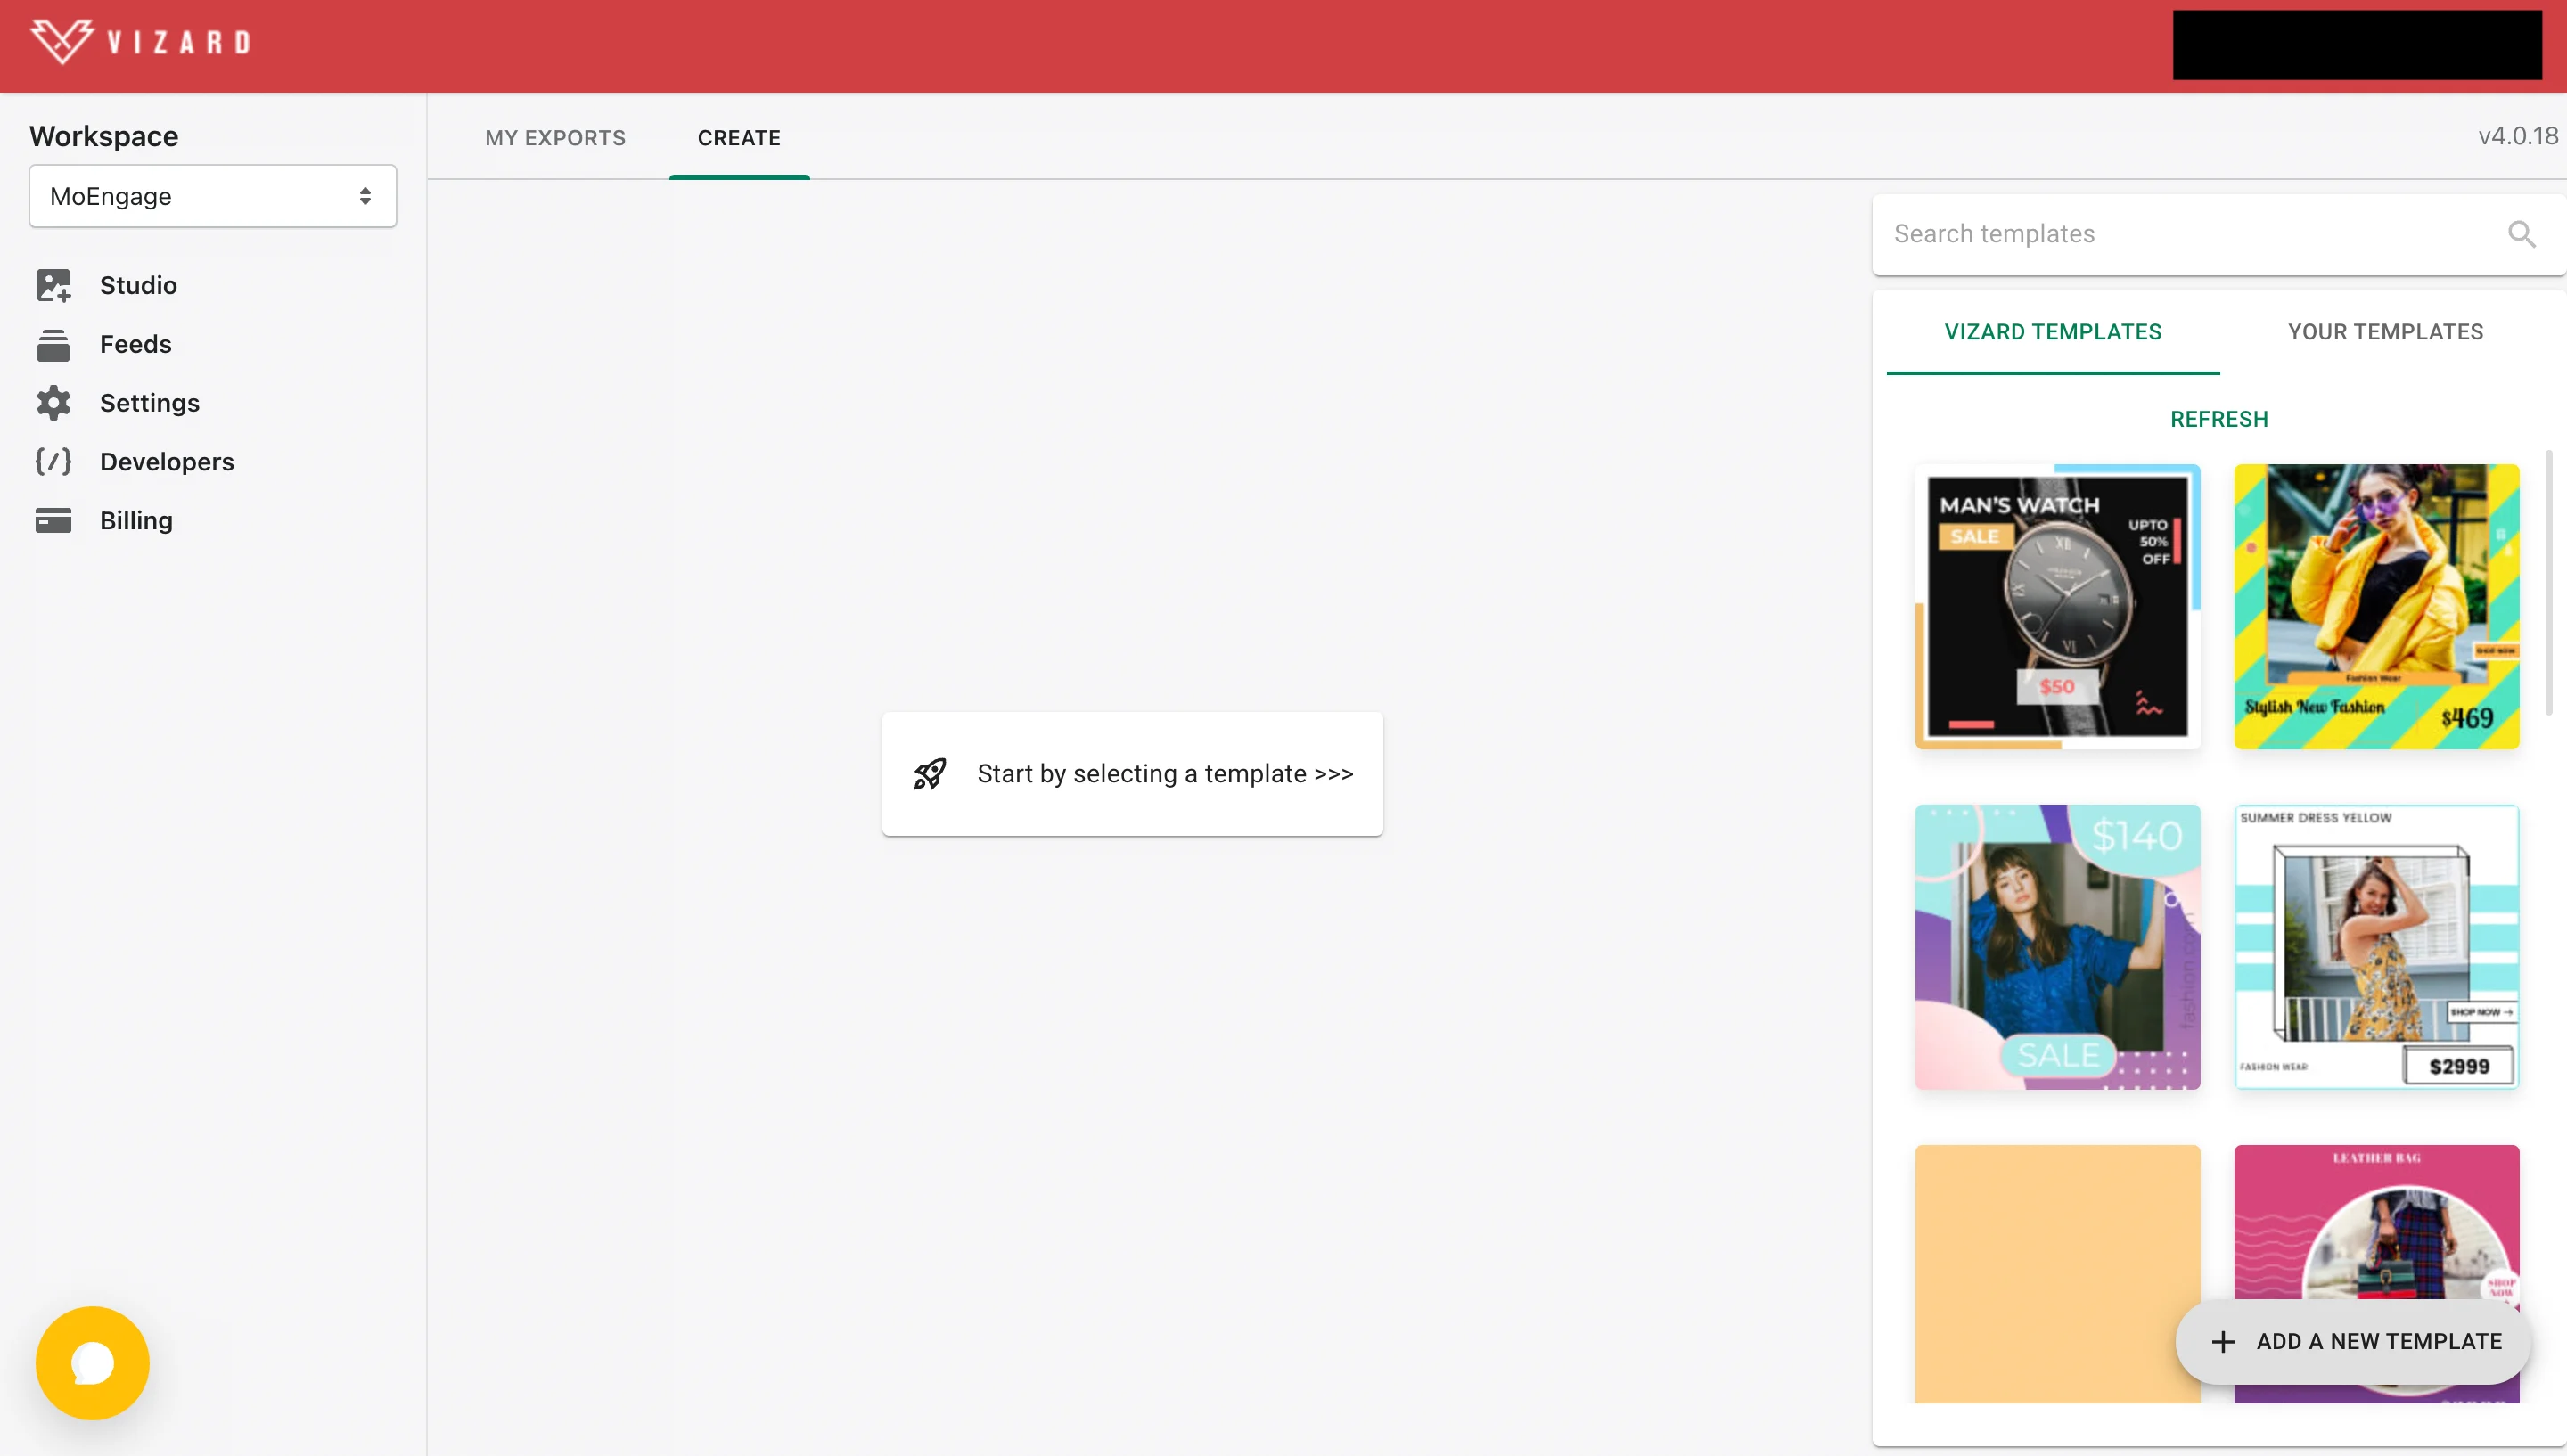 You can choose a template from the gallery or create your own in Figma and import it using the official Vizard plugin. To learn more about creating templates, see the [Vizard Knowledge Base](https://vizard.ai/knowledge-base).
Once you have finalized your template, click **Next: Use this template**.
### Step 2: Select Generate Dynamic Images to use APIs
You can choose a template from the gallery or create your own in Figma and import it using the official Vizard plugin. To learn more about creating templates, see the [Vizard Knowledge Base](https://vizard.ai/knowledge-base).
Once you have finalized your template, click **Next: Use this template**.
### Step 2: Select Generate Dynamic Images to use APIs
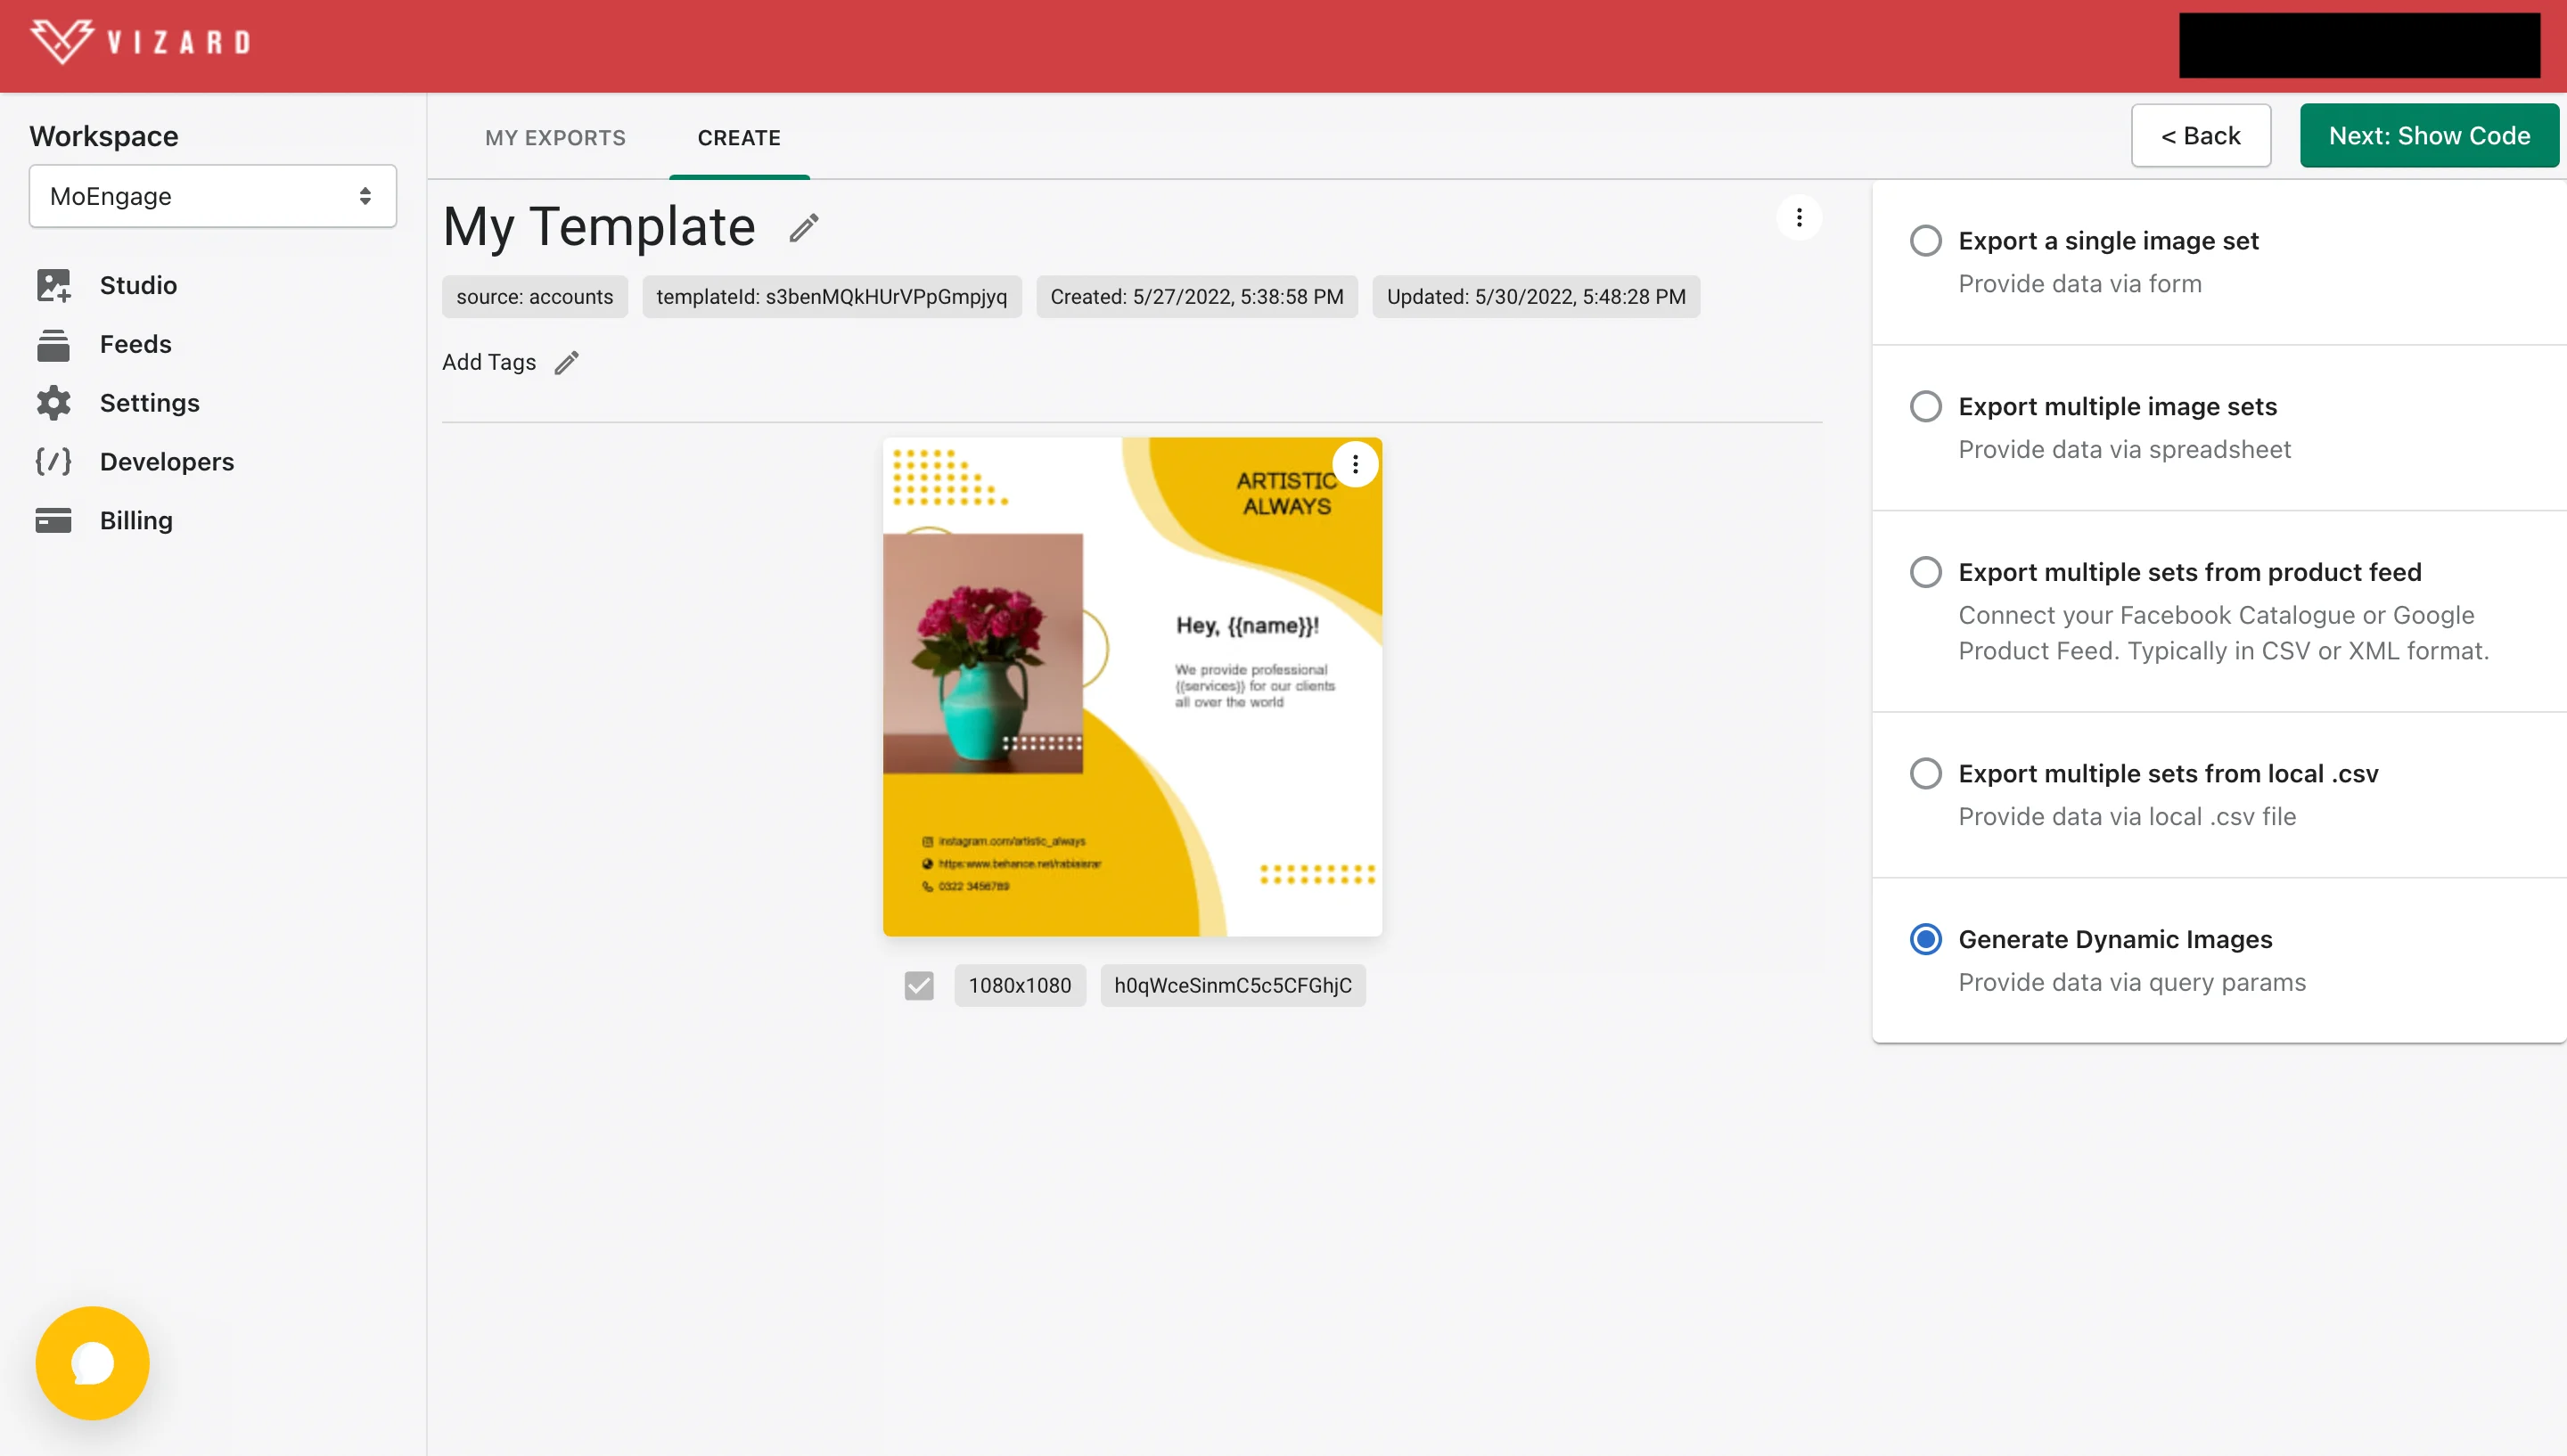 Click **Next: Show Code**. A modal opens with the code required to generate the images dynamically.
### Step 3: Get the magic image link

Select the **Dynamic Image URL (Magic Image)** tab to get your URL. Choose the dimension you want to use, then click **Copy to clipboard**. The URL looks like this:
```text wrap theme={null}
https://fast.vizardapps.com/dynamic/v1.0/ktqe3GxU1daR0m0C8OuBUN8cBKV2/Cauo0Bty5UJl6BKA1g73/gMCkHfmg5ohL2YY1RuEi/t_unsigned,bg_false?name=Hey!&cta=Swipe%20Now
```
To test the URL, open it in your browser. Try changing the URL parameter values and reopening the URL — Vizard generates a new image each time you change a parameter.
### Step 4: Use the link in MoEngage campaigns
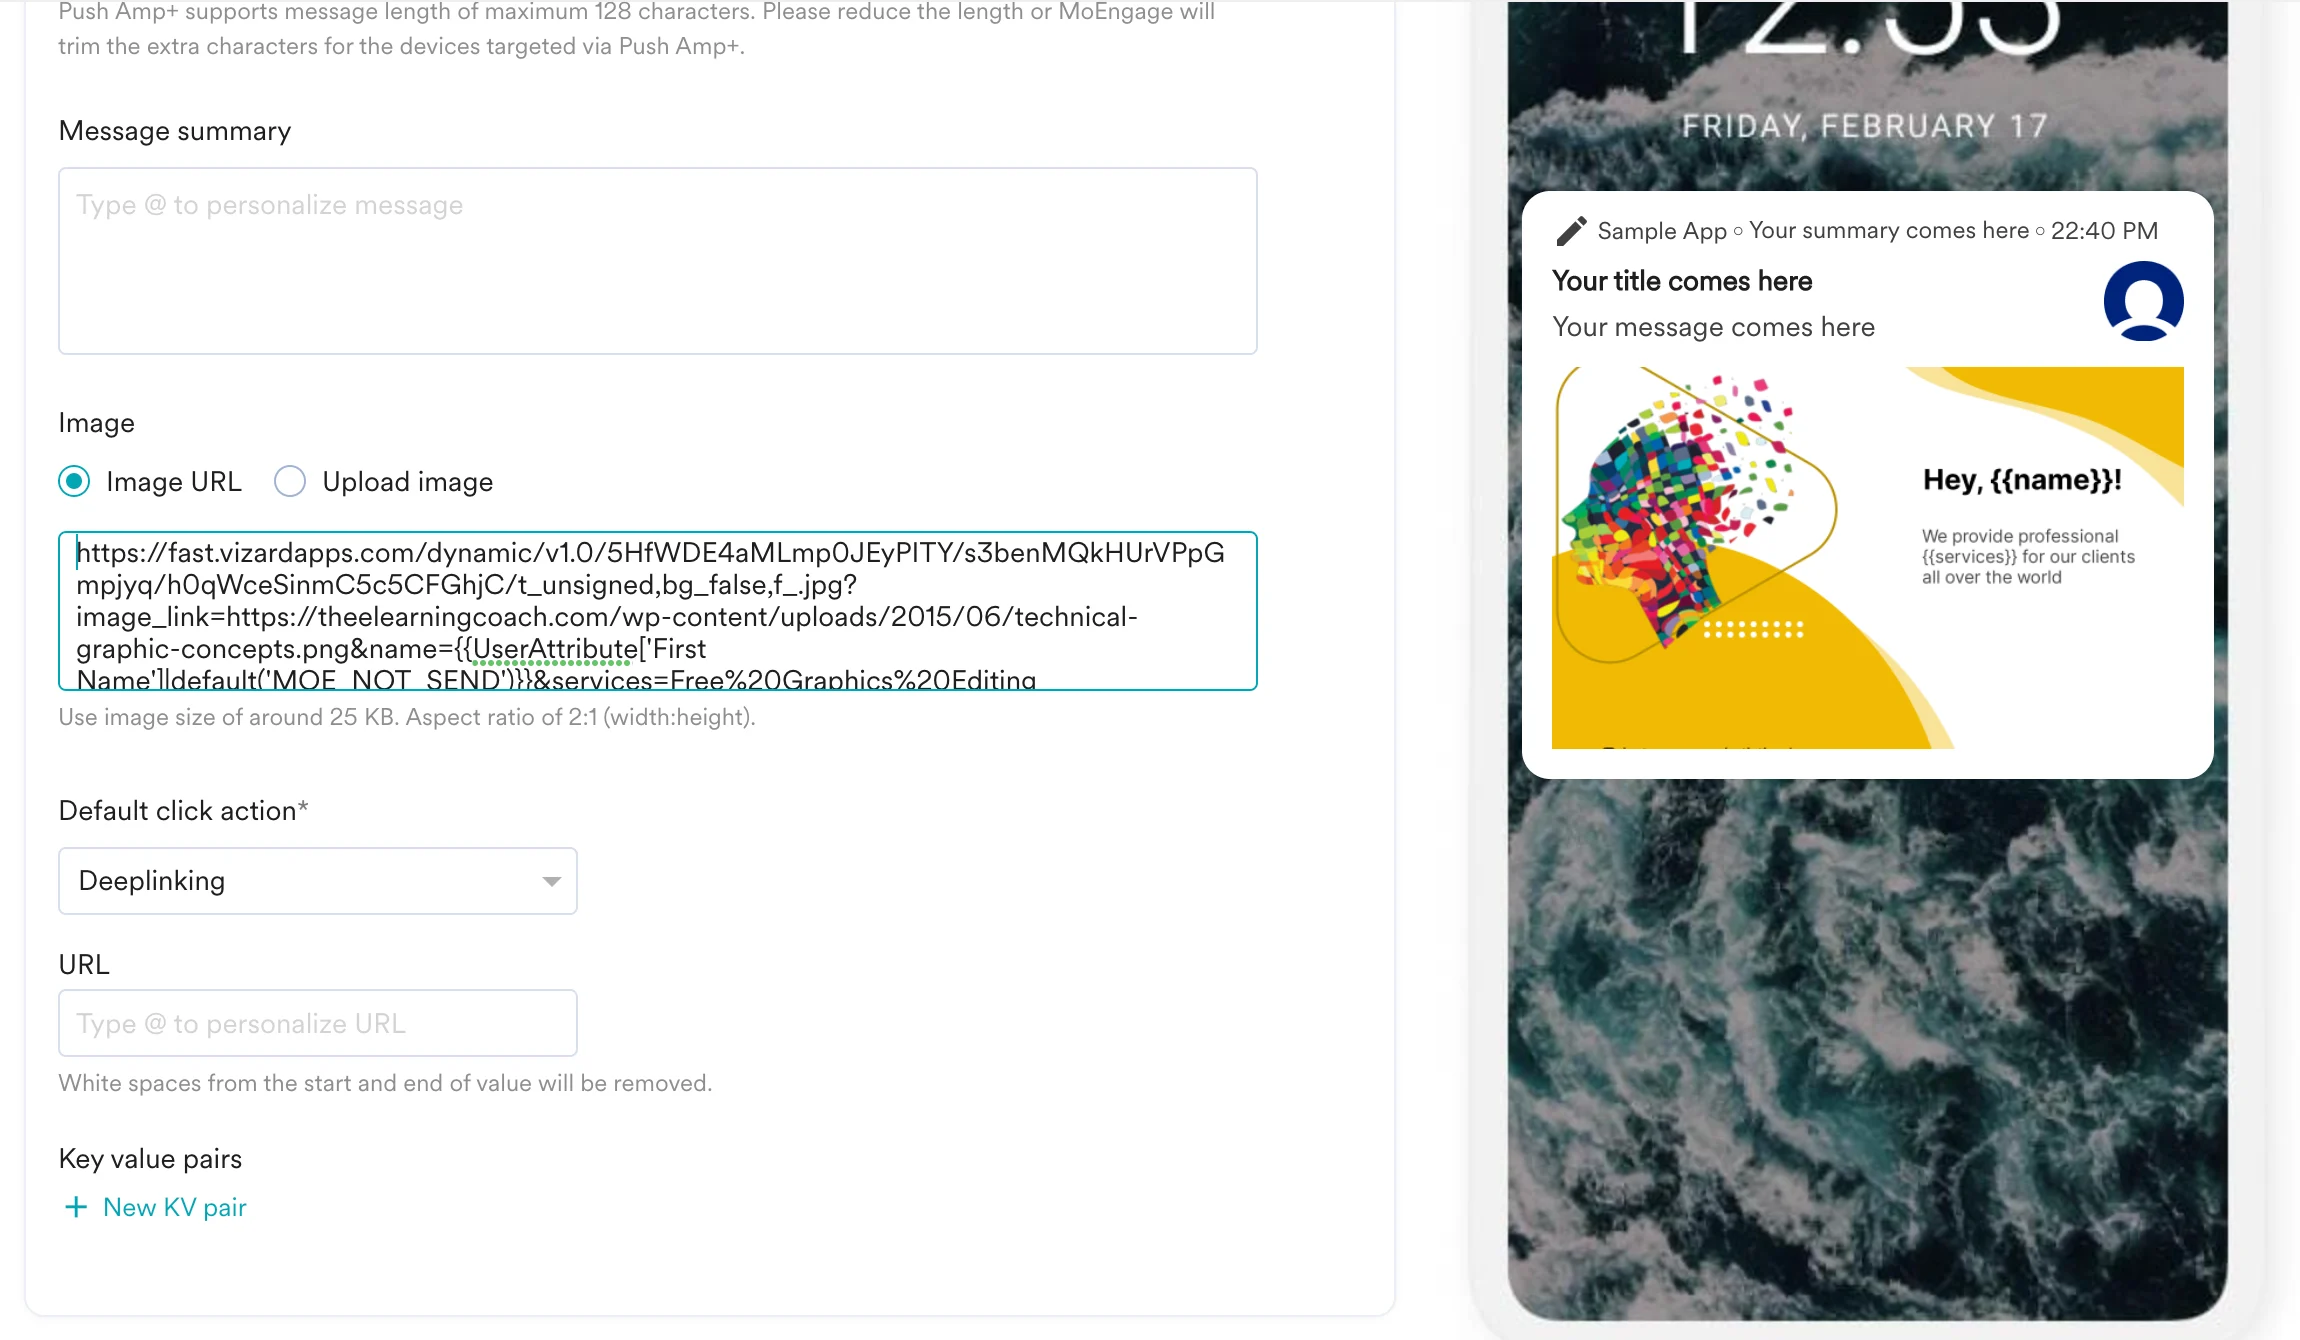
To include the Vizard URL in your MoEngage campaign, on step 2 of campaign creation:
#### Push campaigns
Click **Next: Show Code**. A modal opens with the code required to generate the images dynamically.
### Step 3: Get the magic image link

Select the **Dynamic Image URL (Magic Image)** tab to get your URL. Choose the dimension you want to use, then click **Copy to clipboard**. The URL looks like this:
```text wrap theme={null}
https://fast.vizardapps.com/dynamic/v1.0/ktqe3GxU1daR0m0C8OuBUN8cBKV2/Cauo0Bty5UJl6BKA1g73/gMCkHfmg5ohL2YY1RuEi/t_unsigned,bg_false?name=Hey!&cta=Swipe%20Now
```
To test the URL, open it in your browser. Try changing the URL parameter values and reopening the URL — Vizard generates a new image each time you change a parameter.
### Step 4: Use the link in MoEngage campaigns
To include the Vizard URL in your MoEngage campaign, on step 2 of campaign creation:
#### Push campaigns
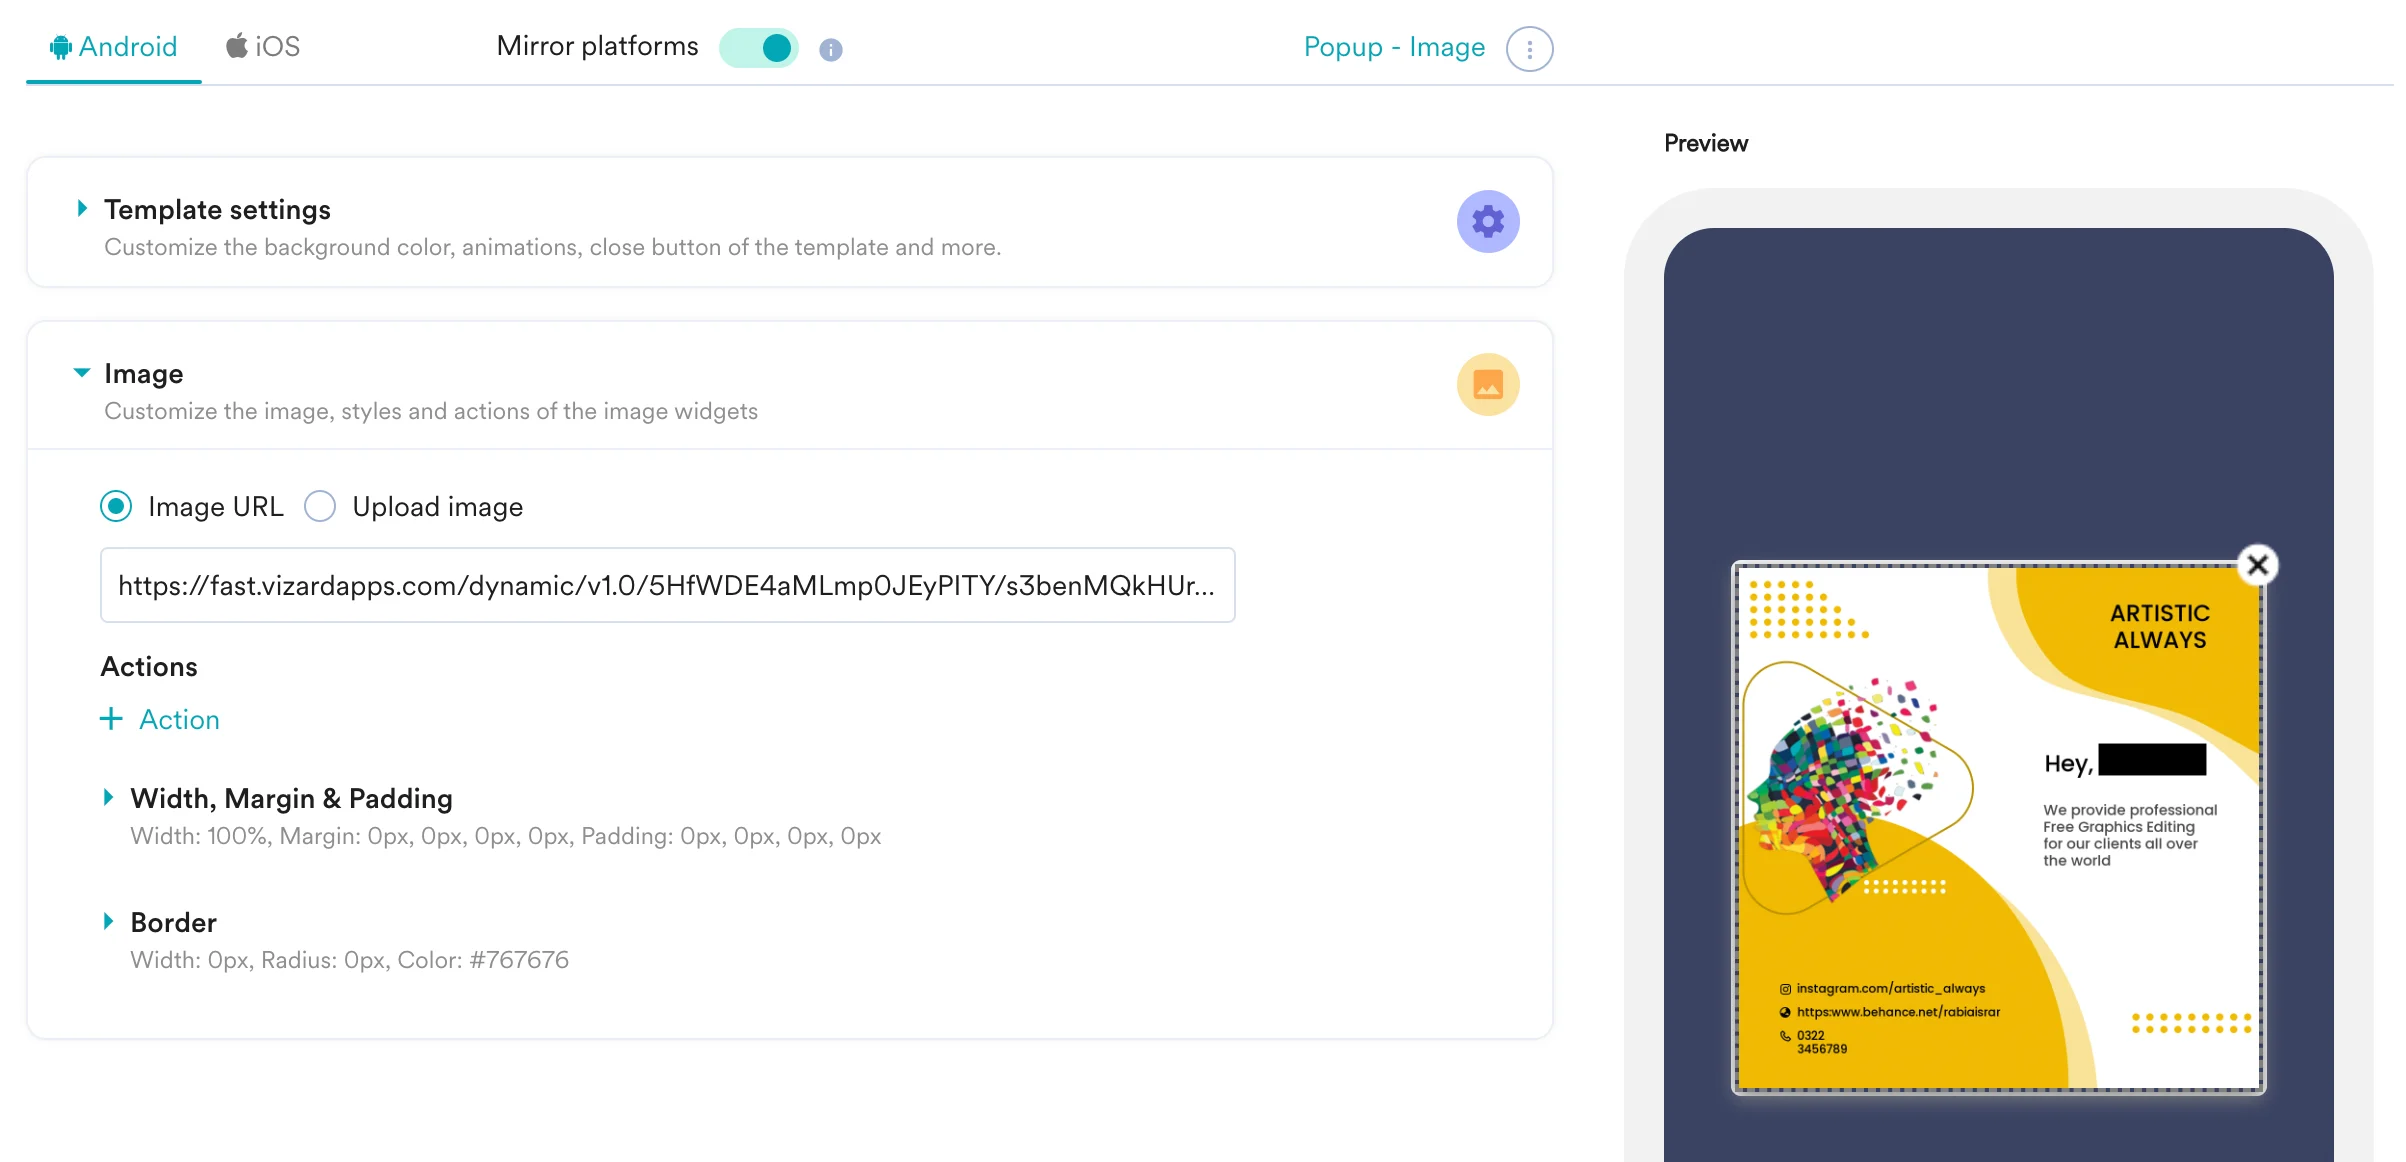
 #### In-app campaigns
Insert the Vizard URL into your in-app image URL field.
#### In-app campaigns
Insert the Vizard URL into your in-app image URL field.
 #### Email campaigns
Insert the Vizard magic link URL directly in your email templates.
## Option 2: Use personalized URLs
If you want to reuse your Vizard creative across campaigns, store it as a Content API in MoEngage. After you get your URL using Steps 1 and 2 above, follow the steps below.
### Step 1: Add a Content API on MoEngage
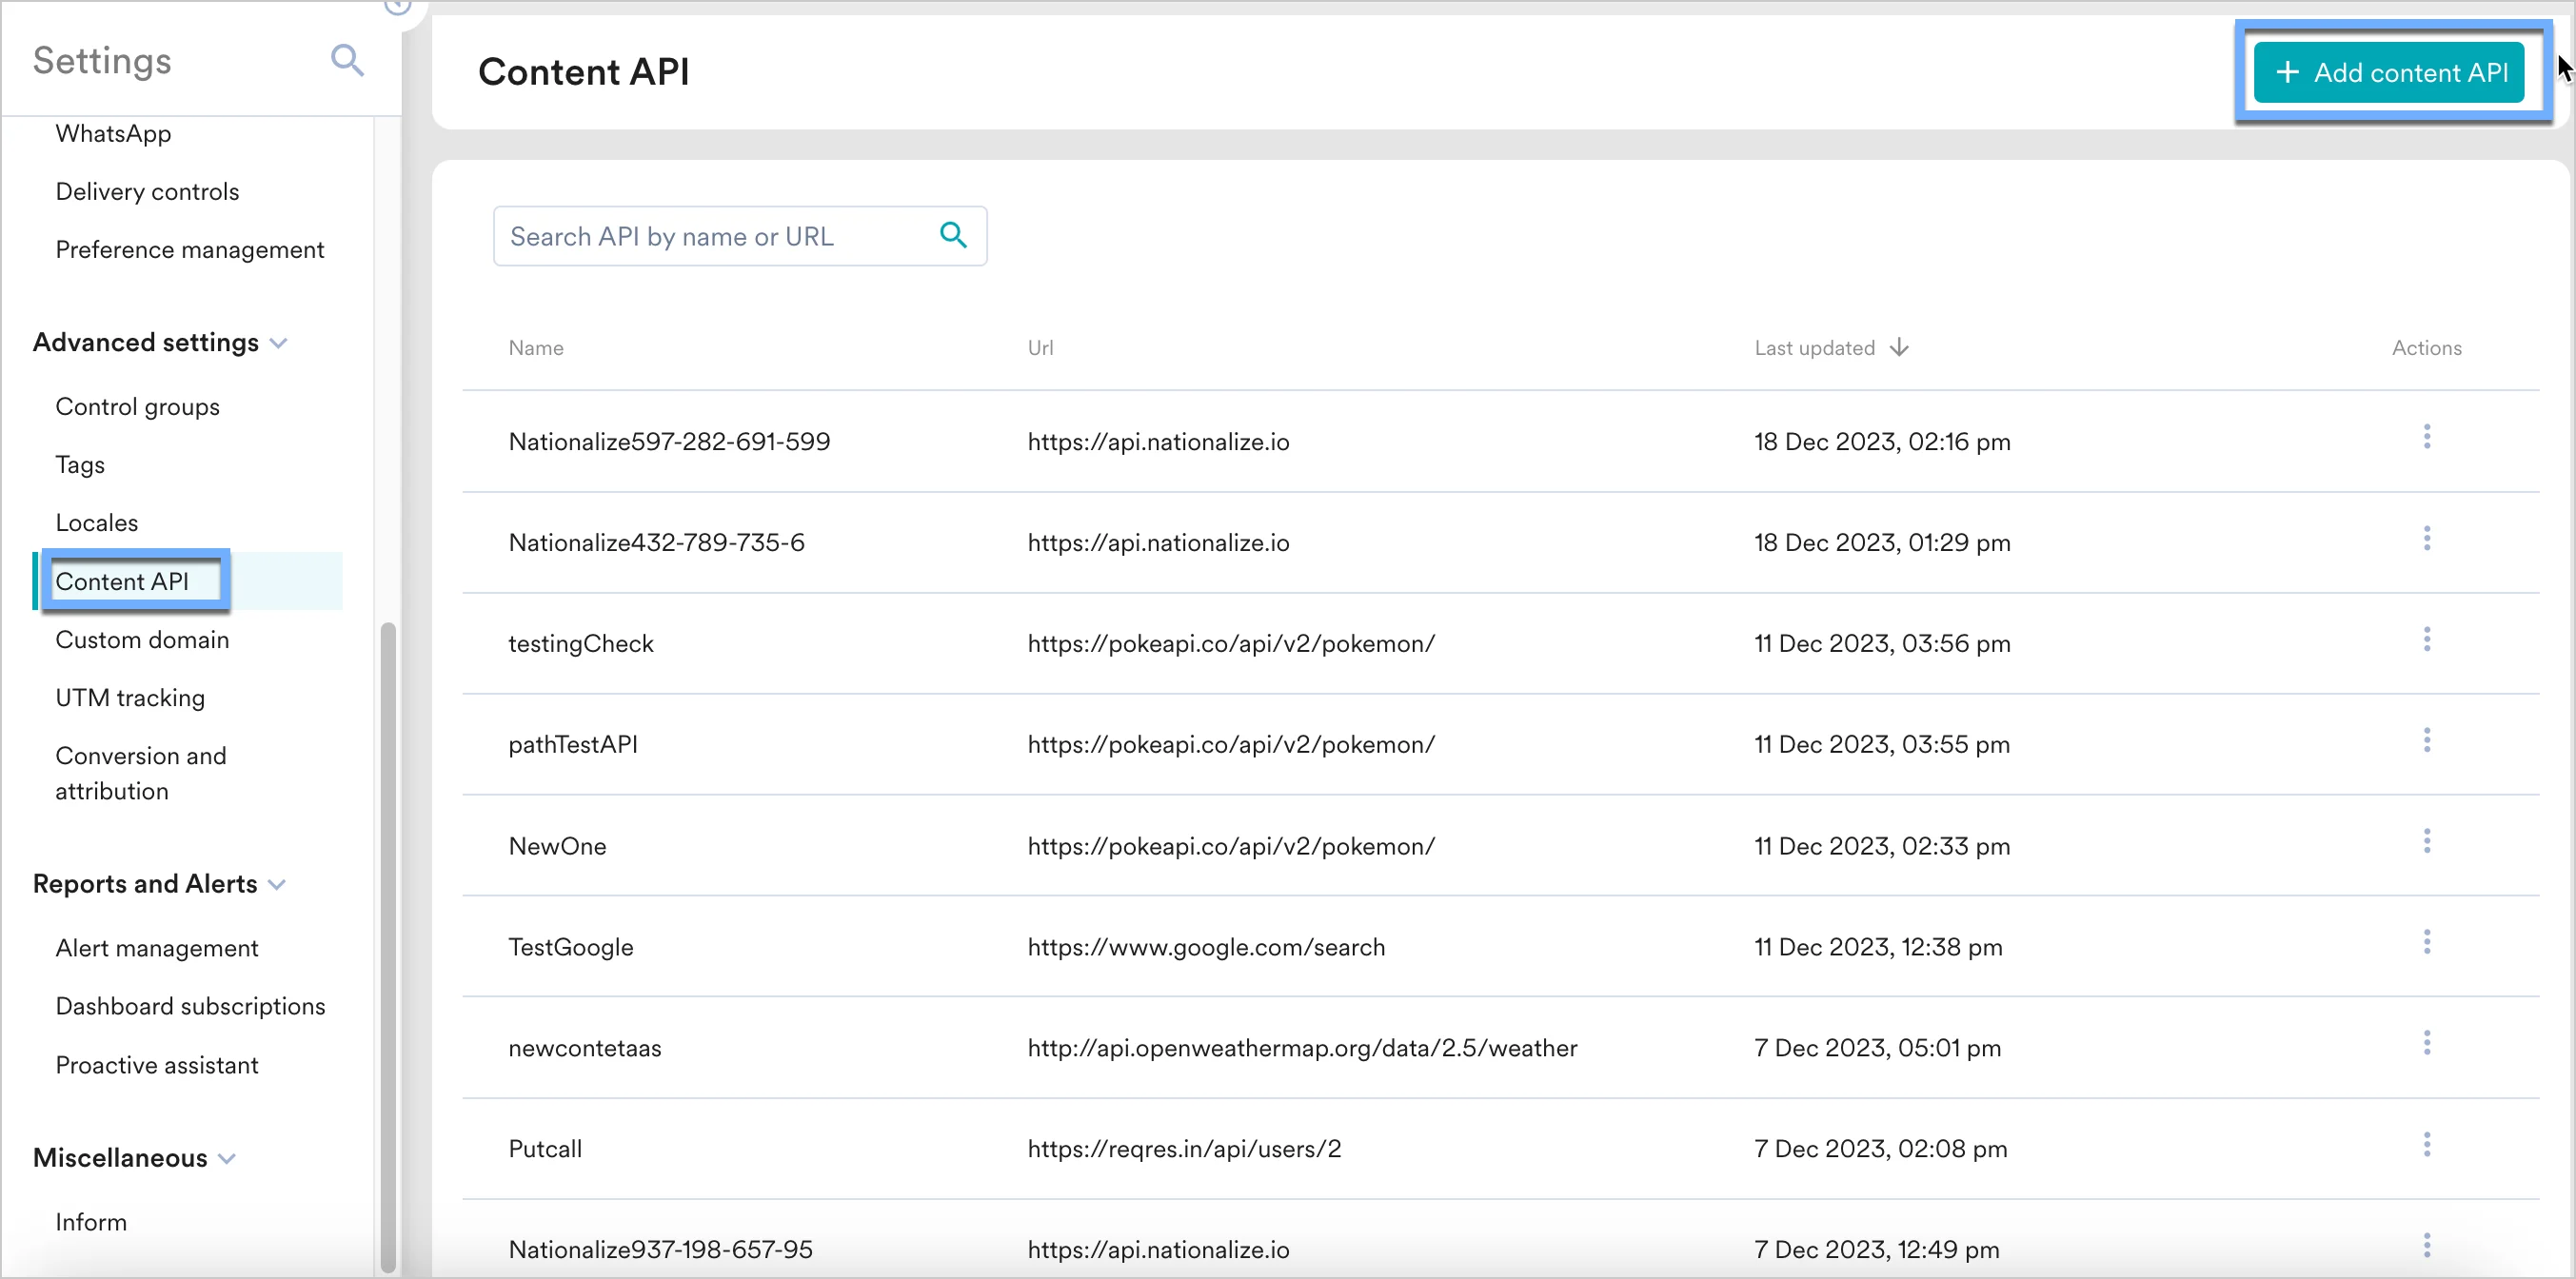
1. Navigate to **Settings** > **Advanced settings** > **Content API**. Click **+ Add content API** in the upper-right corner of the Content API screen.
#### Email campaigns
Insert the Vizard magic link URL directly in your email templates.
## Option 2: Use personalized URLs
If you want to reuse your Vizard creative across campaigns, store it as a Content API in MoEngage. After you get your URL using Steps 1 and 2 above, follow the steps below.
### Step 1: Add a Content API on MoEngage
1. Navigate to **Settings** > **Advanced settings** > **Content API**. Click **+ Add content API** in the upper-right corner of the Content API screen.
 2. Add your Vizard API to the endpoint URL. It must be the same URL you copied above.
**API URL**
This URL must be the same as the one copied in the previous step.
**Parameters**
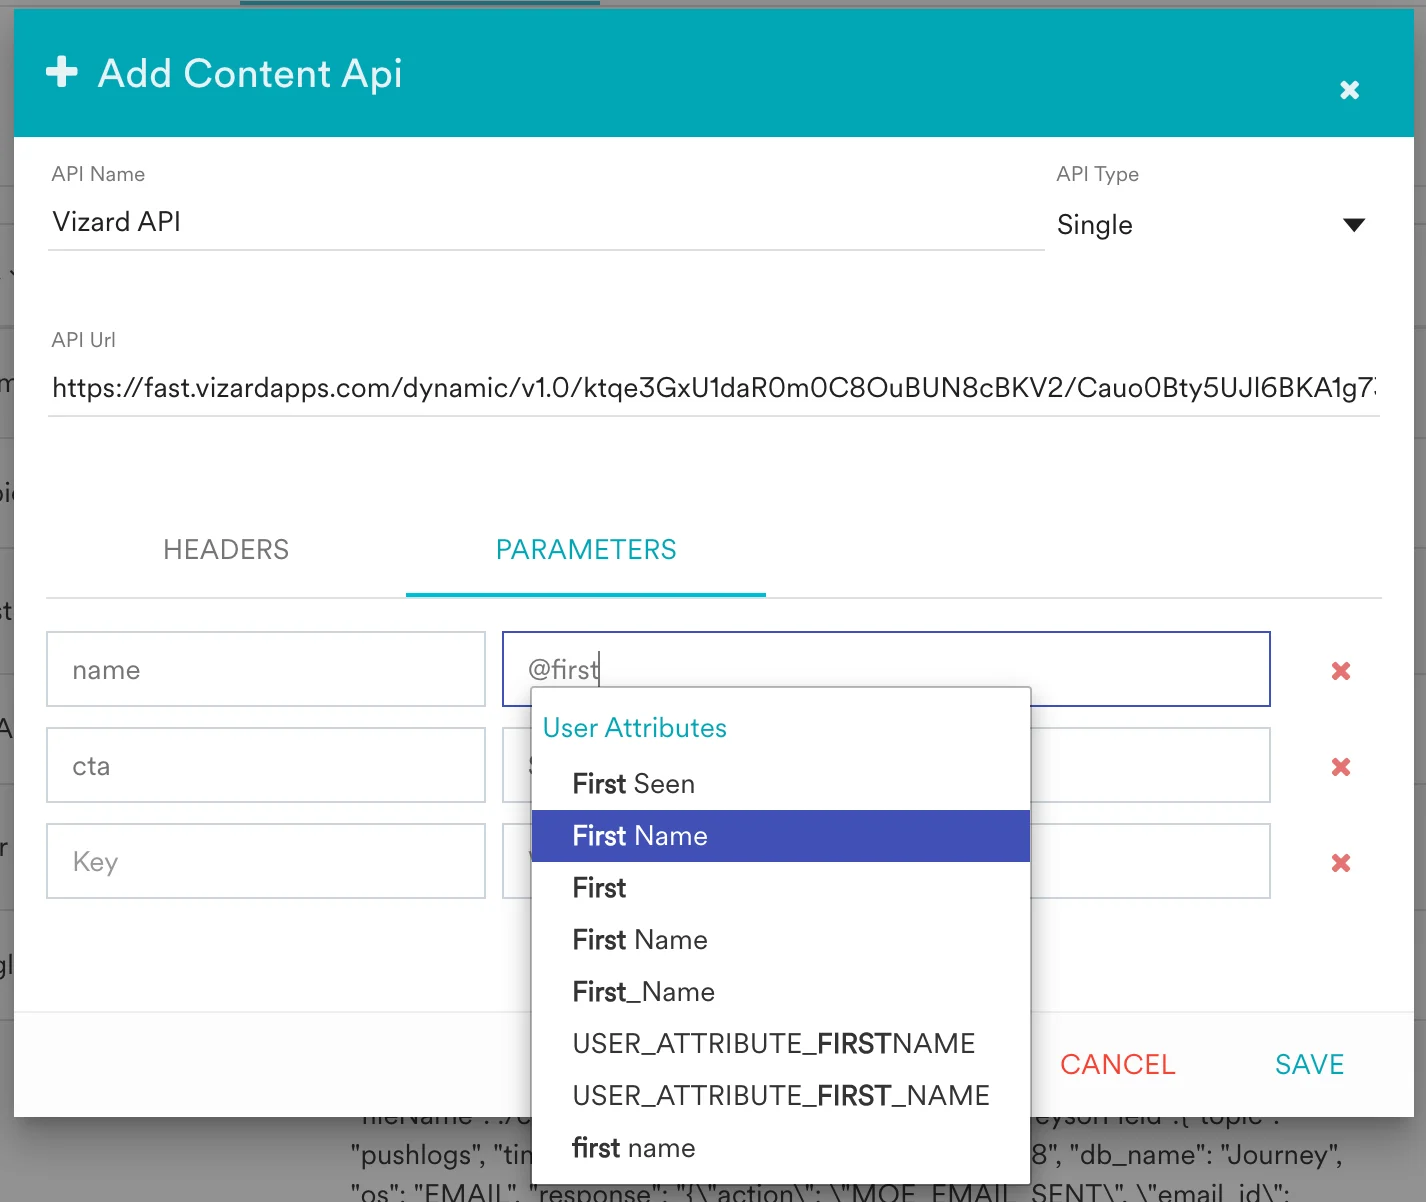
Your parameters auto-populate. Update the values with personalized variables — type `@` and select the variable.
2. Add your Vizard API to the endpoint URL. It must be the same URL you copied above.
**API URL**
This URL must be the same as the one copied in the previous step.
**Parameters**
Your parameters auto-populate. Update the values with personalized variables — type `@` and select the variable.
 3. Click **Test** to validate your API response, then click **Save**.
### Step 2: Use the Content API in MoEngage campaigns
You can now use this Content API in your campaigns. To learn more, refer to [Content APIs](https://www.moengage.com/docs/user-guide/campaigns-and-channels/getting-started/campaign-content/content-apis).
1. On step 2 of campaign creation, type `@`.
2. In the personalization pop-up, select the Vizard Content API you configured in Step 1.
3. Use the [MoEngage Templating Language](https://www.moengage.com/docs/user-guide/campaigns-and-channels/getting-started/message-personalization/jinja-templating-language) to parse the API response and use the content in your campaign.
3. Click **Test** to validate your API response, then click **Save**.
### Step 2: Use the Content API in MoEngage campaigns
You can now use this Content API in your campaigns. To learn more, refer to [Content APIs](https://www.moengage.com/docs/user-guide/campaigns-and-channels/getting-started/campaign-content/content-apis).
1. On step 2 of campaign creation, type `@`.
2. In the personalization pop-up, select the Vizard Content API you configured in Step 1.
3. Use the [MoEngage Templating Language](https://www.moengage.com/docs/user-guide/campaigns-and-channels/getting-started/message-personalization/jinja-templating-language) to parse the API response and use the content in your campaign.