> ## Documentation Index
> Fetch the complete documentation index at: https://moengage.com/docs/llms.txt
> Use this file to discover all available pages before exploring further.
# Use MoEngage as a trigger
> Use MoEngage Connector Campaigns as a Zapier trigger to fire workflows on user uninstalls, custom events, and other behavior signals across 5,000+ Zapier apps.
## Introduction
[Zapier](https://zapier.com/) is an online platform that helps you automate workflows by connecting your apps and services you use. Using the MoEngage and Zapier integration, you can create custom workflow automations for more than 5,000+ apps on Zapier.
With MoEngage's [Connector Campaigns](https://www.moengage.com/docs/user-guide/campaigns-and-channels/connectors/create/create-a-connector-campaign), you can use MoEngage to trigger your Zapier workflows for multitude of purposes.
## Use cases
Some ideas to get you started:
1. Post Slack message for each uninstall event in MoEngage.
2. When a particular event occurs in MoEngage, add data to a Google Sheet.
3. Create a new ticket in Zendesk for each user when they perform a custom event in MoEngage.
4. When a user performs an event in MoEngage, add them to a cohort in MoEngage.
**Prerequisites**
Ensure you have access to your Zapier account and have connected it to your MoEngage account. You can [follow the steps here to connect Zapier to MoEngage](/docs/partner-guide/data-and-analytics/workflow-automation/zapier/overview#connecting-zapier-to-moengage).
## Integration
The use case takes advantage of MoEngage [Connector Campaigns](https://www.moengage.com/docs/user-guide/campaigns-and-channels/connectors/create/create-a-connector-campaign). For this tutorial, we will pick up Use Case #1: Post Slack message for each uninstall in MoEngage. On your [Zapier Dashboard](https://zapier.com/app/dashboard), click on "+ Create Zap" on the top-left corner.
### Step 1: Select Webhook by Zapier as the trigger app
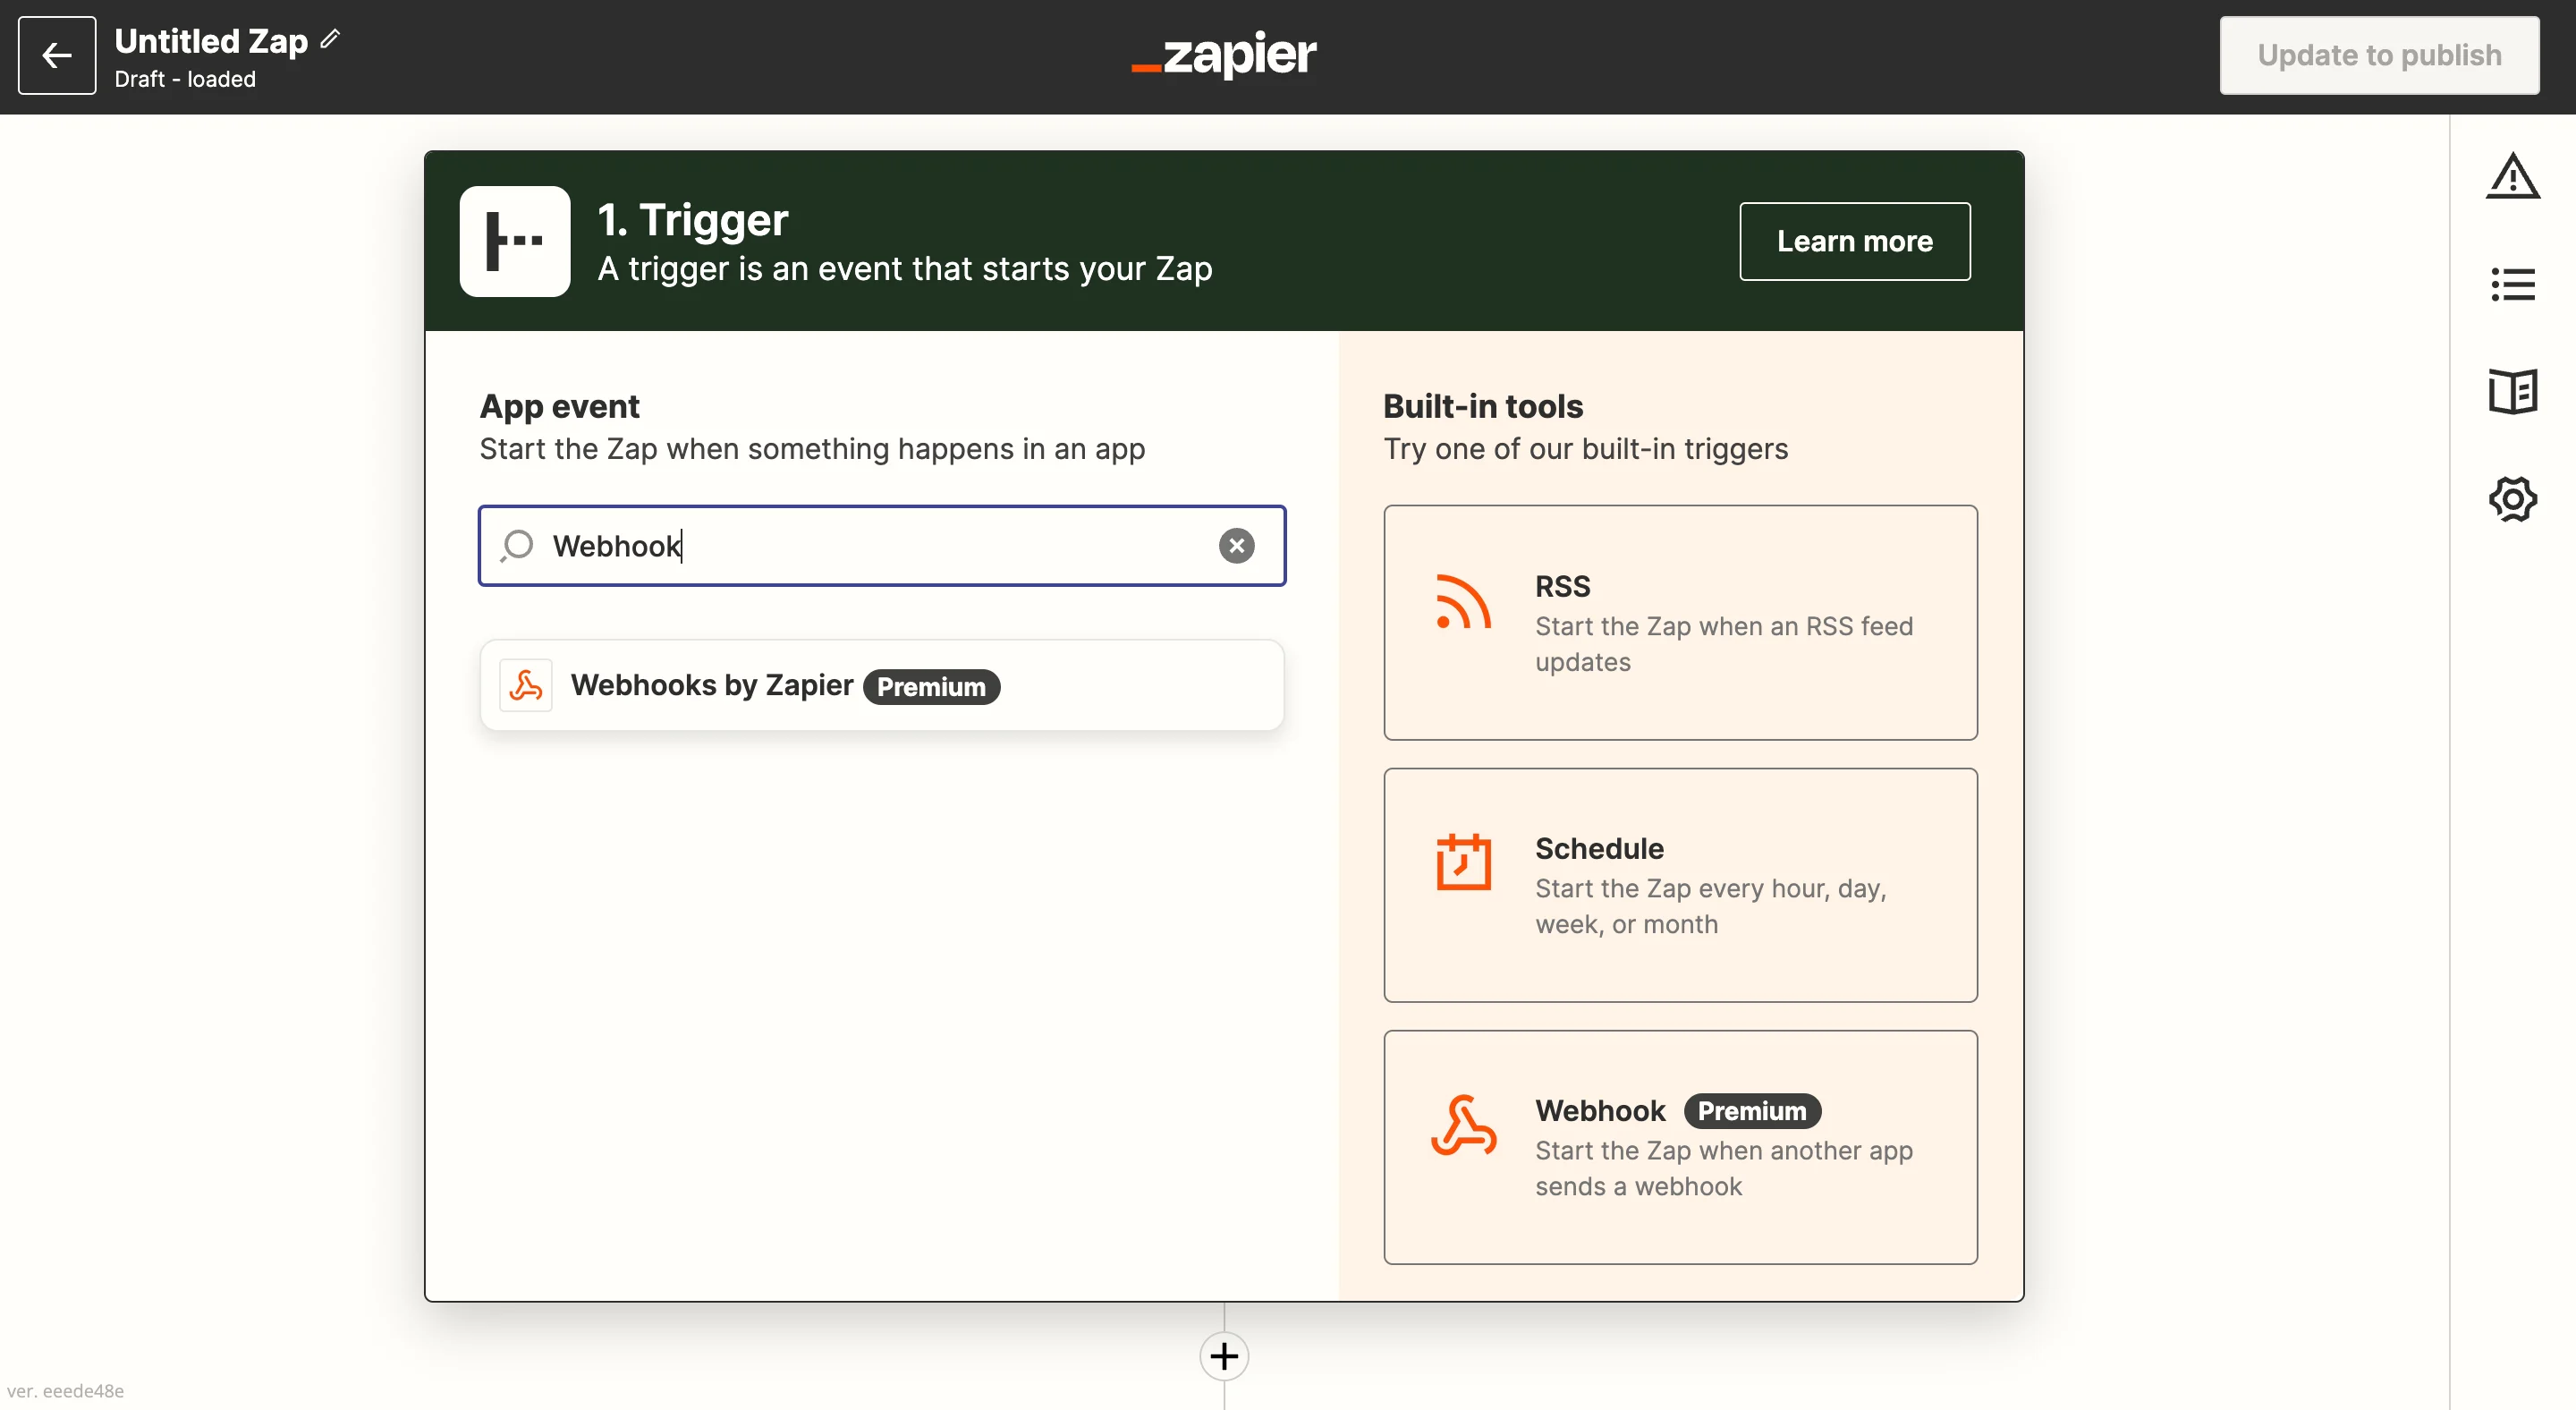
For the trigger, type "Webhook by Zapier" and select it. This will be the trigger that will start your zap.
 ### Step 2: Setup the trigger app
1. Select the event from the dropdown: "Catch Hook". Click continue.
2. Under the "Set up trigger" step, leave the "Pick off a Child Key" blank. Click continue.
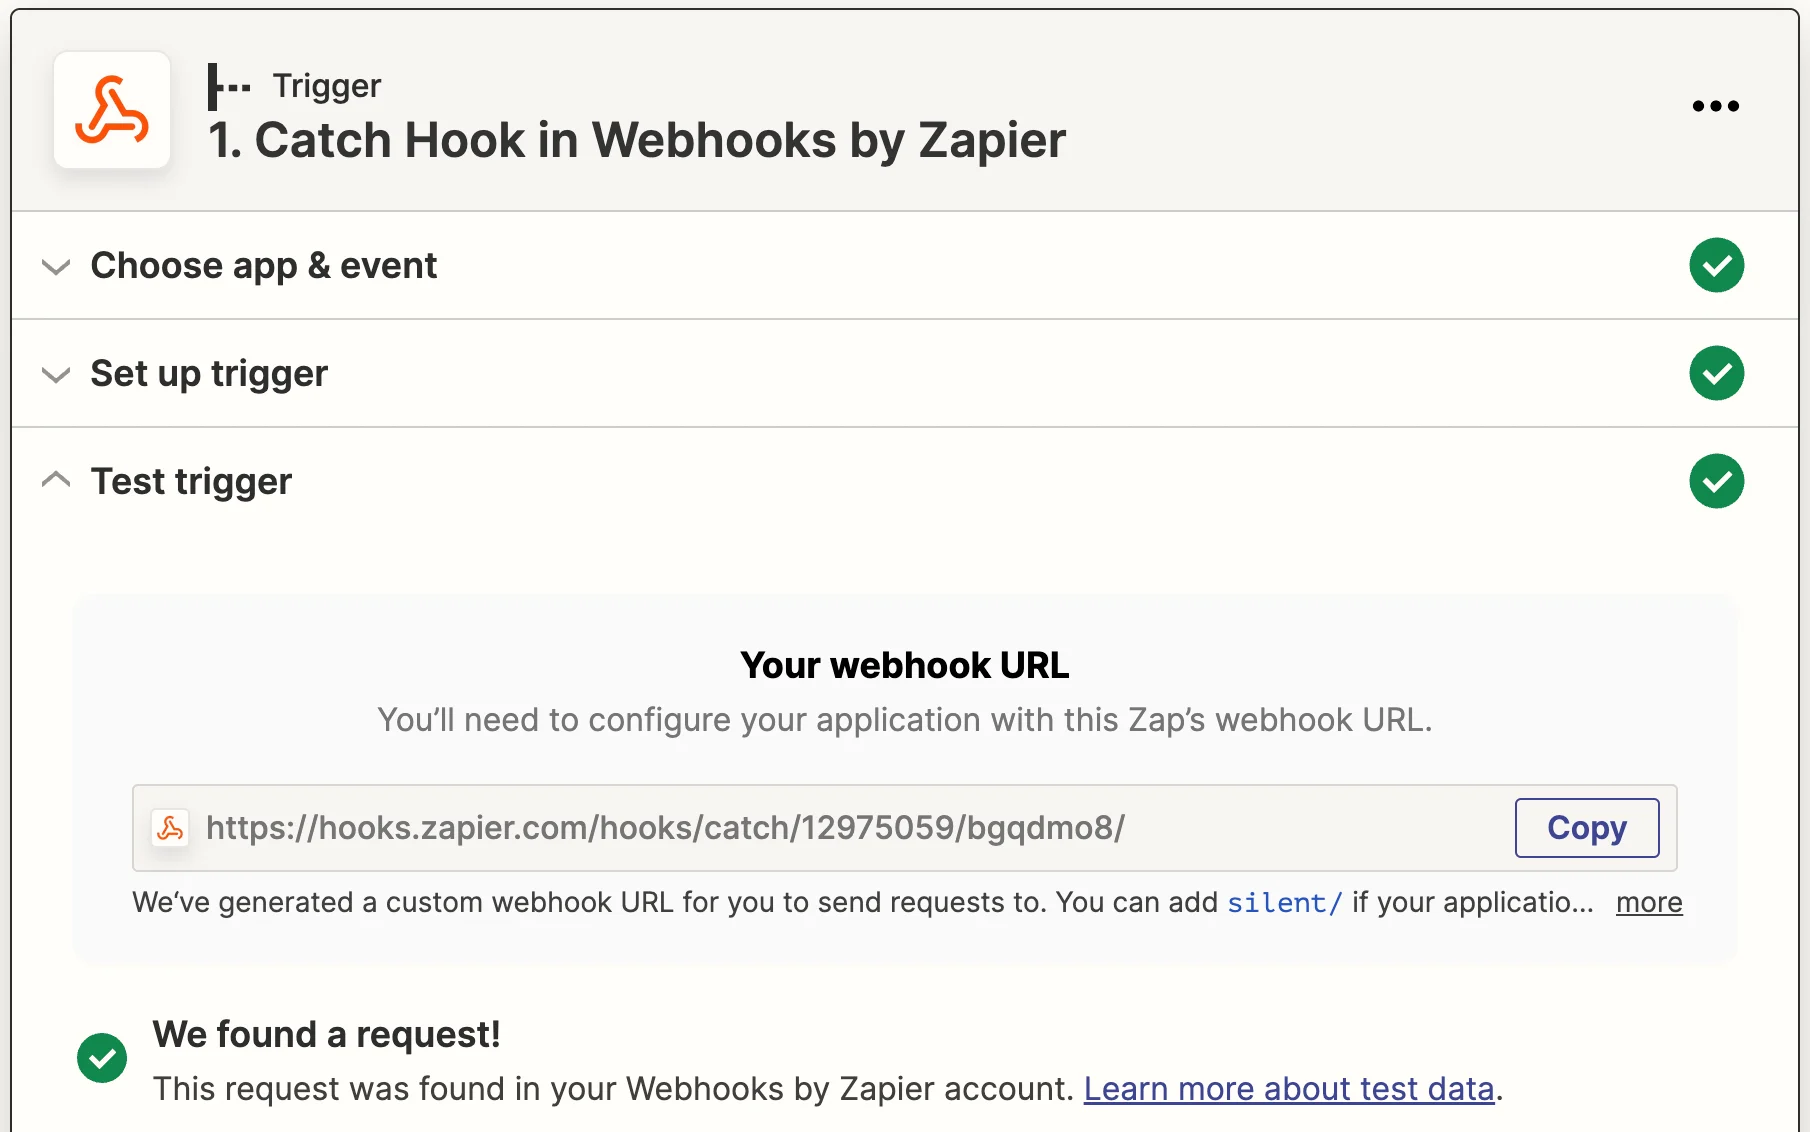
3. You will now be shown your unique Webhook URL.
### Step 2: Setup the trigger app
1. Select the event from the dropdown: "Catch Hook". Click continue.
2. Under the "Set up trigger" step, leave the "Pick off a Child Key" blank. Click continue.
3. You will now be shown your unique Webhook URL.
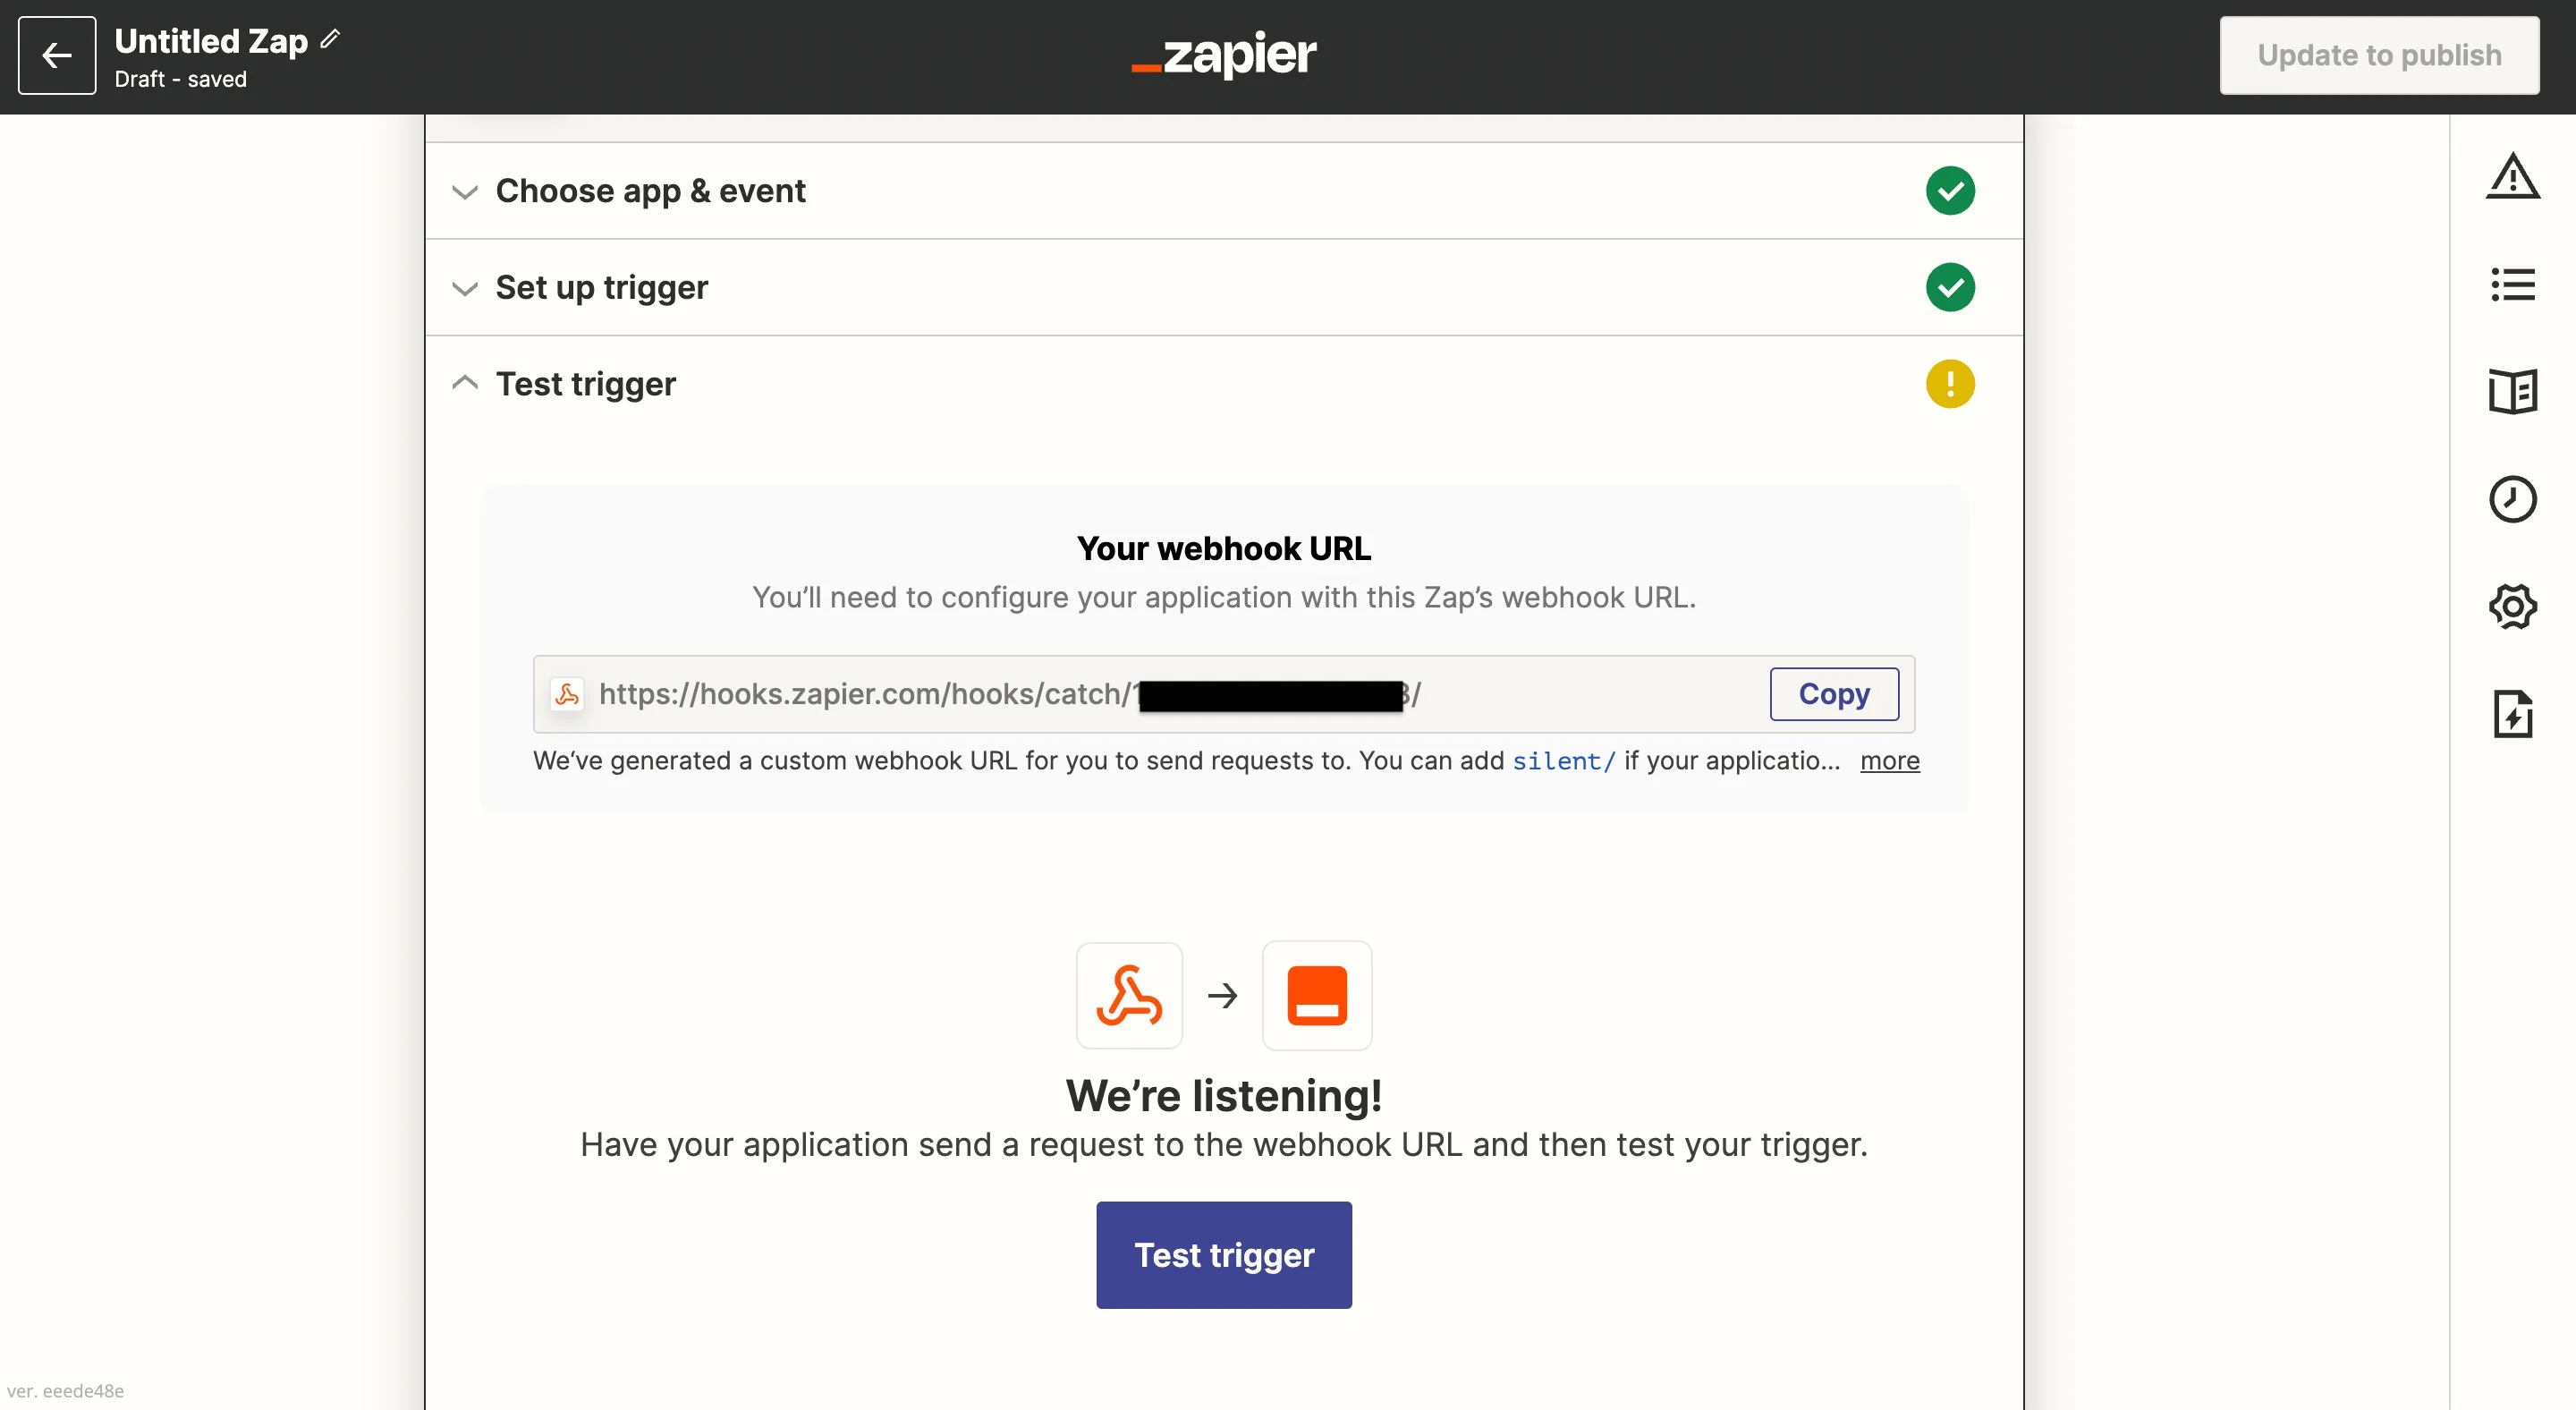 4. Keep this URL handy. You will need this to setup Connector Campaigns.
### Step 3: Setup Connector Campaign in MoEngage
1. Navigate to MoEngage Dashboard.
2. Use any one of the following options:
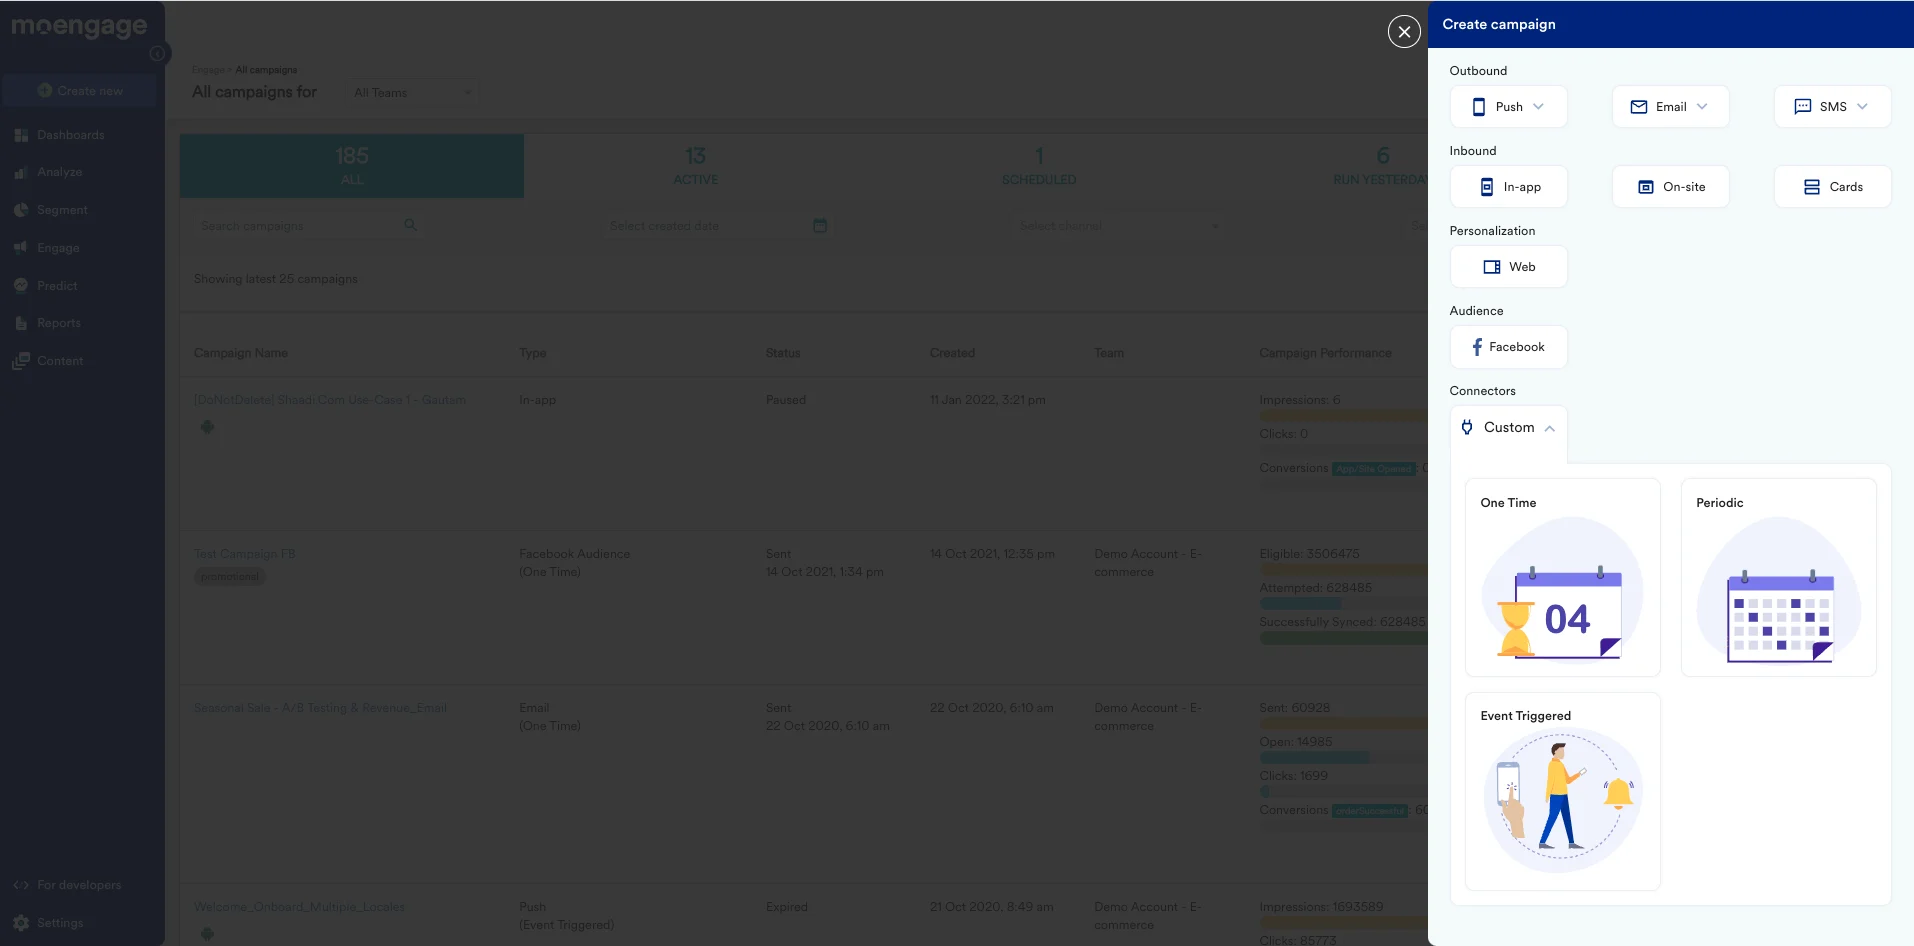
1. On the **All Campaigns** page, click **Create Campaign**. The Create Campaign page is displayed.
4. Keep this URL handy. You will need this to setup Connector Campaigns.
### Step 3: Setup Connector Campaign in MoEngage
1. Navigate to MoEngage Dashboard.
2. Use any one of the following options:
1. On the **All Campaigns** page, click **Create Campaign**. The Create Campaign page is displayed.
 2. Click **Create New > Campaign**. The Create Campaign page is displayed.
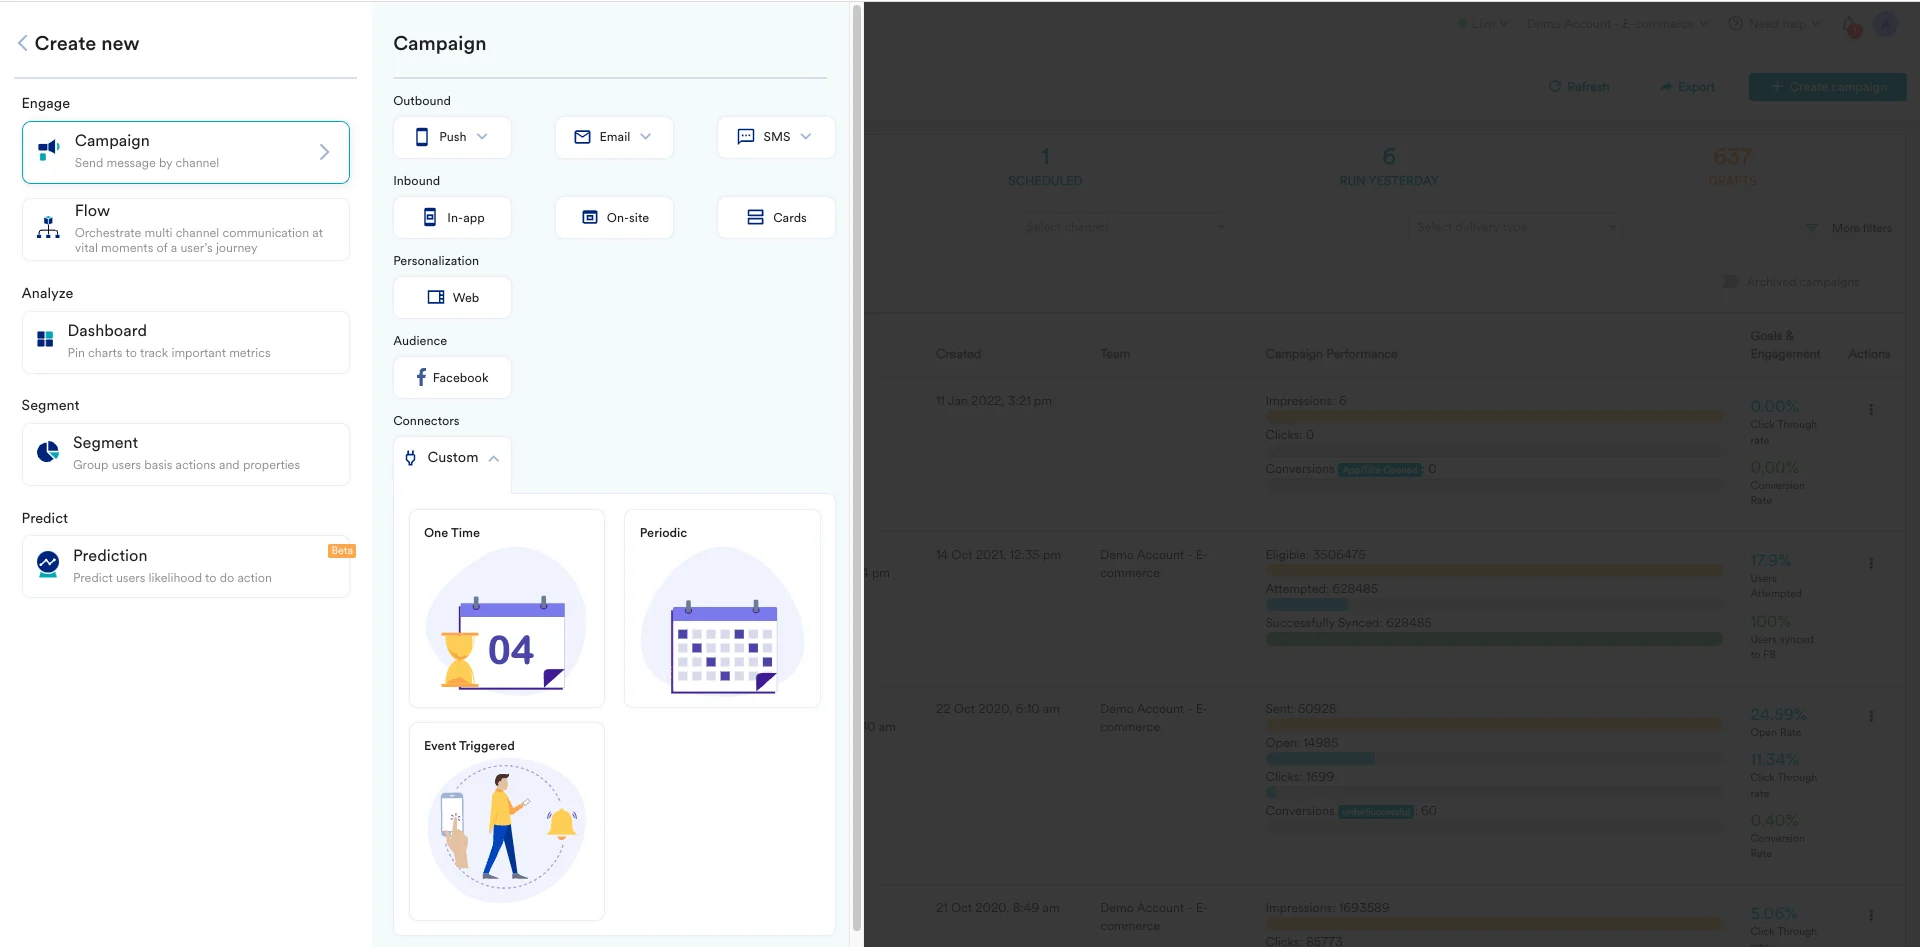 3. Click **Custom** under Connectors.
4. For the campaign delivery types, choose "Event-Triggered".
* For more information about delivery types, refer to [Delivery Types](https://www.moengage.com/docs/user-guide/campaigns-and-channels/getting-started/introduction/delivery-types-moengage-channels).
5. On the next screen, give your Campaign a name, and select the Criteria as "Device Uninstall".
6. For trigger, choose "immediately".
3. Click **Custom** under Connectors.
4. For the campaign delivery types, choose "Event-Triggered".
* For more information about delivery types, refer to [Delivery Types](https://www.moengage.com/docs/user-guide/campaigns-and-channels/getting-started/introduction/delivery-types-moengage-channels).
5. On the next screen, give your Campaign a name, and select the Criteria as "Device Uninstall".
6. For trigger, choose "immediately".
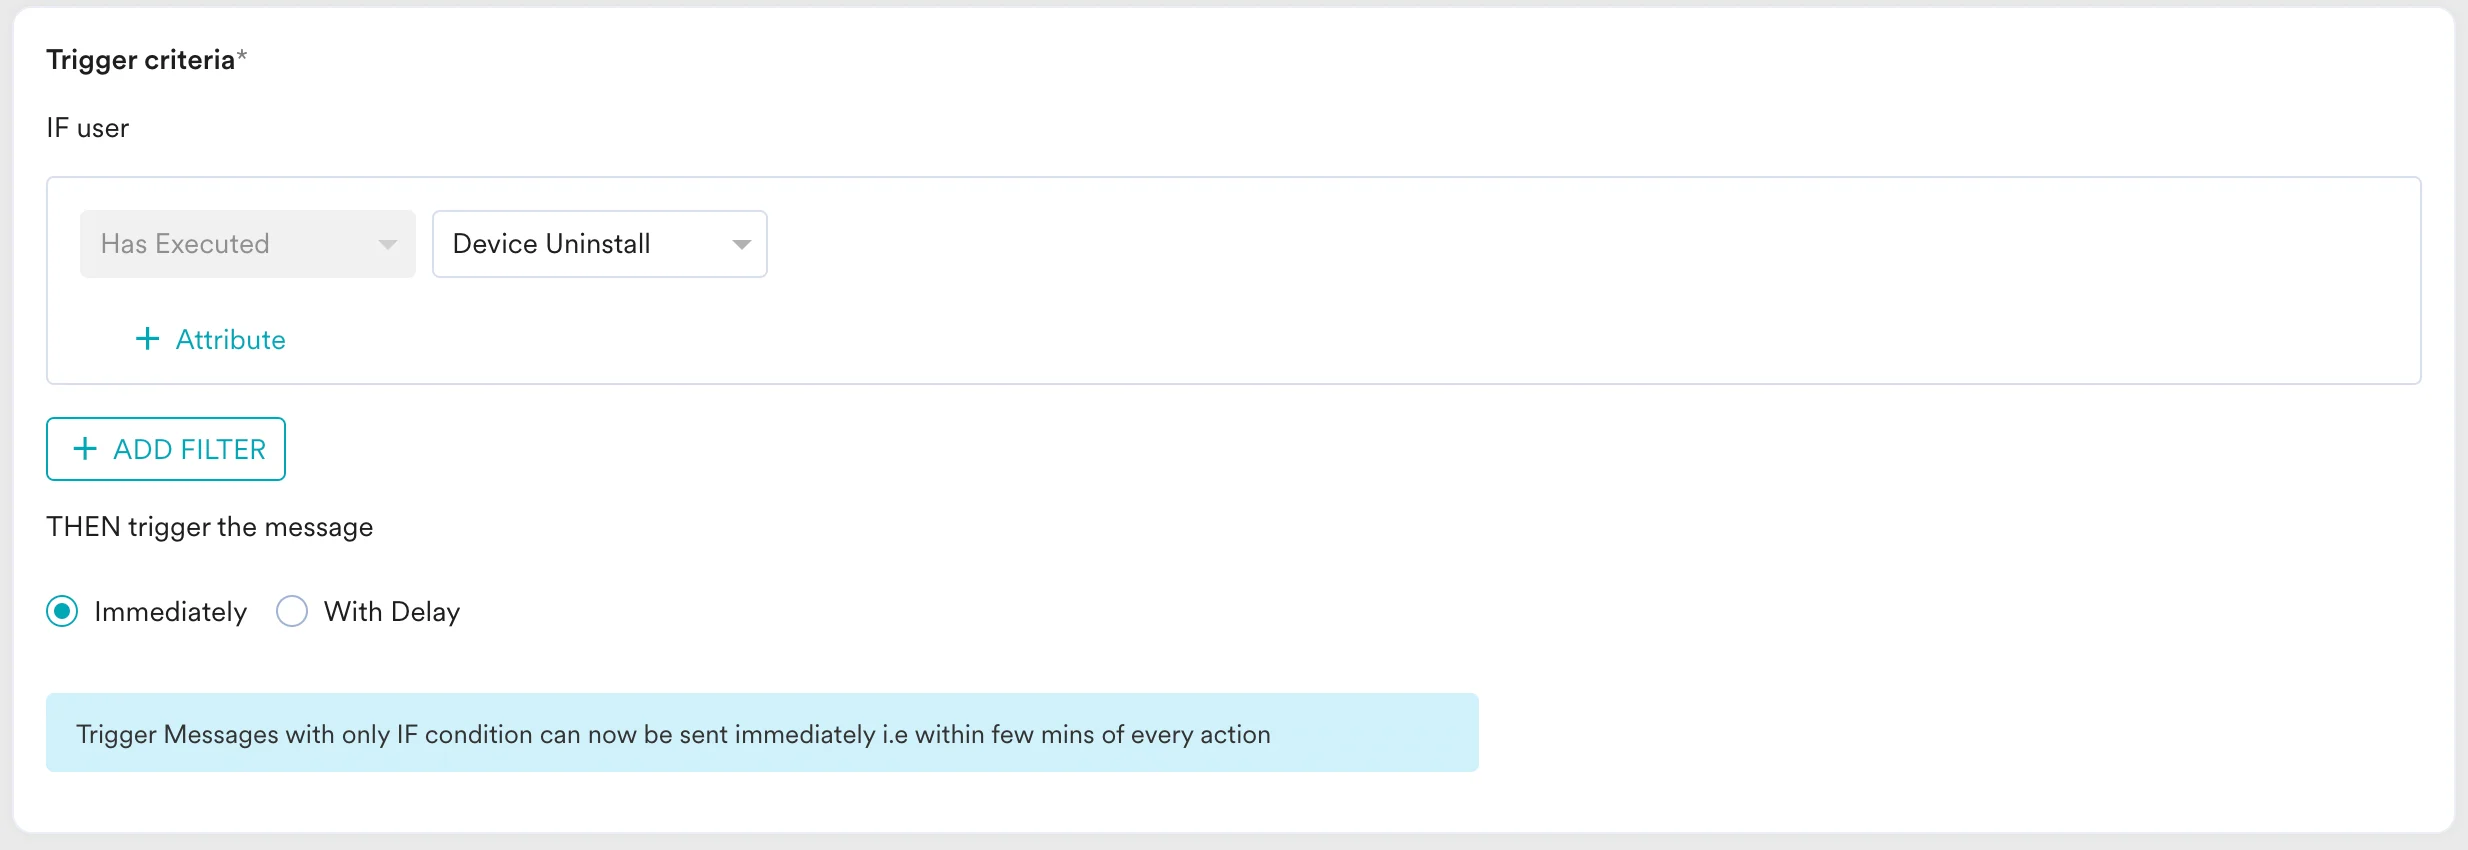 7. For audience, let us choose "All users" for this use case. Click "next" when satisfied.
8. On the content screen, we will define our payload and webhook URL we got from the previous step.
9. Choose method as "POST" (know more about [Webhooks on Zapier](https://zapier.com/help/create/code-webhooks/trigger-zaps-from-webhooks)).
10. Enter the webhook URL you copied earlier.
11. Define the headers and parameters as per your requirements. For this use case, we will just define our payload body. (You can type @ to insert personalised values as well.)
7. For audience, let us choose "All users" for this use case. Click "next" when satisfied.
8. On the content screen, we will define our payload and webhook URL we got from the previous step.
9. Choose method as "POST" (know more about [Webhooks on Zapier](https://zapier.com/help/create/code-webhooks/trigger-zaps-from-webhooks)).
10. Enter the webhook URL you copied earlier.
11. Define the headers and parameters as per your requirements. For this use case, we will just define our payload body. (You can type @ to insert personalised values as well.)
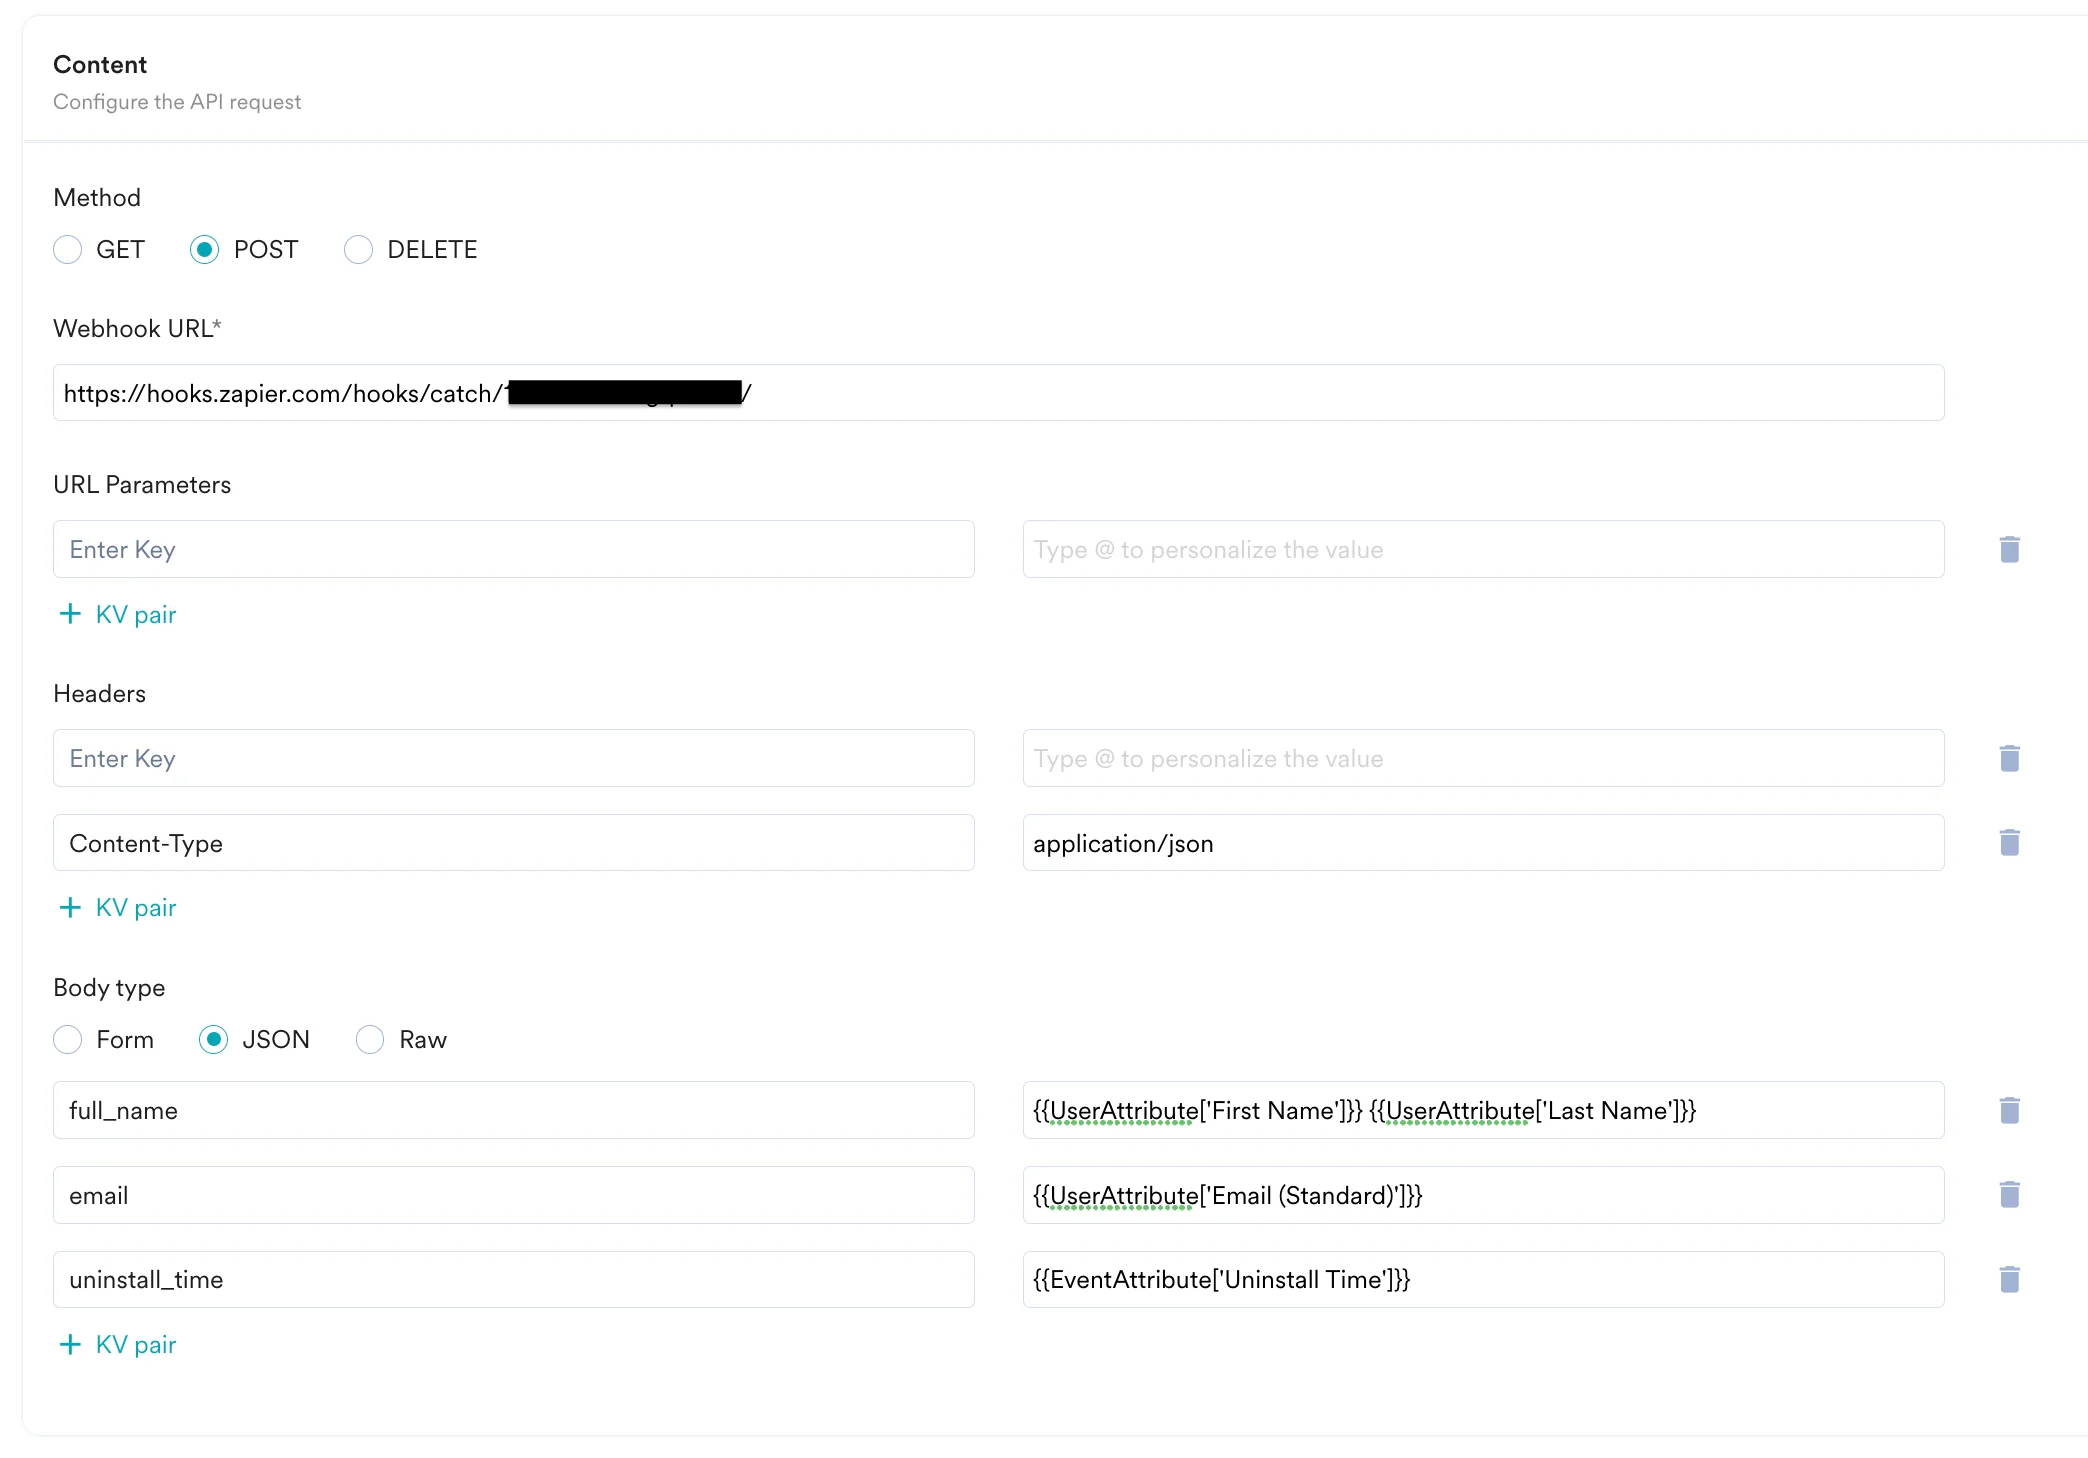 12. Now you need to test this webhook. Scroll down and enter a test user's data and click on "test".
13. You should see a new modal saying the test was successful.
12. Now you need to test this webhook. Scroll down and enter a test user's data and click on "test".
13. You should see a new modal saying the test was successful.
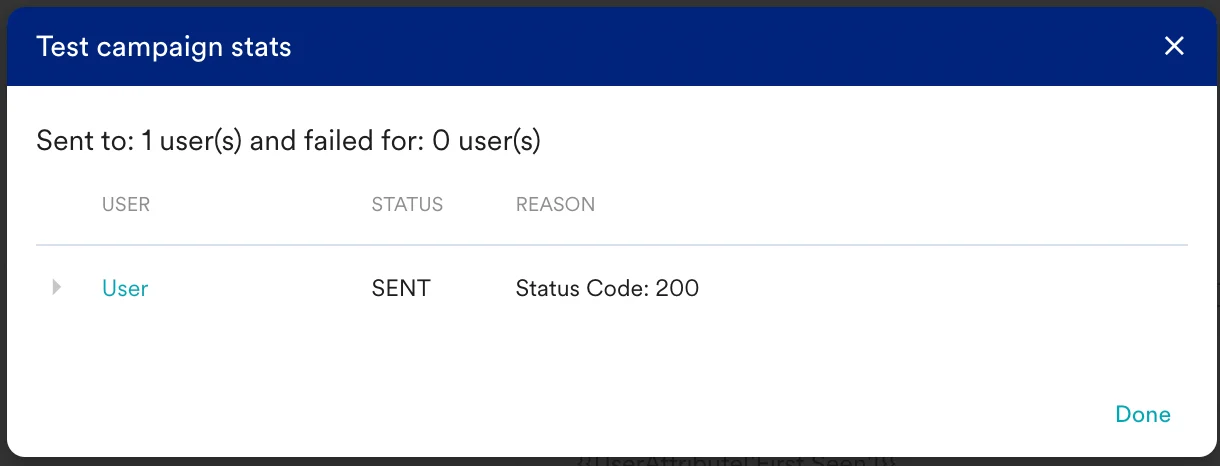 14. Now go back to the Zapier editor.
### Step 4: Test webhook setup on Zapier
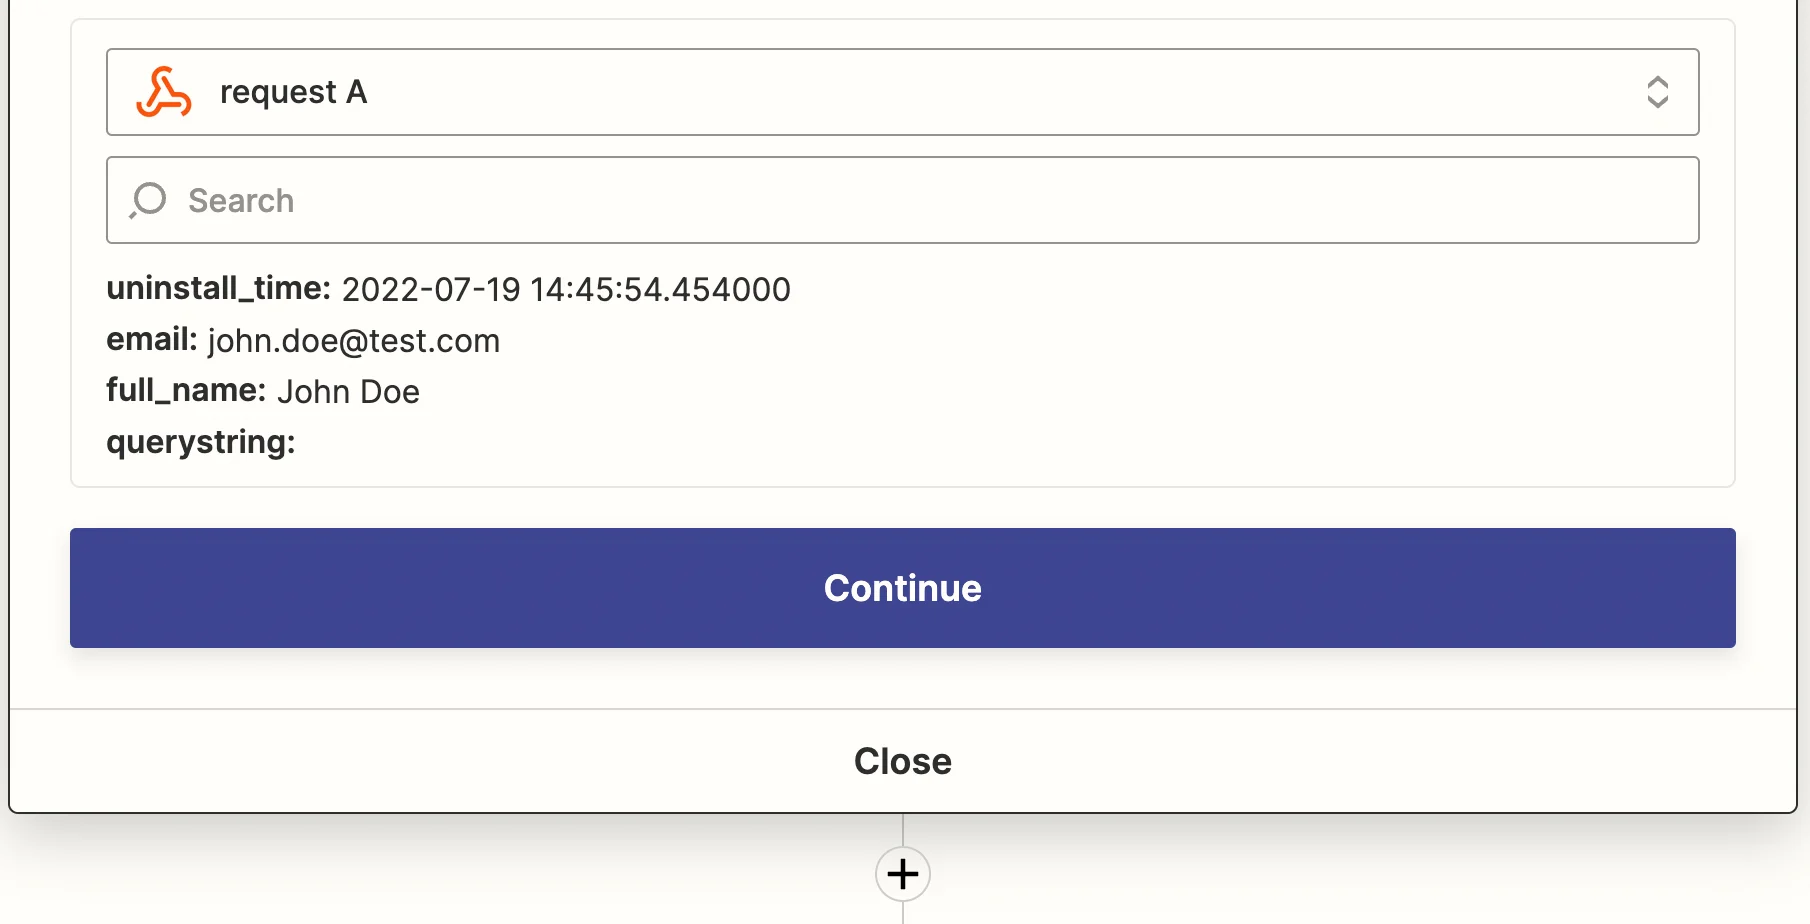
1. Click on "Test Trigger" to pull in the test campaign you just sent in MoEngage.
2. Once you are satisfied with this data, you can publish the Connector Campaign on MoEngage.
3. Back in Zapier, click continue to add the next step in your workflow.
14. Now go back to the Zapier editor.
### Step 4: Test webhook setup on Zapier
1. Click on "Test Trigger" to pull in the test campaign you just sent in MoEngage.
2. Once you are satisfied with this data, you can publish the Connector Campaign on MoEngage.
3. Back in Zapier, click continue to add the next step in your workflow.
 ### Step 5: Add Slack as the action app
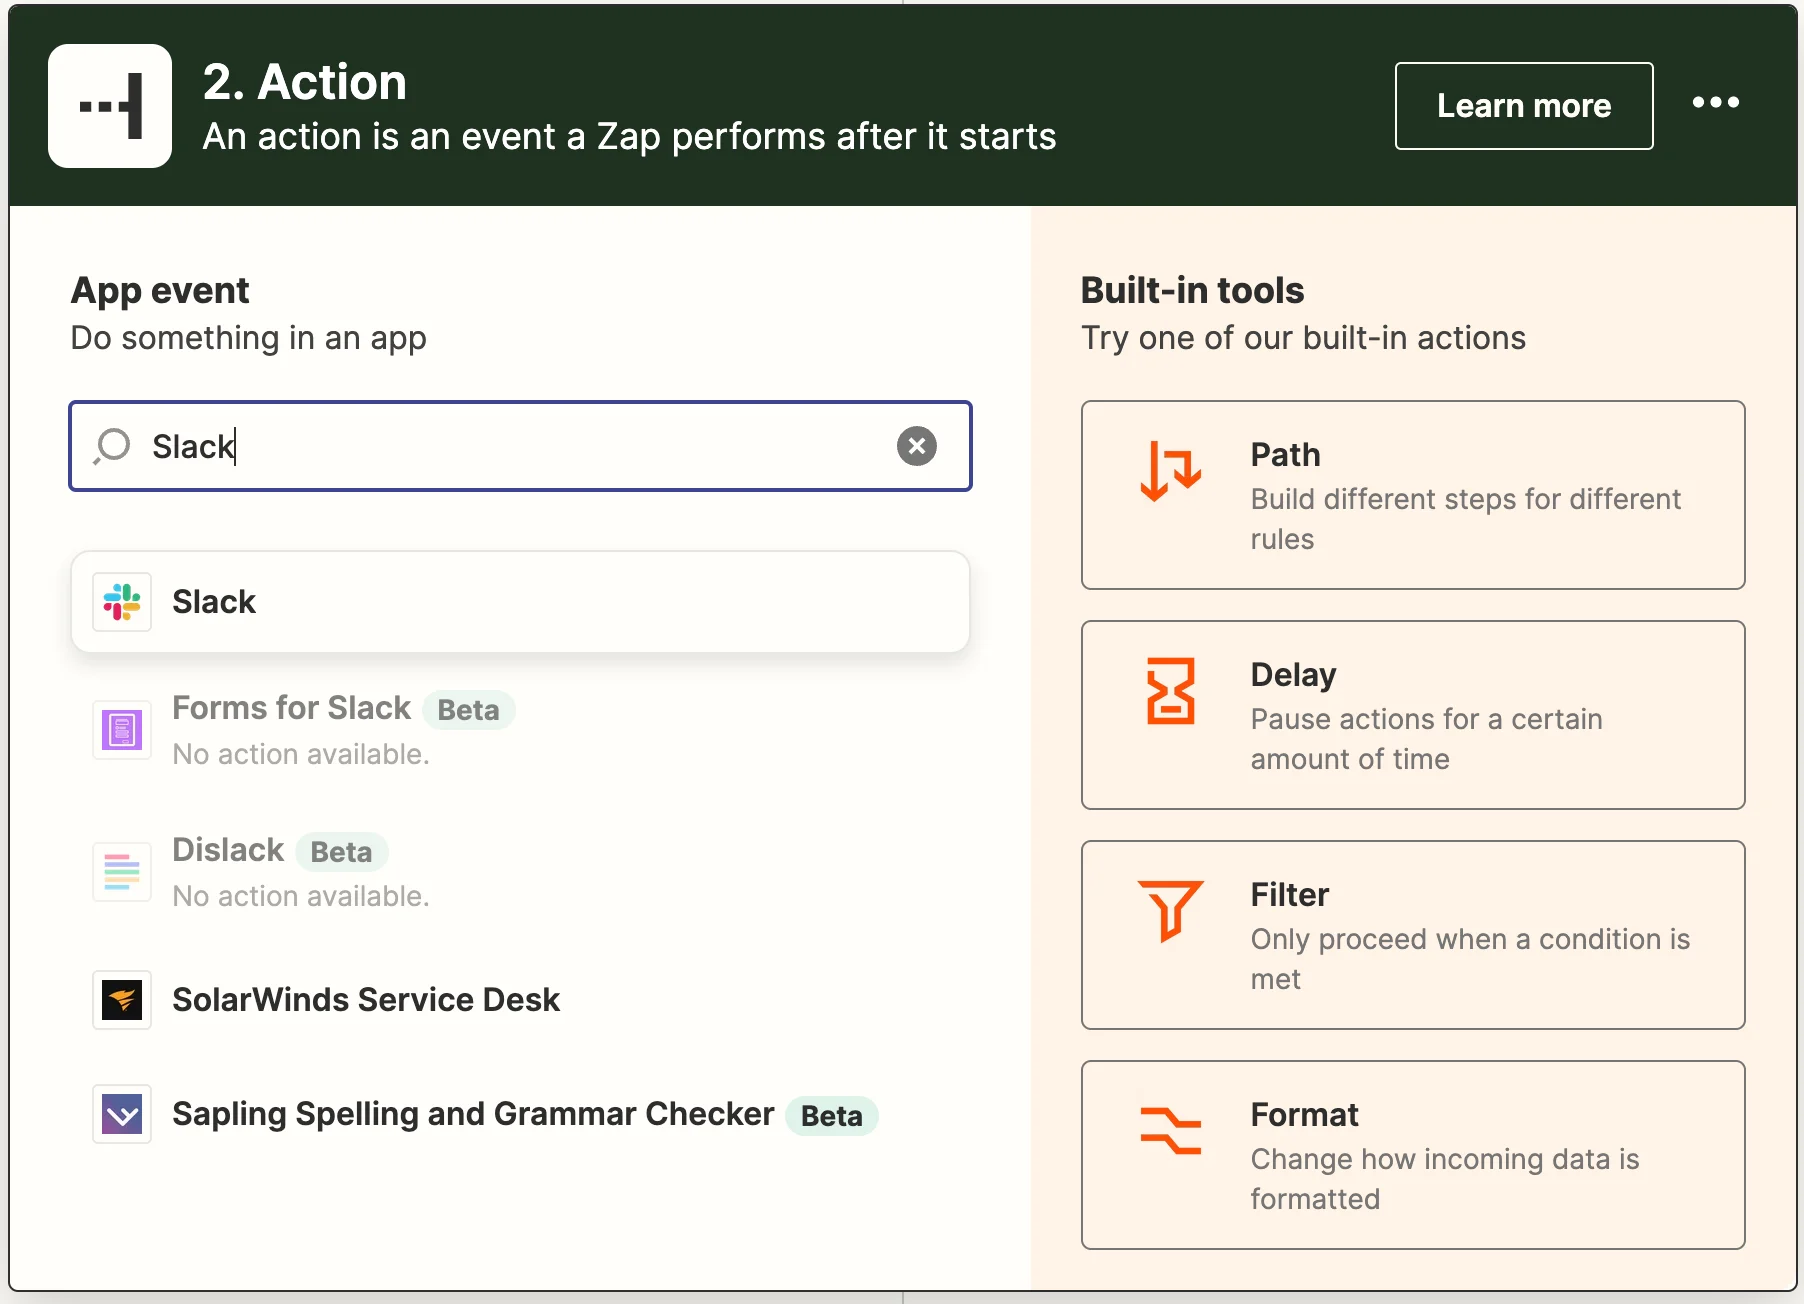
Click on "+" to add a new step. Then, search for "Slack" from the apps and select it.
### Step 5: Add Slack as the action app
Click on "+" to add a new step. Then, search for "Slack" from the apps and select it.
 ### Step 6: Setup Slack action
1. From the event dropdown, select: "Send Direct Message". Click continue.
2. Now you need to connect to Slack. Once you are done, choose the connected account from the dropdown and click continue.
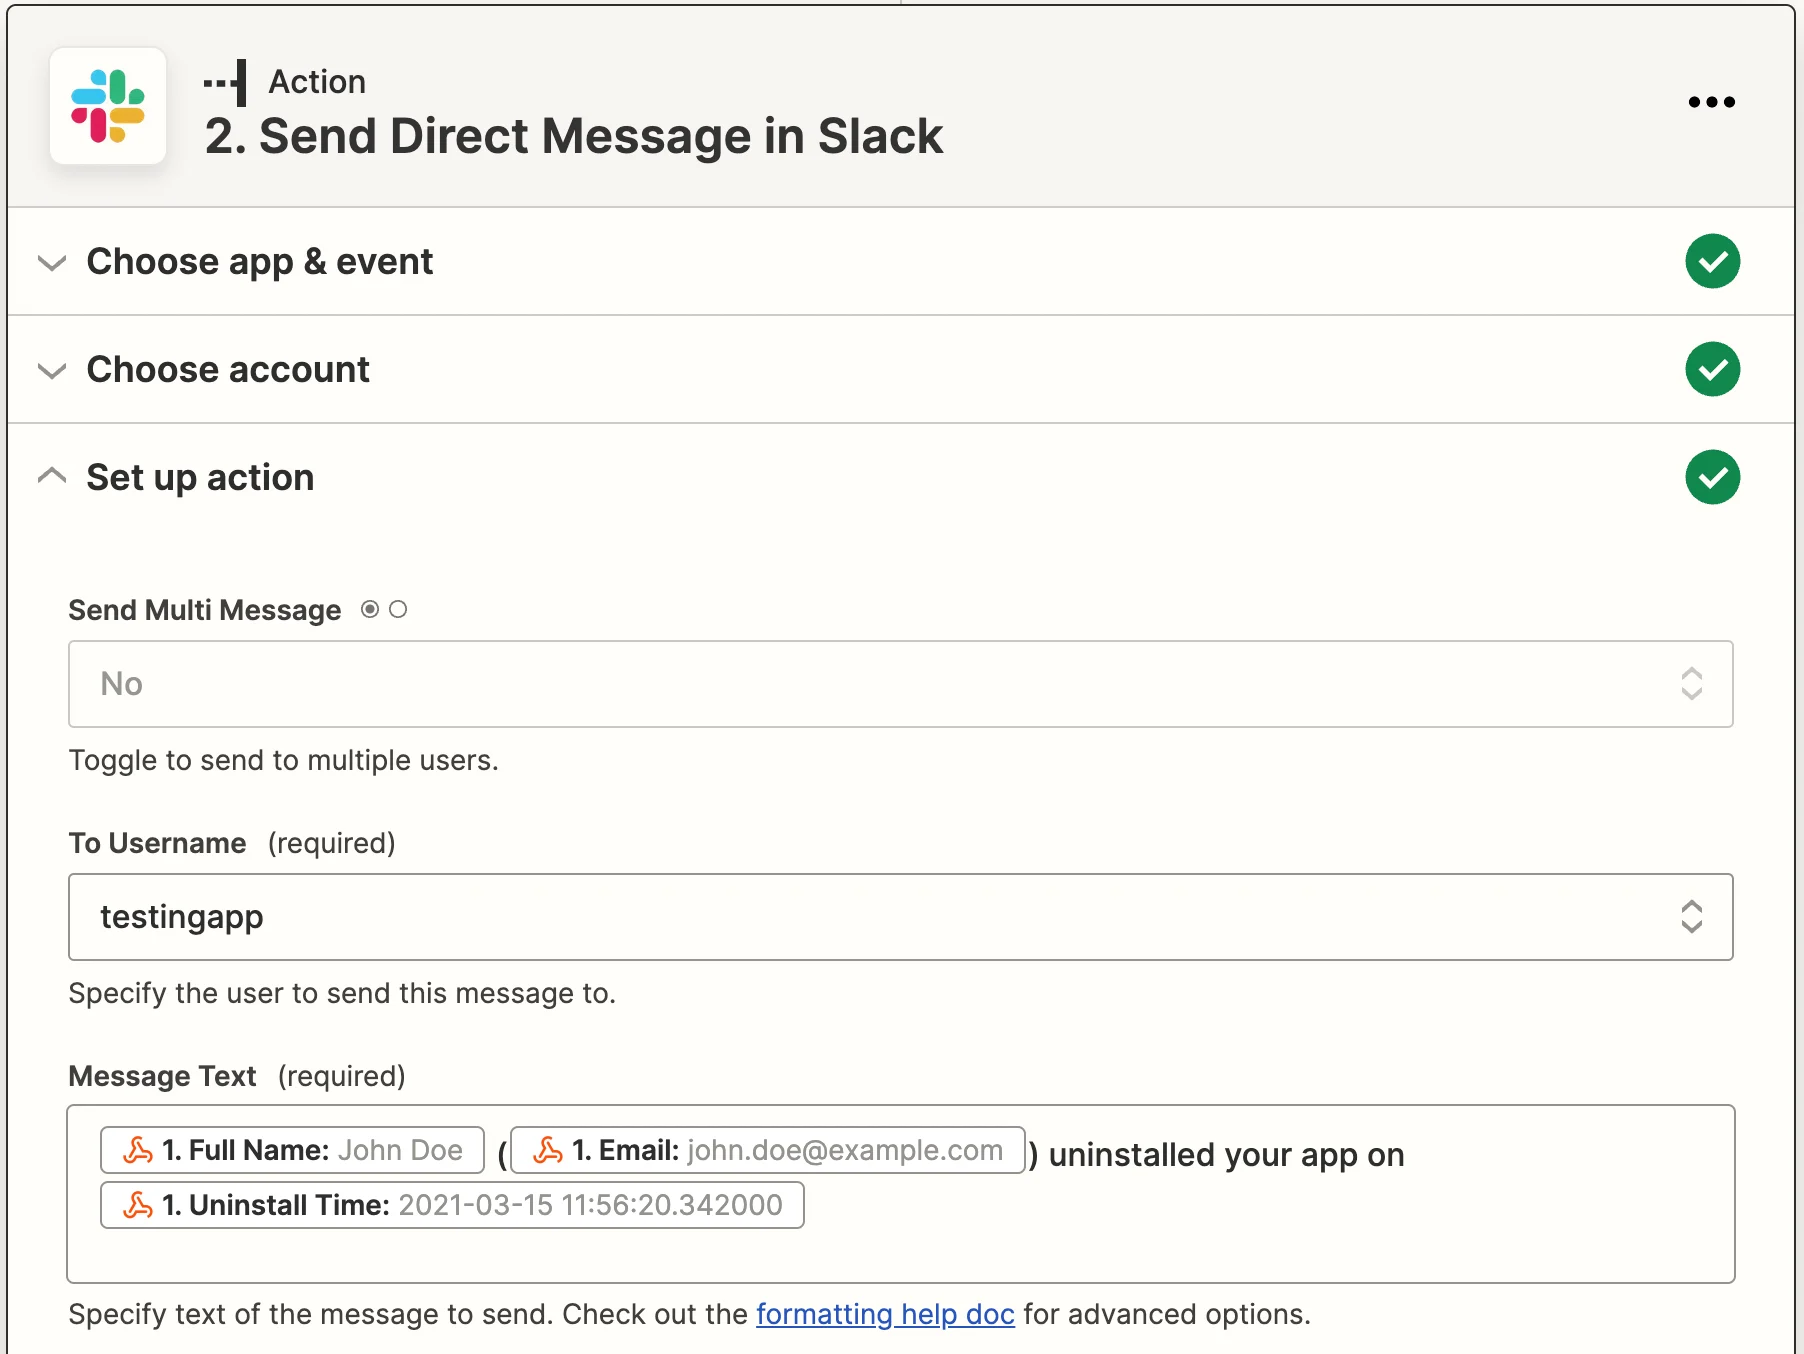
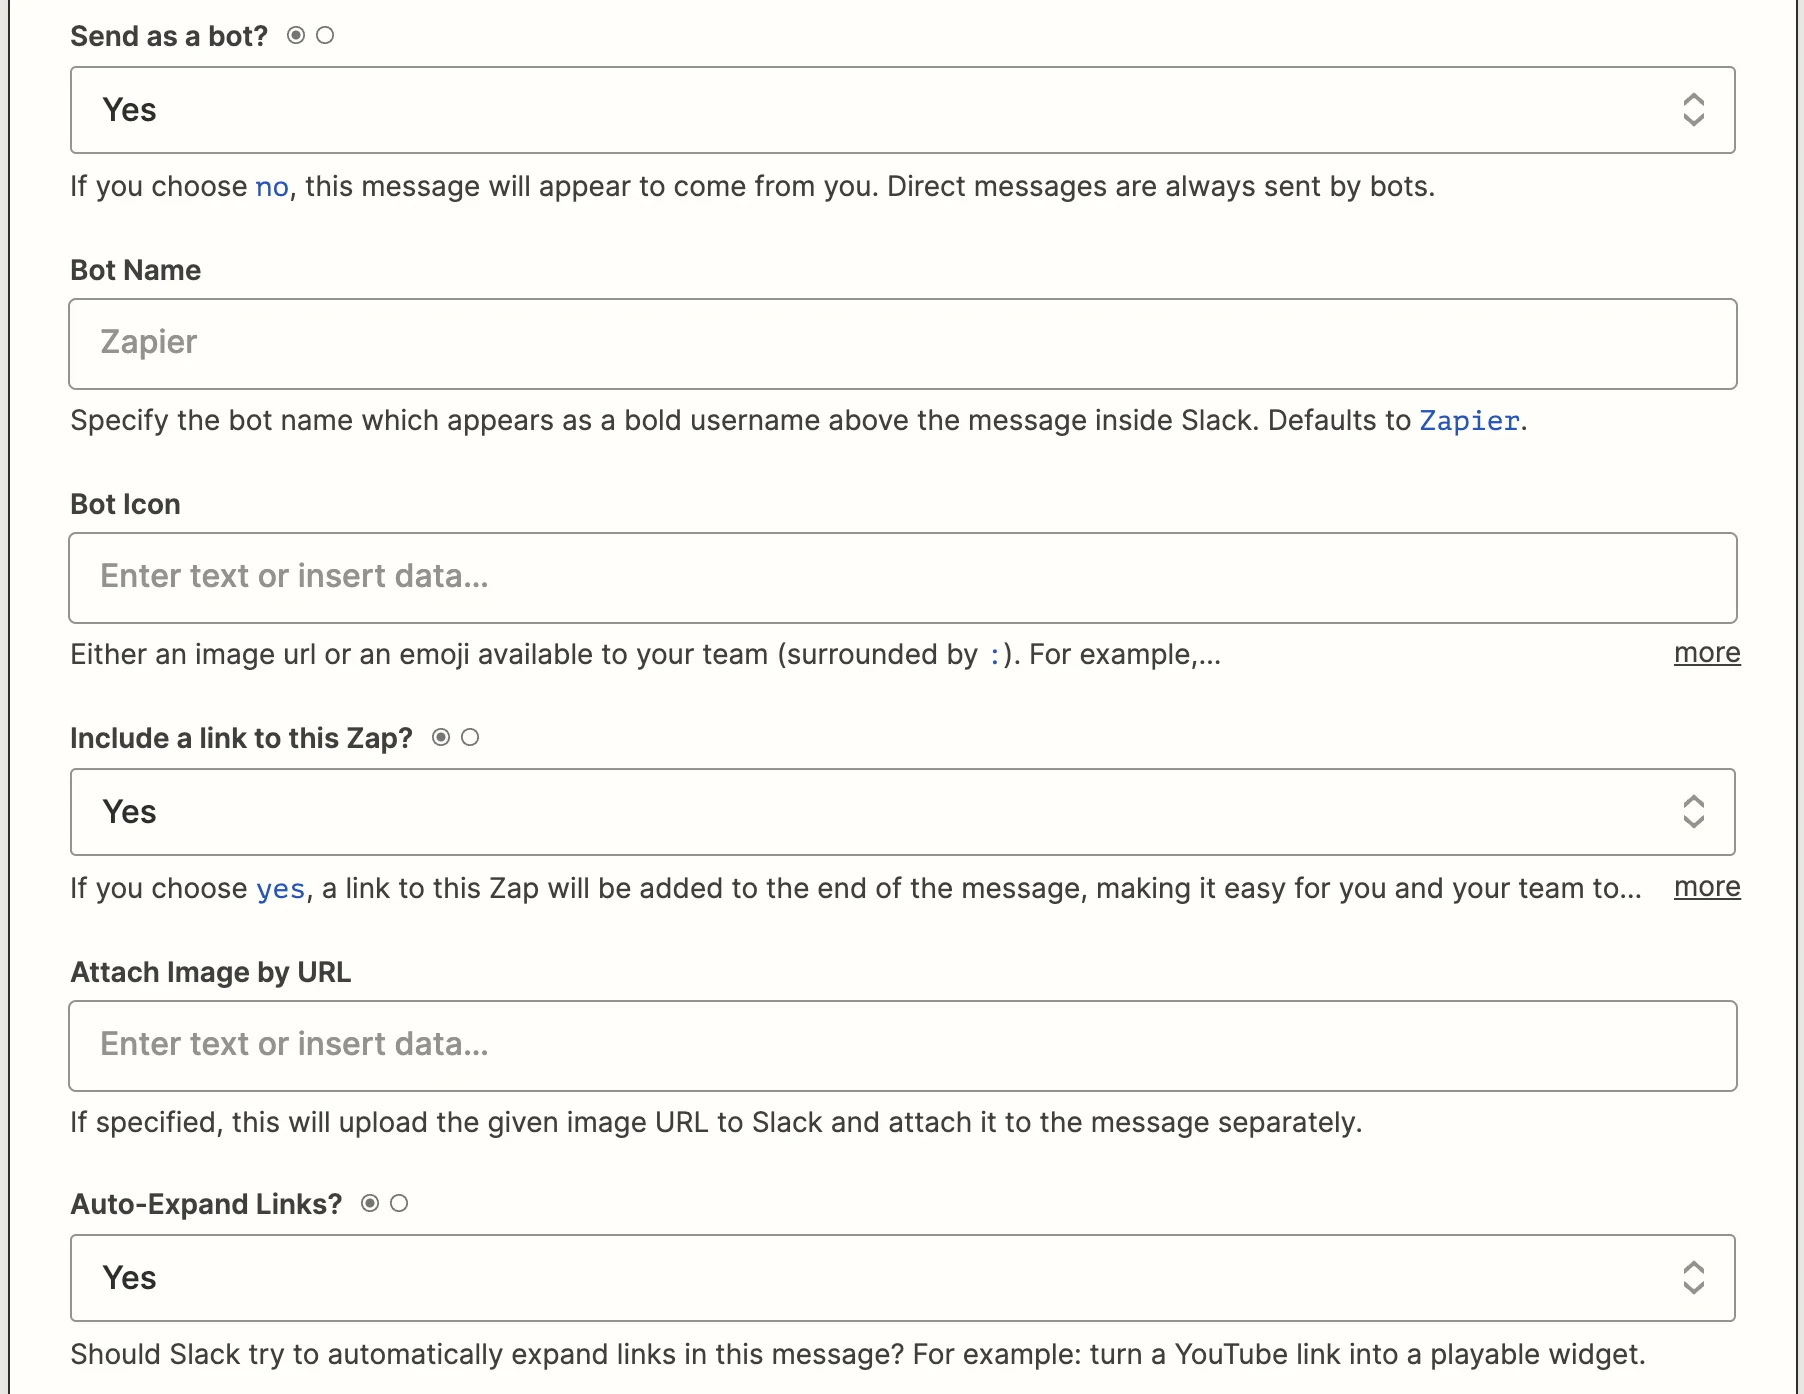
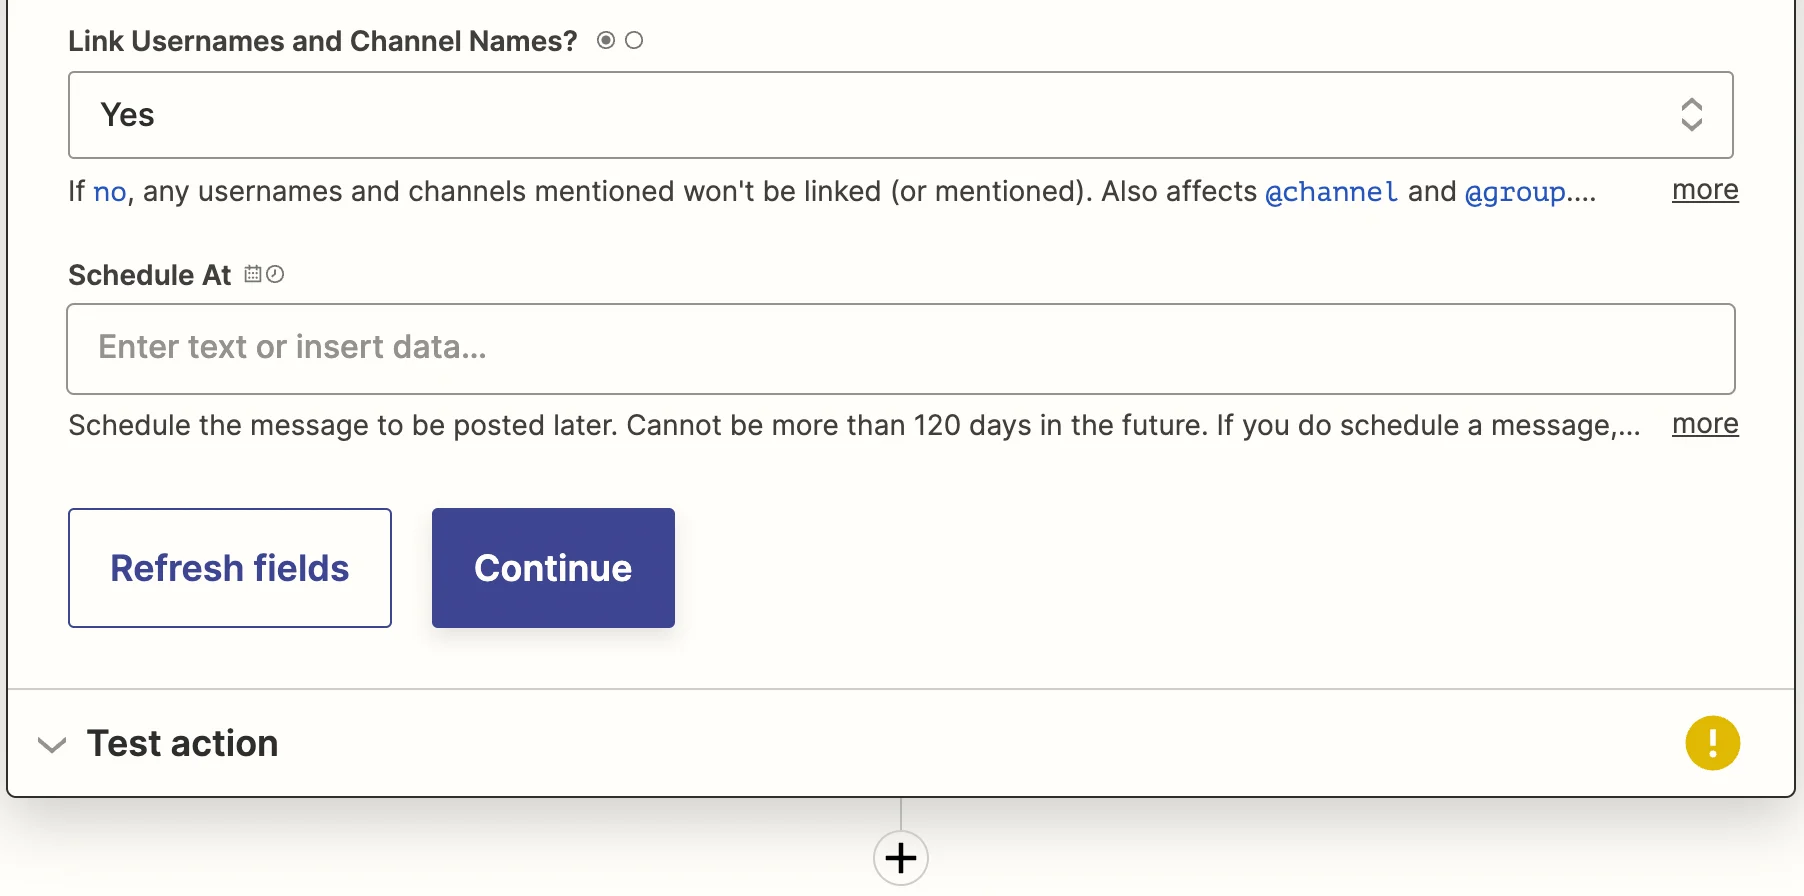
3. In the next step "Set up action", you will see a form for you to either fill-in or map from the previous step. We will just fill in the values for "To Username" and "Message Text". Make sure to select "Yes" for "Send as a bot?".
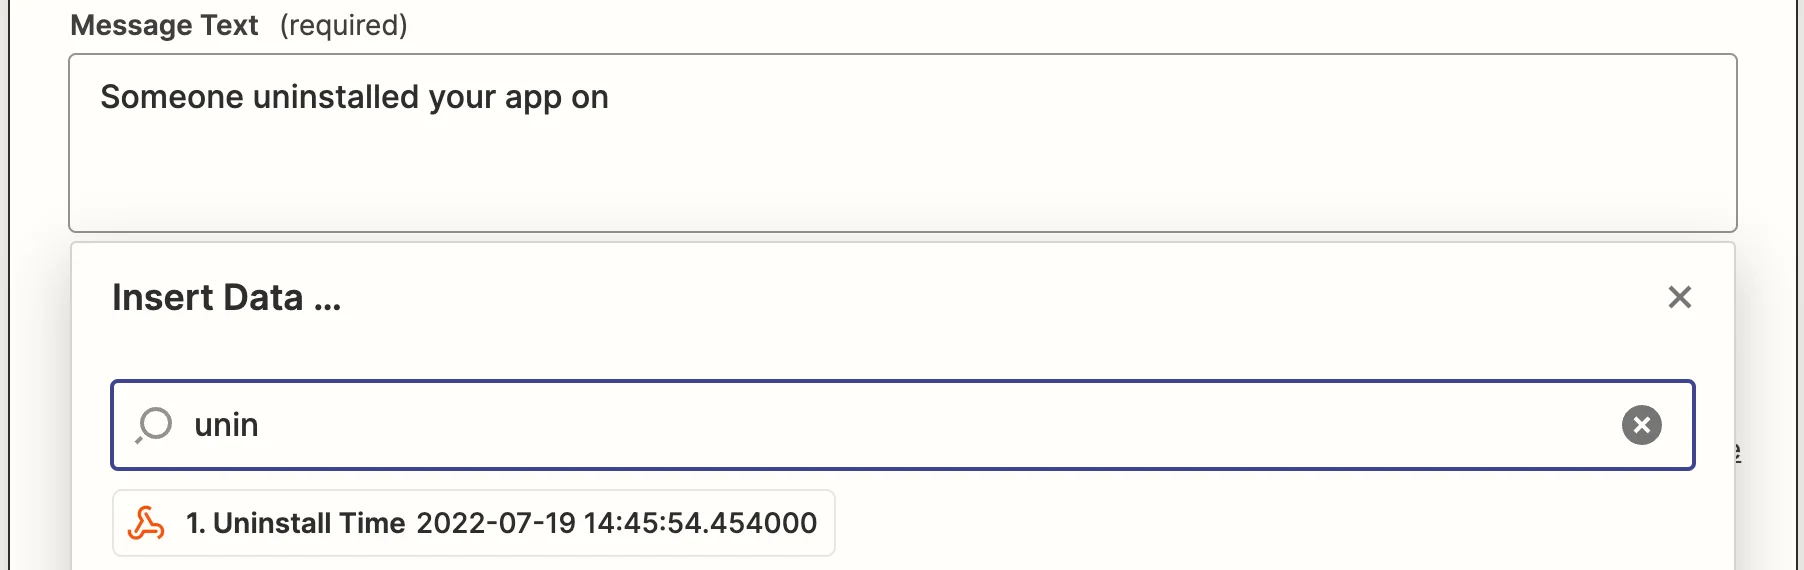
You can also map data from previous step:
### Step 6: Setup Slack action
1. From the event dropdown, select: "Send Direct Message". Click continue.
2. Now you need to connect to Slack. Once you are done, choose the connected account from the dropdown and click continue.
3. In the next step "Set up action", you will see a form for you to either fill-in or map from the previous step. We will just fill in the values for "To Username" and "Message Text". Make sure to select "Yes" for "Send as a bot?".
You can also map data from previous step:
 The form could look like this:
 4. You will now be presented with an option to test this setup.
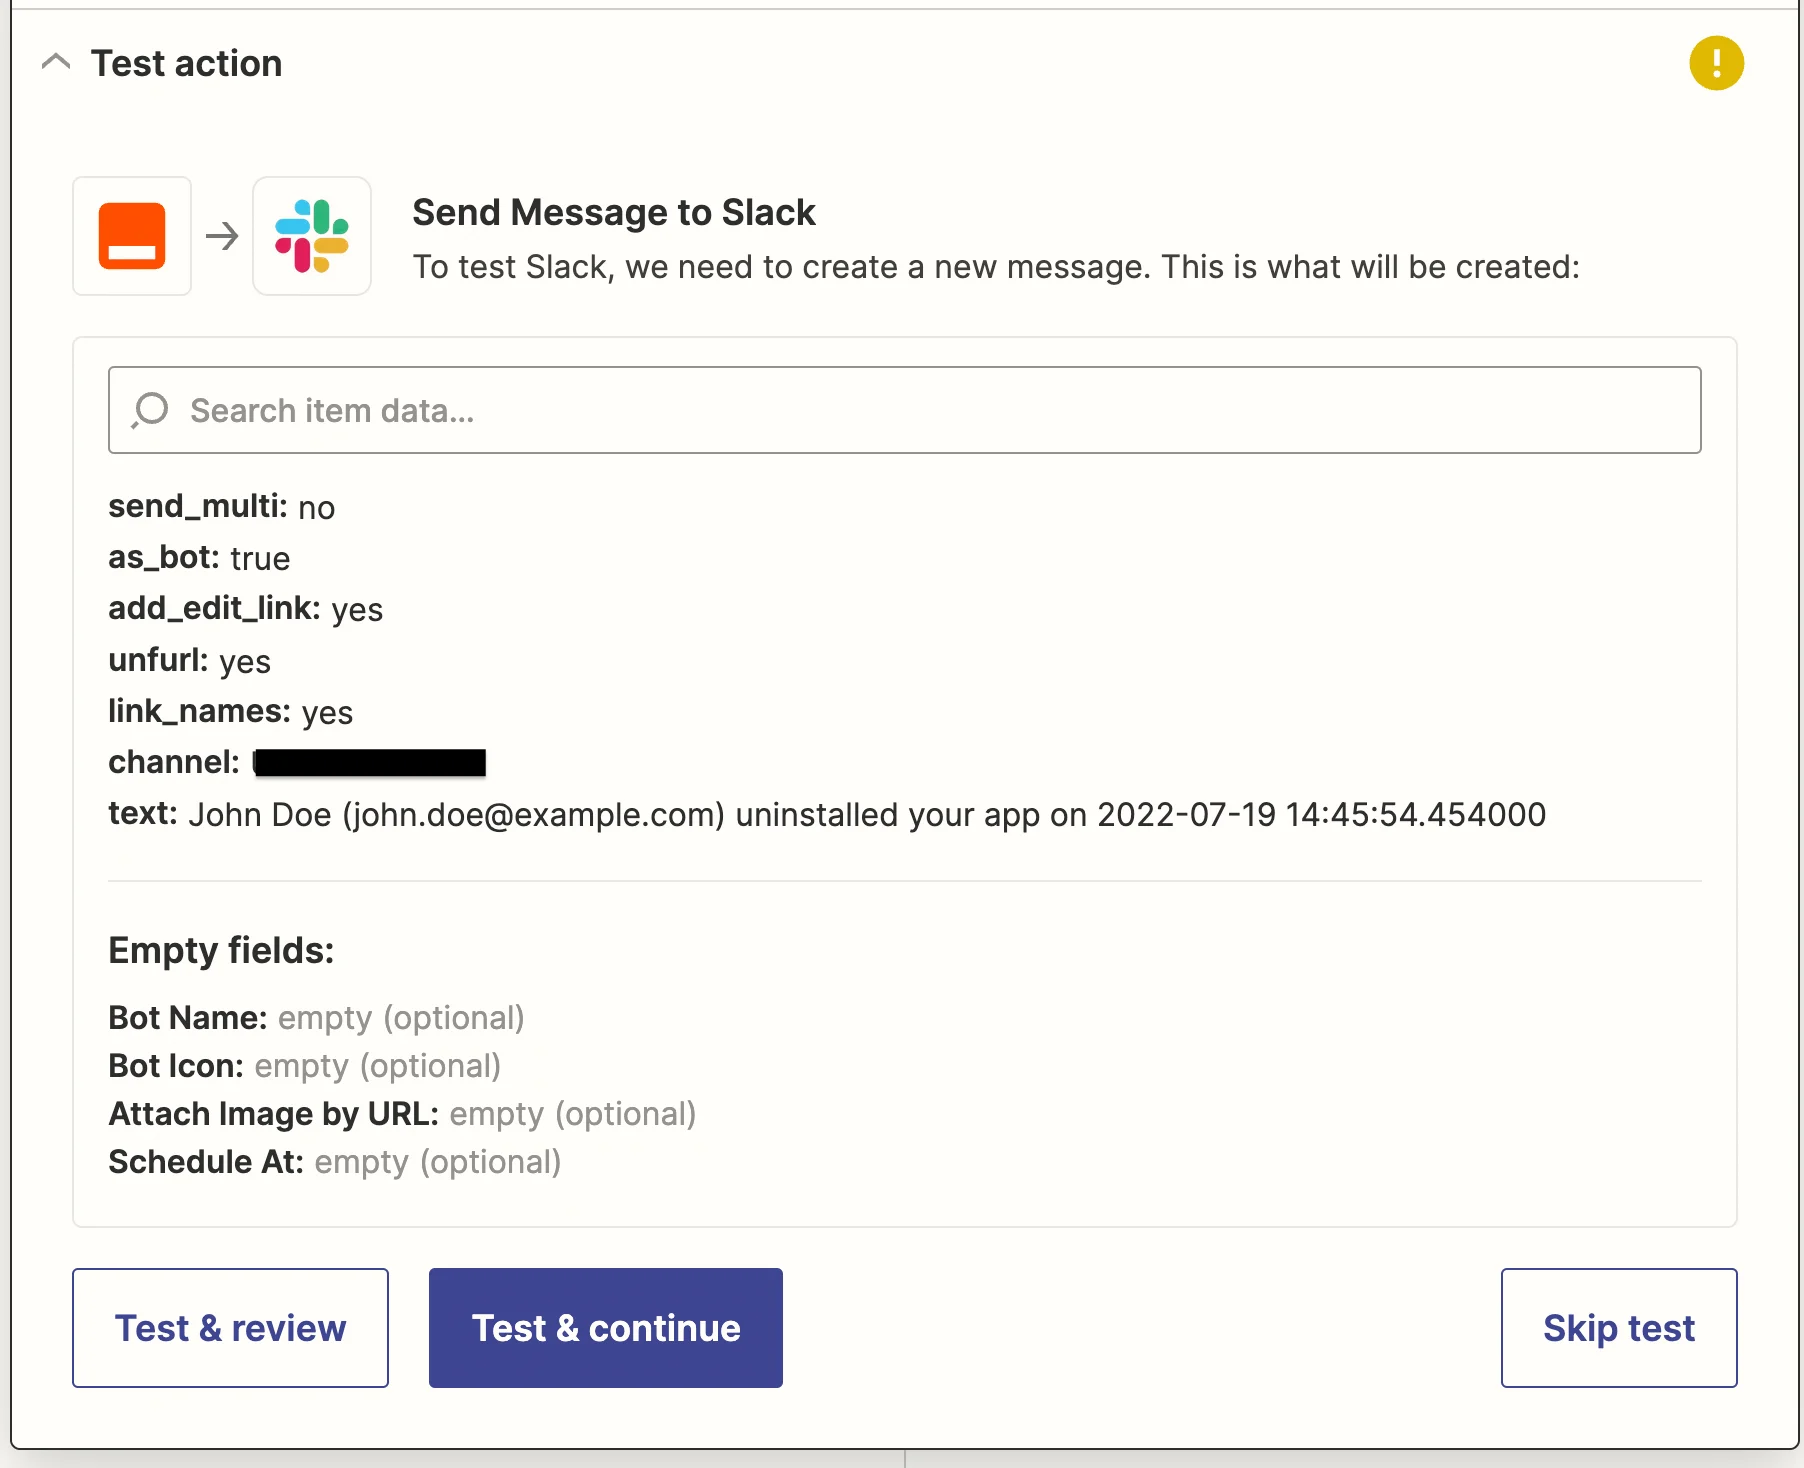 5. Click on "Test & continue" to test this setup.
6. If the API call was successful, you should see a "success" return.
5. Click on "Test & continue" to test this setup.
6. If the API call was successful, you should see a "success" return.
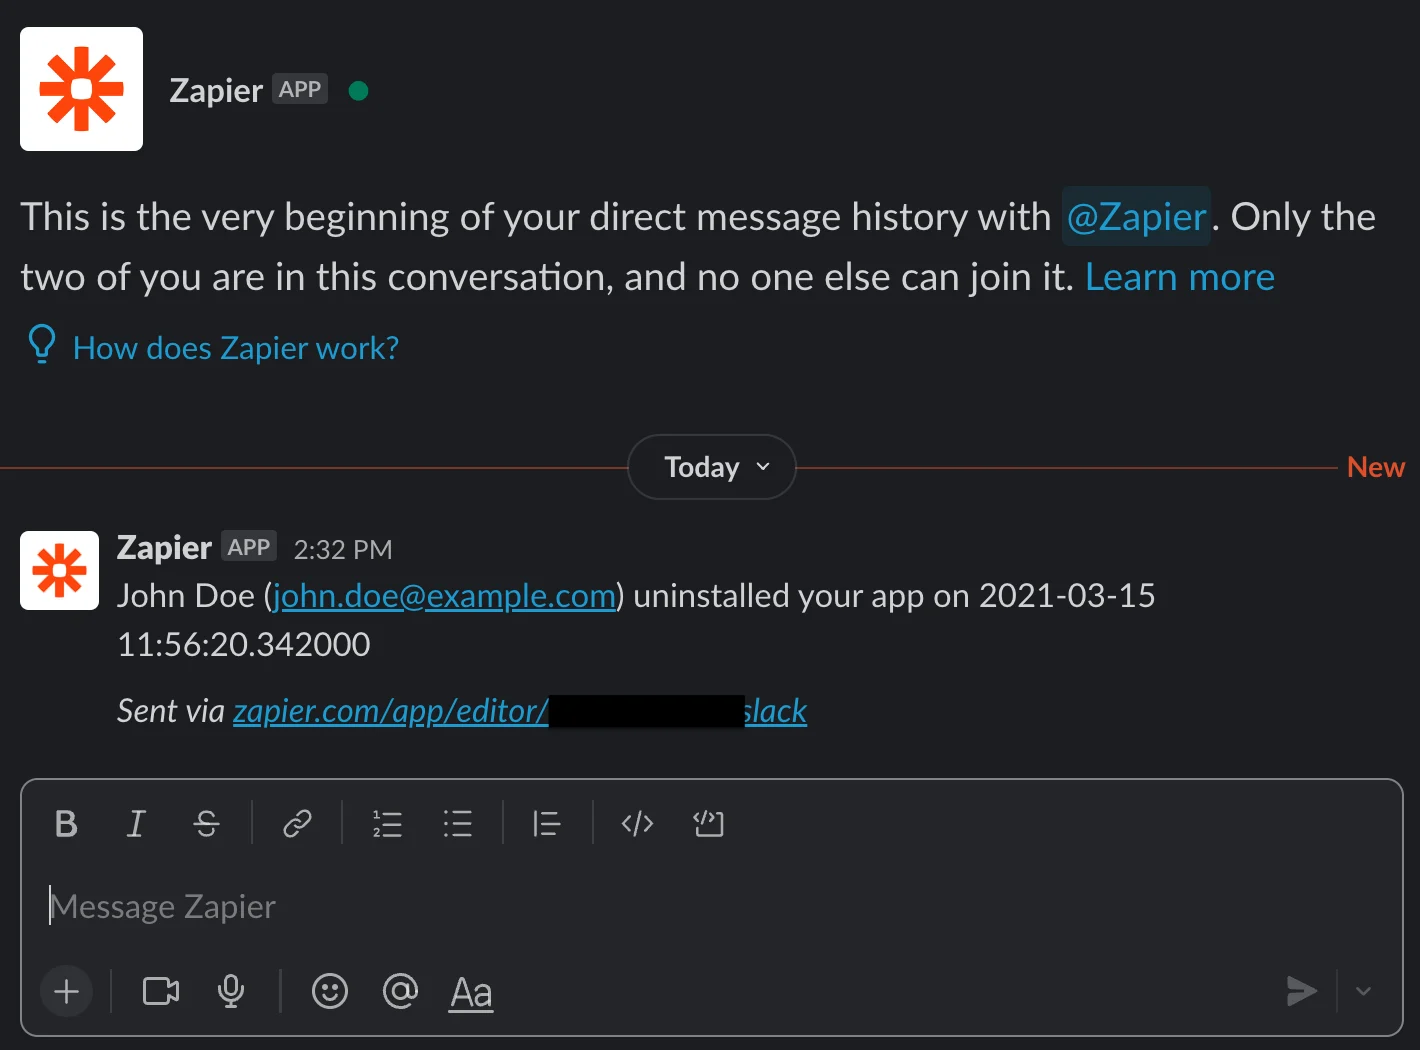
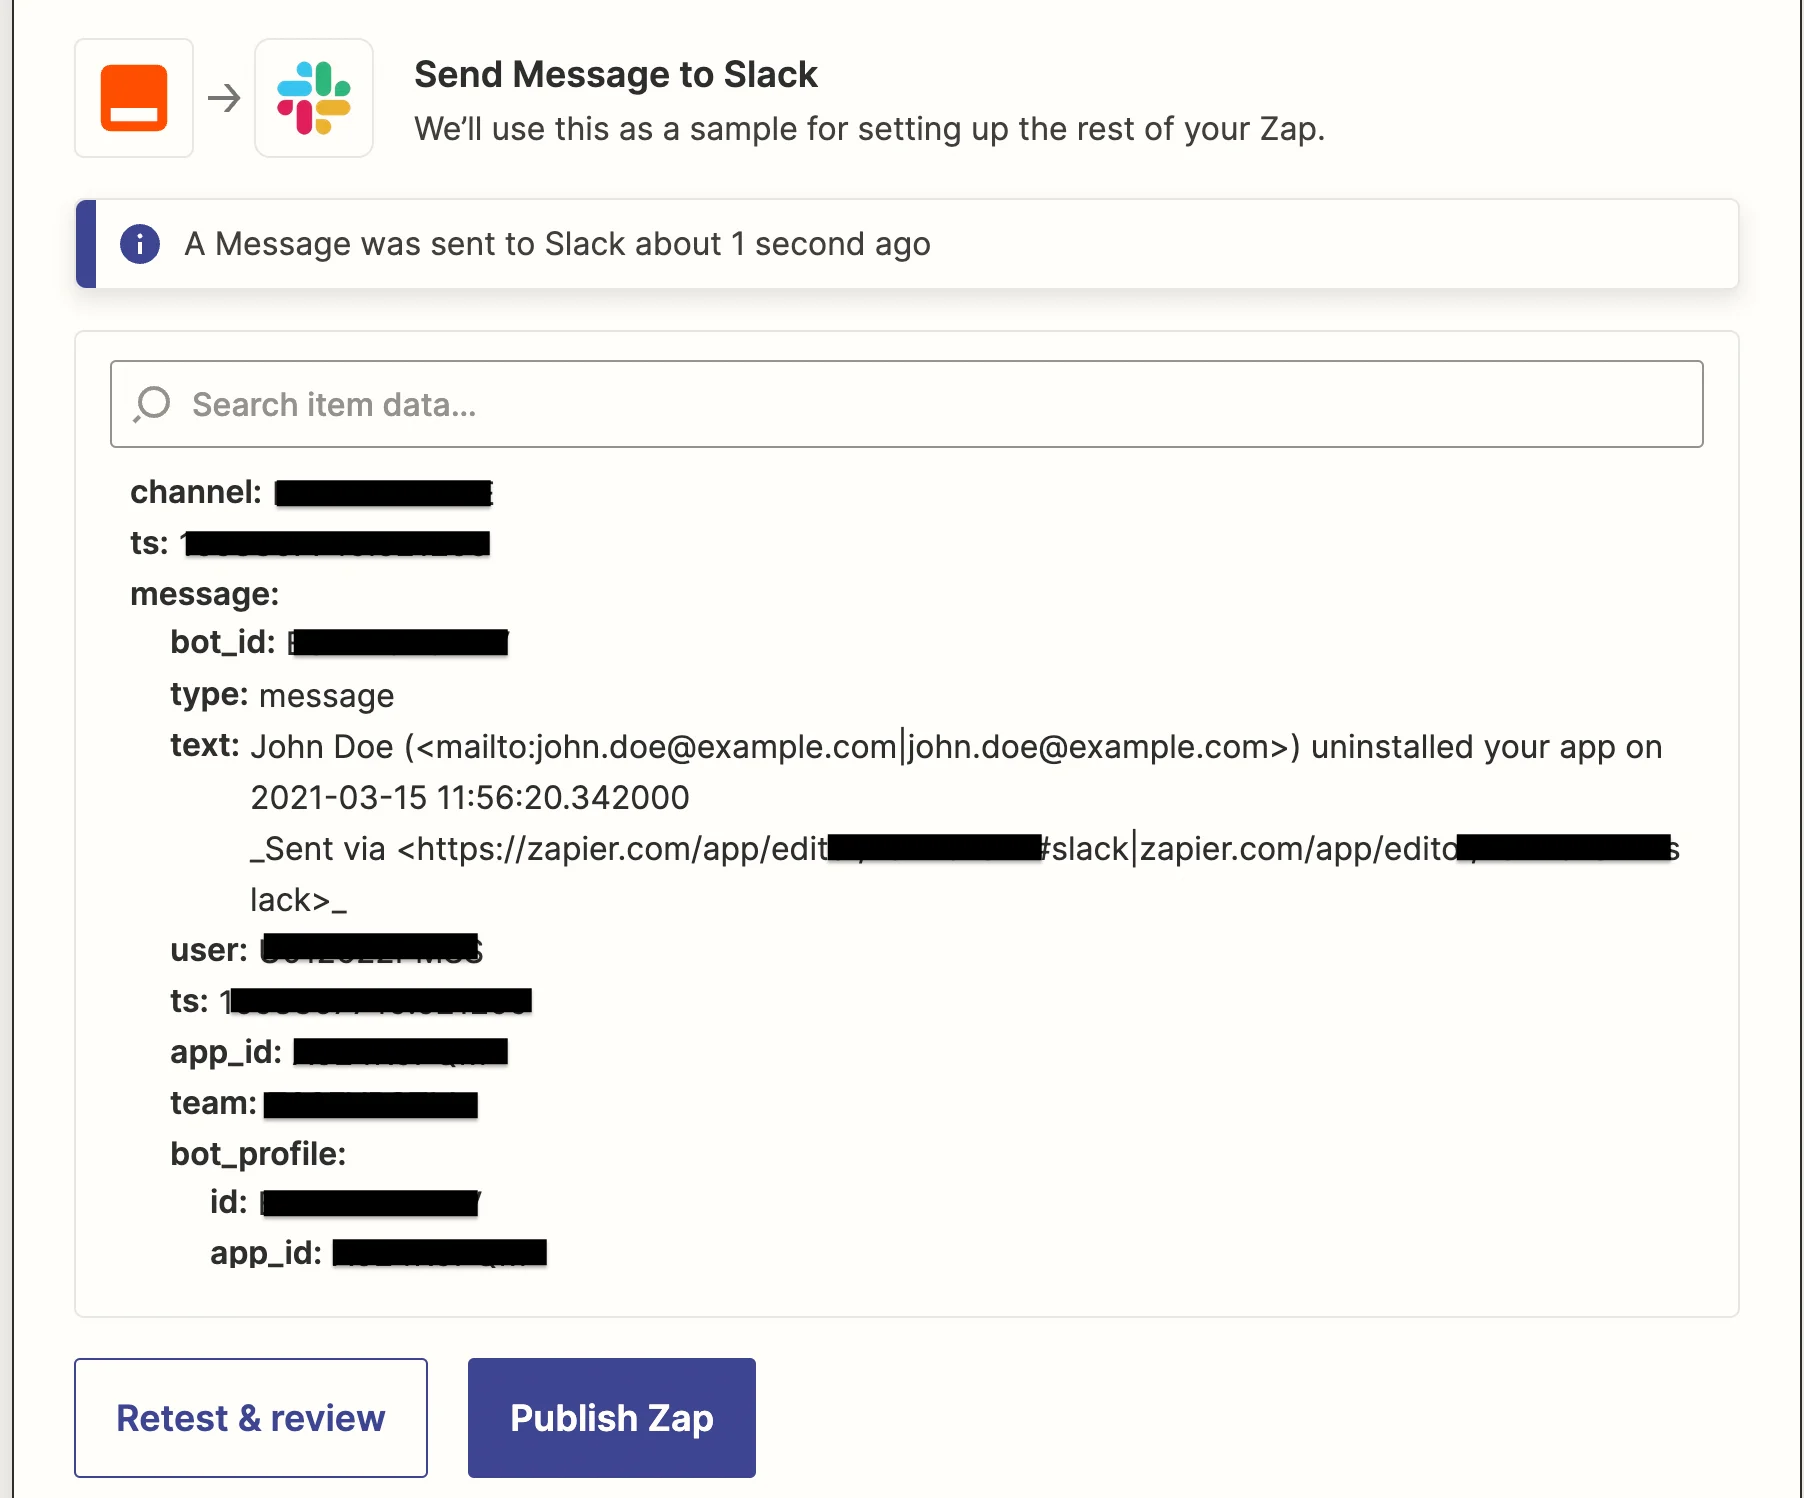 You can also verify this in Slack. You should now see a new message there.
 7. Once you are satisfied that everything works, click on "Publish Zap" and it will run every time a new uninstall takes place. You will be notified on Slack.